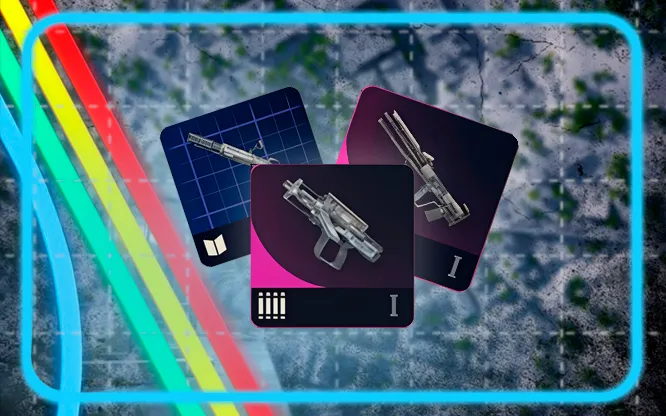
Quick answer: For an ARC Raiders budget PvP loadout after Frozen Trail, start with the Ferro if replacement cost is your limit; choose the Anvil if you can afford its new Rare-tier recipe and want six shots before reloading. Both list 40 base damage and use Heavy Ammo, but the Ferro costs just 5 Metal Parts and 2 Rubber Parts to craft. The Anvil now needs a learned blueprint, Gunsmith 2, and rarer materials. A Ferro plus Stitcher is the cheaper two-gun starting point—not a universally better fighting kit.
The old advice to treat the Anvil as a disposable green weapon is outdated. This comparison separates the guns' verified crafting requirements from our practical recommendations: which to build first, when upgrades are worth the extra resources, and whether carrying both solves a problem or merely adds another weapon to lose. It concerns ordinary weapons, not Amplified variants, and does not rank every gun in the game. For that wider comparison, use our ARC Raiders best-weapons guide.
Did this answer your question?
Your feedback helps improve this guide.
Anvil vs Ferro: what changed after Frozen Trail?
The Anvil wiki's Frozen Trail history states: “Changed rarity from Uncommon to Rare.” It also records higher-tier resource requirements and the removal of the old Anvil Splitter tech attachment. Those changes matter more to a budget player than a tier-list letter: a gun can remain useful while becoming harder to replace.
Do not read an older Anvil crafting guide, collect its ingredients, and assume your current Workshop will accept them. The current Anvil I recipe is 2 Advanced Mechanical Components, 3 Heavy Gun Parts, and 3 Hand Drills, with Gunsmith 2 and the blueprint required. The Ferro I needs 5 Metal Parts and 2 Rubber Parts at the Workbench or Gunsmith 1. Its listed recipe has no blueprint requirement. These are separate production budgets, not interchangeable ways to spend the same handful of scrap.
The practical correction is simple: call the Ferro a low-cost starting weapon, and call the Anvil an investment that can be sensible once your stash supports it. Neither label tells you who wins a particular duel. Aim, cover, reload timing, and the other raider's equipment still matter.
Which gun offers more for its crafting cost?
| Comparison | Anvil I | Ferro I |
|---|---|---|
| Rarity and class | Rare Hand Cannon | Common Battle Rifle |
| Base damage listed by wiki | 40 | 40 |
| Magazine size | 6 | 1 |
| Ammo | Heavy Ammo | Heavy Ammo |
| Firing mode | Single-Action | Break-Action |
| ARC armor penetration | Strong | Strong |
| Listed weight | 5.0 | 8.0 |
| Crafting station | Gunsmith 2 | Workbench or Gunsmith 1 |
| Crafting materials | 2 Advanced Mechanical Components, 3 Heavy Gun Parts, 3 Hand Drills | 5 Metal Parts, 2 Rubber Parts |
| Blueprint for crafting | Required | Not listed as required |
Sources: the current Anvil and Ferro item pages. The table uses base weapons, not amplified nodes, attachments, or a simulated damage race.
Equal listed damage does not make these guns equivalent. The Anvil gives you more opportunities to fire before a reload. The Ferro forces a reload between shots, so it asks more of your positioning. That difference is valuable, but its value depends on whether you can replace the weapon without abandoning another progression goal.
For a concrete replacement plan, crafting three Ferro I weapons costs 15 Metal Parts and 6 Rubber Parts. Three Anvil I weapons require 6 Advanced Mechanical Components, 9 Heavy Gun Parts, and 9 Hand Drills, plus the one-time station and blueprint prerequisites. These totals are recipe arithmetic, not a claim about how many raids gathering them takes. No reliable fixed farming time applies to every player.
When should you choose the Ferro first?
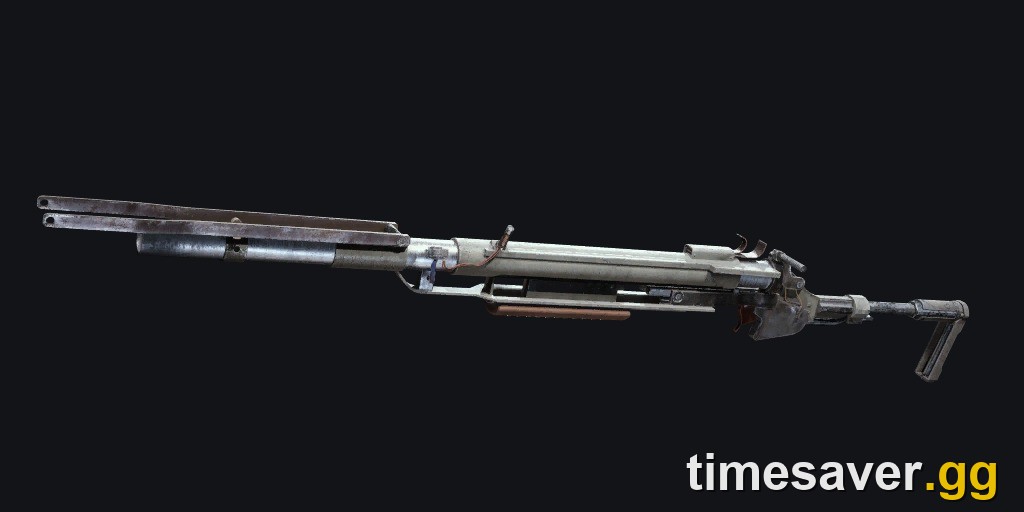
Choose the Ferro first when your main problem is rebuilding after losses. It offers a straightforward way to prepare several spare guns from basic materials. The Ferro page also lists scavenging and Tian Wen as sources, and notes that a Free Loadout may include one. “May” matters: do not budget around receiving the same free gun every time.
Our recommended use is a deliberate opening shot from cover, followed by a decision: reload safely, reposition, or swap to a close-range weapon. Do not turn the one-round magazine into an exposed reload contest. If you miss, the cost of the mistake is not just the lost shot; it is the time you now need before firing again.
This is a recommendation about how to work around the weapon's limitation, not a guaranteed strategy for beating expensive kits. A low replacement bill makes repeated attempts affordable. It does not give the Ferro hidden damage bonuses, erase enemy shields, or guarantee that a headshot downs a healthy opponent.
Best fit: learning fights, rebuilding a thin stash, and runs where preserving crafting materials matters more than having multiple immediate follow-up shots. If you already own a healthy Anvil, however, the Ferro's cheaper recipe is not by itself a reason to leave that Anvil unused forever.
When does the Anvil justify the extra materials?

The Anvil is the more comfortable choice when you want several deliberate shots available before reloading and can keep replacing the gun. Its six-round magazine makes it less dependent on resetting the fight after every trigger pull. That does not turn it into a spray weapon: the wiki describes slow handling and a single-action firing mode.
Treat the blueprint and Gunsmith 2 as gates you must actually meet, not footnotes. Owning a found Anvil and being able to manufacture another are different situations. Before building one, check how many spare Heavy Gun Parts and Hand Drills remain after any other planned crafts. If the recipe consumes your entire reserve, the gun is not yet disposable for you.
A useful personal rule is to prepare the replacement before taking your preferred kit topside. That is an inventory-management recommendation, not a game requirement. It keeps one lost fight from becoming an unplanned farming session and makes the cost of your loadout visible before matchmaking.
Do not copy the old Anvil Splitter attachment advice into this build. Frozen Trail removed that tech mod and introduced amplification options instead. This guide compares normal Anvil tiers; the Anvil amplification guide covers that separate progression path.
Should you carry Anvil and Ferro together?
You can, but it should be a deliberate preference rather than the automatic definition of a budget kit. Both use Heavy Ammo and offer high-damage individual shots. A Ferro opener followed by Anvil shots is a possible sequence; it is not evidence that the pair is the cheapest or strongest answer to every fight.
The main question is what the second weapon adds. If your problem is handling an enemy who pushes into close range, a fully automatic alternative may be more useful to you than another deliberate-fire weapon. If your problem is simply missing your first shot, adding an expensive backup does not fix the underlying aim or positioning issue.
| Your immediate need | Suggested starting choice | Reason |
|---|---|---|
| Lowest verified crafting bill among these guns | Ferro I | Basic-material recipe with no listed blueprint gate |
| Multiple shots before a reload | Anvil | Six-round magazine instead of one |
| Cheap automatic backup | Stitcher I | Common SMG made from Metal Parts and Rubber Parts |
| You already own both and prefer weapon swaps | Anvil plus Ferro | Viable preference, but not the minimum replacement cost |
| Advanced endgame weapon customization | Research amplification separately | Outside this base-weapon comparison |
These are editorial choices based on the listed recipes and firing modes, not a ranked tournament meta or measured win-rate table. Start with the problem your current kit actually has, then pay for the second gun only if it solves it.
ARC Raiders - Materials
Get materials in 10 minutes
Is Ferro plus Stitcher the cheaper two-gun option?
For basic crafting materials, yes. The Stitcher I recipe is 8 Metal Parts and 4 Rubber Parts, at the Workbench or Gunsmith 1. Adding a Ferro I makes the two-gun recipe 13 Metal Parts and 6 Rubber Parts. That total excludes ammo, healing, shield, augment, attachments, upgrades, and repairs: it is not the price of an entire ready-to-raid kit.
The Stitcher uses Light Ammo, has a listed 20-round magazine, and is fully automatic. Its role here is an affordable alternative firing mode, not a claim that it out-damages more expensive SMGs. The wiki lists Very Weak ARC armor penetration, so do not confuse its close-range backup role with a recommendation for shooting armored machines head-on.
Compared with carrying Anvil and Ferro, this pairing uses two ammo types. Check both supplies before entering a raid. Conversely, sharing Heavy Ammo does not make the Anvil-Ferro pair free to feed: your carried ammunition still has to support both weapons.
If you rarely fire your backup, try carrying less equipment rather than upgrading everything by habit. Budget discipline is choosing what earns its slot in your own runs, not copying a fully loaded screenshot and then wondering why your stash keeps shrinking.
Which upgrades should you buy first?
The verified upgrade paths reward different things. The Ferro upgrade table lists reduced reload time, while the Anvil table lists increased fire rate and reduced dispersion recovery time. Neither table lists increased base damage for these ordinary upgrades.
| Upgrade from the preceding tier | Ferro ingredient cost | Ferro listed reload reduction | Anvil ingredient cost | Anvil listed fire-rate increase |
|---|---|---|---|---|
| I to II | 7 Metal Parts | 13% | 3 Mechanical Components, 1 Simple Gun Parts | 25% |
| II to III | 9 Metal Parts, 1 Simple Gun Parts | 26% | 1 Advanced Mechanical Components, 1 Heavy Gun Parts | 50% |
| III to IV | 1 Mechanical Components, 1 Simple Gun Parts | 39% | 2 Advanced Mechanical Components, 1 Heavy Gun Parts | 75% |
The percentage columns show the resulting tier's listed bonuses, not additional bonuses to add together at every step. Crafting a base weapon is also separate from paying these upgrade ingredients.
For a resource-constrained Ferro player, tier II is an accessible first decision: spend 7 more Metal Parts to improve the reload, or keep those parts toward another spare gun. For the Anvil, remember that the base craft needs Gunsmith 2 even though the upgrade rows list Gunsmith 1. Do not confuse the requirements for modifying an owned weapon with those for manufacturing it.
Our priority is replacements first, then upgrades that address a limitation you regularly notice. If exposed reloads keep ending your runs, a reload improvement is relevant—but cover discipline remains necessary. If the weapon normally stays holstered while you loot, a high-tier upgrade may be a lower priority than keeping another usable kit ready.
How do you keep the loadout affordable?
Before deploying, make three checks. First, separate the gun's recipe from the total equipment bill. Second, check whether the resources you intend to consume are also earmarked for progression. Third, decide in advance what situation calls for swapping weapons rather than reloading. A kit is easier to use when each gun has a job.
Avoid attaching an unsourced coin-per-raid estimate to this comparison. A gun's sell price is not its purchase price, and neither tells you how long your next crafting-material run will take. The concrete budget here is the verified ingredient list. Your stash determines which recipe is affordable today.
Want to spend less time collecting your next craft? Browse the relevant timesaver.gg options, then check your blueprint and station requirements before choosing a service.
- ARC Raiders Blueprints — browse weapon-unlock options; a learned blueprint does not replace station requirements.
- ARC Raiders Materials — compare available crafting resources against the recipe you actually need.
FAQ
Is the Anvil still Uncommon? No. The current wiki records its change from Uncommon to Rare in Frozen Trail 2.0, alongside higher-tier resource requirements. Older green-Anvil budget advice needs rechecking.
Does the Anvil deal more base damage than the Ferro? Their current wiki entries both list 40 base damage. Their magazine sizes, firing modes, and handling differ. Equal listed damage does not establish equal time-to-kill or identical performance in an actual fight.
Can I craft an Anvil without its blueprint? The Anvil I crafting recipe requires the learned blueprint and Gunsmith 2. Finding or receiving a weapon is separate from unlocking its recipe; owning one does not prove you can build another.
What does a Ferro plus Stitcher cost to craft? The two base weapons together require 13 Metal Parts and 6 Rubber Parts. Ammo and the rest of your equipment are extra. This is a recipe total, not a complete loadout price.
Should I upgrade the Ferro or save for an Anvil? Upgrade the Ferro if its reload is the limitation you want to improve and you can still maintain spares. Save for the Anvil if six shots before reloading are worth its more demanding recipe to you. Neither decision is universally correct for every stash.
Is Anvil plus Ferro the best budget PvP loadout? Not automatically. It is a deliberate-fire pairing with shared Heavy Ammo, but the Anvil is no longer a cheap Uncommon craft. For the smallest basic-material bill among the two-gun options discussed here, Ferro plus Stitcher is the clearer starting point.
Sources: Anvil, Ferro, and Stitcher, checked October 31, 2026. Images: ARC Raiders game artwork.