Bank is one of Tom Clancy's Rainbow Six Siege's most mechanical maps — multi-floor vertical play, reinforcement tricks that decide the round, and a compact callout system that separates ranked players from Gold-stuck ones. This guide covers every Bank callout room by room, all four bomb sites with entry and anchor strategy, and the Y11S3 (Operation Split Fire) operator picks that work best here.
Current season: Y11S3 — Operation Split Fire, launched September 1, 2026. Bank has not been structurally reworked in Y11S3 — the Villa rework and the Stadium/House visual updates went out this season instead. Bank received its last major structural rework in September 2021 (Operation Crystal Guard), and a visual modernization in June 2025. That means this callout guide is stable and will carry you through the season.
Quick Answer — Bank Callouts at a Glance
Bank in 30 seconds: Four bomb sites across three floors — Basement (Lockers/CCTV), two First Floor sites (Tellers/Archives and Staff/Open Area), and Second Floor (CEO/Executive). Three attacker spawns: Boulevard (northwest), Jewelry (northeast), Back Alley (southeast). Priority callouts to learn first: Square (central 1F hub), Banana (curved 2F hallway near CEO), Main Stairs, Blue Stairs, and the Server hatch.
>
Y11S3 meta: Thermite and Thatcher remain non-negotiable attackers. Kaid or Bandit on CEO wall is the core defender trick that decides rounds. New operator Noor directly counters shield pushes in Basement corridors.
>
Ranked map pool: Bank is confirmed in the Y11S3 ranked and competitive map pool. (Source: Ubisoft official map page; siege.gg competitive pool 2026.)
Bank Map Layout — Three Floors, One Vault
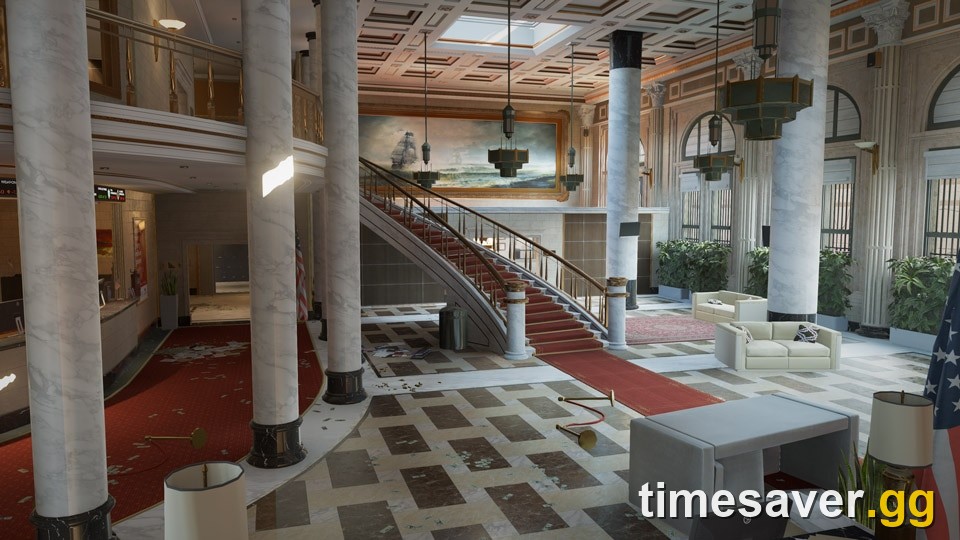
Bank is set in a Los Angeles financial building. Its three main playable floors — Basement (B), First Floor (1F), and Second Floor (2F) — each host different combat styles:
- Basement rewards defenders who control Server hatch and Blue Stairs. Attackers who lose these two positions spend 90 seconds never finding a clean plant angle.
- First Floor is the most open. Square (the central interior hub) is the critical chokepoint: whoever holds Square at execute time splits rotations and controls both 1F sites.
- Second Floor rewards hard-breach skill and vertical reads. The CEO wall is the most-attacked reinforced surface in the building.
Attacker Spawns (3 total)
| Spawn | Direction | Key Entry Points |
|---|---|---|
| Boulevard | Northwest | Main Entrance, Parking Garage roof ladder, rappel to High Roof |
| Jewelry | Northeast | 0F Tunnel (manhole), Main Entrance |
| Back Alley | Southeast | 1F Electrical door, 1F Printer window |
Floor-by-Floor Callouts

Basement (B) Callouts
| Callout | What It Is |
|---|---|
| Lockers | Site room A — defender anchor position |
| CCTV Room | Site room B — camera station, anchor position |
| Server Room | East side of basement; hatch above from 1F is the primary vertical entry |
| Vault | Northwest corner; accessed from Lockers side |
| Blue Stairs | Secondary vertical staircase; connects B to 1F. Named for the blue-tinted lighting. Attacker who secures Blue Stairs cuts the Lockers rotation |
| Main Stairs | Primary vertical connector for the whole building (B ↔ 1F ↔ 2F) |
| Garage | Ground-level access from Boulevard spawn into B; connects to Lockers corridor |
| Elevators | Additional vertical path between 1F and 2F (reworked in Crystal Guard, 2021) |
| 0F Tunnel | The manhole entry from Jewelry spawn into Basement; used for sneaky early pushes |
| E-Box / Electric | Electrical utility corner near Garage entry; common Kapkan/Frost trap spot |
First Floor (1F) Callouts
| Callout | What It Is |
|---|---|
| Tellers' Office | Site room A of the Tellers/Archives site |
| Archives | Site room B; often has a critical connector wall breachable from Lobby |
| Staff Room | Site room A of the Staff/Open Area site |
| Open Area | Site room B; large open floor space, hard to hold without utility |
| Lobby | Main entrance atrium; primary attacker funnel from Boulevard and Jewelry |
| ATMs | Alcove east of Lobby; common pre-aim position on pushes through Main Entrance |
| Square | Central interior hub connecting Lobby to both 1F sites and both staircases. The most important callout on the map — whoever announces "Square" controls where the round goes |
| Garage Ramp | Links Boulevard spawn exterior to interior via Garage; flank route into 1F/Basement |
| Electrical | East door entry from Back Alley spawn; priority drone route for Tellers/Archives |
| Printer | East window entry from Back Alley; secondary rappel point |
Second Floor (2F) Callouts
| Callout | What It Is |
|---|---|
| CEO Office | Site room A — hard-breach target wall on east face |
| Executive Lounge | Site room B; connects to CEO via interior double doors |
| Stock Trading | Adjacent to CEO; open room that attackers often clear before executing site |
| Conference Room | South 2F space; defender anchor roam position |
| Top Main | Top of Main Stairs, 2F landing; first foothold attackers need to claim |
| Top Square | Open area overlooking the 1F Square from the 2F mezzanine; controls the vertical window between floors |
| Banana | The curved hallway near the Elevators and CEO side; named for its shape. Critical rotation route — anchors caught in Banana lose the site |
| Janitor / Closet | Small service room; common Kapkan placement and quick-peek spot on the Banana side |
| Skylight | Glass ceiling panels above CEO area; can be shot through from Roof |
Roof / Exterior
| Callout | What It Is |
|---|---|
| Parking Garage Roof | Accessible from Boulevard spawn via ladder; rappel point for High Roof and 2F external windows |
| High Roof / Bank Roof | Top of the main building; rappel access to 2F Skylight area |
| Plaza | Northeast exterior near Jewelry spawn; used for 0F Tunnel pushes |
All 4 Bomb Sites — Callouts, Entries, and Reads
Site 1: Lockers / CCTV (Basement)
Attacker entry priorities: Push Blue Stairs for CCTV-side pressure. Take the Server hatch from 1F (Sledge or Buck soft-destroy from above). Advance through 0F Tunnel (Jewelry spawn) for a flanking approach into Lockers.
Defender setup:
- Reinforce Server wall (Kaid or Bandit trick on Server wall and the hatch above prevents vertical entry)
- Mira Black Mirror between Server Room and Lockers provides real-time intel on the primary attack vector without losing an anchor body
- Smoke delays the planted defuser via remote detonation grenades through any gap in the Server wall
- Kapkan EDDs at Blue Stairs and E-Box catch careless advances; Y11S3 EDD damage buffed to 62 HP (Ubisoft patch notes)
Key read: If attackers control both Blue Stairs and Server hatch before execute, the site is almost indefensible. Deny both with a Kaid/Bandit trick on the hatch and a secondary anchor on Blue.
Noor on Lockers/CCTV (Y11S3): Bank's Basement corridors historically draw Fuze (cluster charges through walls) and shield-operator pushes from Garage. Noor's Horus Lance Launcher fires five projectiles that pierce surfaces, stick to ballistic shields, and ignite them — the shield-user must lower the shield or take damage, which is directly relevant in Basement corridors. Noor's 2-speed/2-armor rating lets her roam Blue Stairs and rotate to Server during execute. (Source: Ubisoft Noor operator page)
Site 2: Tellers' Office / Archives (First Floor)
Attacker entry priorities: Main breach point is the reinforced wall between Archives and Lobby — Thermite or Ace opens it from the Lobby side for a direct execute. Electrical door (east) and Printer window (east) provide secondary entry for information.
Defender setup:
- The Tellers-to-Lobby reinforced wall is non-negotiable: Bandit-trick or Kaid-electrify it (4 Shock Wires cover all priority 1F walls)
- Echo (Yokai Drone recharge reduced 16s→15s in Y11S3) covers the Lobby-to-Tellers breach window
- Maestro Evil Eye camera on the Open Area long line provides intel without committing an anchor
- Mute Jammer on the main breach wall denies drone intel during the drone phase and — as of Y11S3 — also interrupts Dokkaebi's Jegeo Payload upload if she tries to hack near the site (Source: KB verified Y11S3 Dokkaebi nerf)
Key read: The round hinges on whether defenders deny or lose the Lobby reinforced wall. If attackers breach it cleanly, the execute from Lobby is near-instant.
Site 3: Staff Room / Open Area (First Floor)
Attacker entry priorities: The Staff site is the most rotatable 1F option — attackers who control Square force defenders to guess which angle to hold. Garage entry and Printer window both add pressure.
Defender setup:
- The reinforced wall between Open Area and the Teller side (splitting the two 1F sites) is the most critical soft-point — losing it allows attackers to rotate between both 1F sites freely
- Bandit-trick this wall; pair with a Jäger ADS deployment at the Staff Room windows to absorb capitao fires and grenades
- Smoke delays the plant through any gap into Open Area
Key read: Staff/Open Area is won or lost in the first 30 seconds. If defenders keep the central wall and staff doors reinforced, attackers must breach from the outside. If that wall falls, so does the site.
Site 4: CEO Office / Executive Lounge (Second Floor)
Attacker entry priorities: The CEO east-face reinforced wall is the primary breach target for Thermite or Ace. Approaches through Top Main (Main Stairs) or rappel to High Roof (Skylight, then drop) are the two main vectors. Iana's Gemini Replicator can drone out the CEO wall from Banana before the real Thermite plant.
Defender setup:
- Kaid Rtila electrified trap on the CEO east wall is the mandatory trick — Kaid's Rtila covers both the wall AND the Skylight hatch (one Rtila on the wall, one on the hatch above)
- Thatcher's EMP Grenades will disable Kaid traps — the outcome of this Thatcher/Kaid matchup decides the round
- Jäger ADS at Executive Lounge catches grenades thrown through the Banana entrance during execute
Key read: CEO is the most mechanical bomb site on Bank. Kaid electrifying the CEO wall is the highest-value single action a defending player can take — it forces the attacking team to run Thatcher or lose the execute.
Y11S3 Operator Picks for Bank
Top 5 Attackers for Bank (Y11S3)
| Operator | Tier | Role | Why Bank Specifically |
|---|---|---|---|
| Thermite | S | Hard breach | CEO wall and Basement Server wall both require hard breach. Non-negotiable pick on all sites. |
| Thatcher | S | Hard breach support | Kaid and Bandit trick every priority wall on Bank. Thatcher's EMP Grenades clear them and enable Thermite/Ace. Without Thatcher, attackers need multiple breach attempts and lose time. |
| Ace | S | Hard breach | S.E.L.M.A Aqua Breacher opens Tellers' Lobby wall at range — Ace doesn't need to stand at the wall to plant it, which is critical in Lobby's open sight lines. |
| Lion | A | Roam-clear | EE-ONE-D scan warning reduced to 1.4 seconds in Y11S3 (down from 1.5s) — defenders have less time to freeze before being detected. Bank's multi-floor layout generates a lot of roaming; Lion helps clear them faster. (Source: Ubisoft Y11S3 patch notes) |
| Nomad | A | Flank watch | Bank's three-spawn layout produces constant flanks from Boulevard/Jewelry during execute. Nomad's Airjab mines seal Garage and Square flank routes without requiring an operator to physically watch. |
Why Sledge and Buck are worth picking: Even at their base Y11S3 level, Sledge and Buck are strong Bank picks — Bank's ceiling above Tellers, Open Area, and Server Room is mostly soft-ceiling-destructible, and vertical pressure created before the execute dramatically speeds up site entry.
Top 5 Defenders for Bank (Y11S3)
| Operator | Tier | Role | Why Bank Specifically |
|---|---|---|---|
| Kaid | S | Anti-breach | CEO wall plus the Server hatch — Kaid's Rtila electrifies both (walls and hatches), while Bandit cannot cover hatches. The highest-value single defender pick on Bank. |
| Mira | S | Intel anchor | Black Mirror in Server Room facing Lockers is the backbone of Basement defense. Defenders see the primary attack vector without committing to a position attackers can clear. |
| Smoke | S | Area denial | Remote Detonation grenades control plant positions across all four sites. On Bank's tight corridors, Smoke grenades have extreme lethal radius — especially in Basement. |
| Bandit | S | Anti-breach | Bandit's Shock Wire covers all four priority 1F and 2F reinforced walls. On sites where Kaid isn't running, Bandit fills the breach-denial role with more walls covered (4 Shock Wires vs Kaid's 3 Rtila). |
| Jäger | A | Utility denial | Active Defense System auto-destroys thrown grenades. Capitao fires and grenades are common attacker tools on Bank — Jäger's ADS protects anchors in CEO and Tellers from gadget denial. Gadget: M870 shotgun or 416-C Carbine. |
Y11S3-specific defender note: Mute (A-Tier) picks up additional value in Y11S3. His Signal Jammers now interrupt Dokkaebi's Jegeo Payload — if Dokkaebi is in the attacker roster and tries to upload the Payload near a site wall, active Mute jammers cancel the upload and waste the ability entirely. (Source: Ubisoft Y11S3 patch notes) Also note: the SMG-12 received a major damage nerf in Y11S3 (28→16 per bullet, magazine 32→22). Defenders who run operators with the SMG-12 as a secondary — including Vigil and Warden — should switch to an alternate weapon this season. (Source: Ubisoft Y11S3 patch notes)
Core Bank Strategies
The wall-trick is the round. Bank's most important mechanic is the Bandit/Kaid trick on priority reinforced walls. The setup — a defender electrifying a reinforcement just as the attacker plants the breach charge — destroys the charge and denies the breach. Attackers who can't open a wall in time run out of clock. Defenders who lose their tricks to Thatcher fall back to one fewer execution lane.
Square is the contested ground. No matter which site you're running, the attacker who holds Square at execute time has options: split toward Tellers, push toward Staff, or cut Main Stairs. Call Square openly — "Square clear" or "Square taken" is the most useful callout any roamer can make.
Drone phase decides execute viability. Bank's basement sites are difficult to execute cold. Invest full drone phase in checking Blue Stairs and Server hatch coverage. If defenders stack two people in Blue corner and a Mira in Server, calling off and re-approaching is smarter than executing into a full kill-zone.
Vertical play scales all sites. Attacks from the floor above (dropping through hatches) or from Below (soft floor destruction) add a third dimension defenders cannot ignore. On CEO: Skylight rappel combined with Main Stairs forces a two-sided response. On Basement: Server hatch dropped on Mira's Black Mirror creates a lethal close-range ambush.
Frequently Asked Questions
What are the Bank bomb sites in Rainbow Six Siege? Bank has four bomb sites: Lockers/CCTV in the Basement, Tellers' Office/Archives on the First Floor, Staff Room/Open Area on the First Floor, and CEO Office/Executive Lounge on the Second Floor.
What is Square on Bank? Square is the central interior hub on the First Floor. It connects the Main Entrance Lobby to both 1F bomb sites, the Main Staircase, and the Blue Staircase. Calling "Square" during a round tells your team whether the most important rotational space is open or contested.
Is Bank in the Y11S3 ranked map pool? Yes. Bank is confirmed in the Rainbow Six Siege ranked and competitive map pool for Y11S3 (Operation Split Fire, 2026). The map was not changed structurally this season — its last rework was Crystal Guard (September 2021). (Source: Ubisoft official Bank map page; siege.gg competitive pool 2026)
What is the best attacker on Bank? Thermite is the best attacker on Bank because all four sites require at least one reinforced wall breach. Thatcher complements Thermite as the EMP support who clears Kaid and Bandit electrification on those walls. Without both, attackers cannot reliably execute any site.
What makes the CEO bomb site the hardest on Bank? CEO Office is the furthest interior point from every attacker spawn and sits behind reinforced walls on its most accessible approach. Kaid's Rtila electrifies both the CEO wall and the hatch above — attackers who skip Thatcher face a double-layered denial. The site also sits on the top floor, which means vertical rappel (Skylight) is the only secondary approach, and defenders who watch that angle can shut it down with a single anchor.
Does Noor work well on Bank? Noor (new defender, Y11S3) is a specific counter for shield-operator pushes in Bank's Basement corridors. Her Horus Lance Launcher fires five projectiles that pierce surfaces, stick to ballistic shields, and ignite them — the shield-user must lower the shield or take damage. Bank's tight Basement hallways make this ability particularly lethal against rush strats. Her 2-speed/2-armor stat line lets her roam aggressively, similar to how Jäger plays. Primary weapons are the Commando-9 assault rifle or ALDA 5.56 LMG; secondaries are the 1911 TACOPS pistol or Bailiff 410. (Source: Ubisoft Noor operator page, ubisoft.com/en-us/game/rainbow-six/siege/game-info/operators/noor)
All operator stats and balance changes reflect Y11S3 — Operation Split Fire (September 1, 2026). Map callouts reflect the September 2021 Crystal Guard rework. For more Rainbow Six Siege guides: see our operator tier list, best loadouts for every operator, ranked system guide, Oregon callouts, and Kafe Dostoyevsky callouts.
Looking for Rainbow Six Siege coaching or boosting services?
>