The Ticket is the story chapter that decides how you leave Tarkov. It is also where most story runs stall. On October 23, 2026, two separate r/EscapefromTarkov threads got stuck on it: one player searched the old Lighthouse beach camp for a note that had moved, and another found their Savior run locked out. This guide covers The Ticket as it works in patch 1.2.5.0 (Season 1 "KORD BREACH", live build 1.2.5.0.48146 per the wiki changelog): every objective, where each ending splits off, the new camp location after the Lighthouse rework, and the three choices you cannot undo.
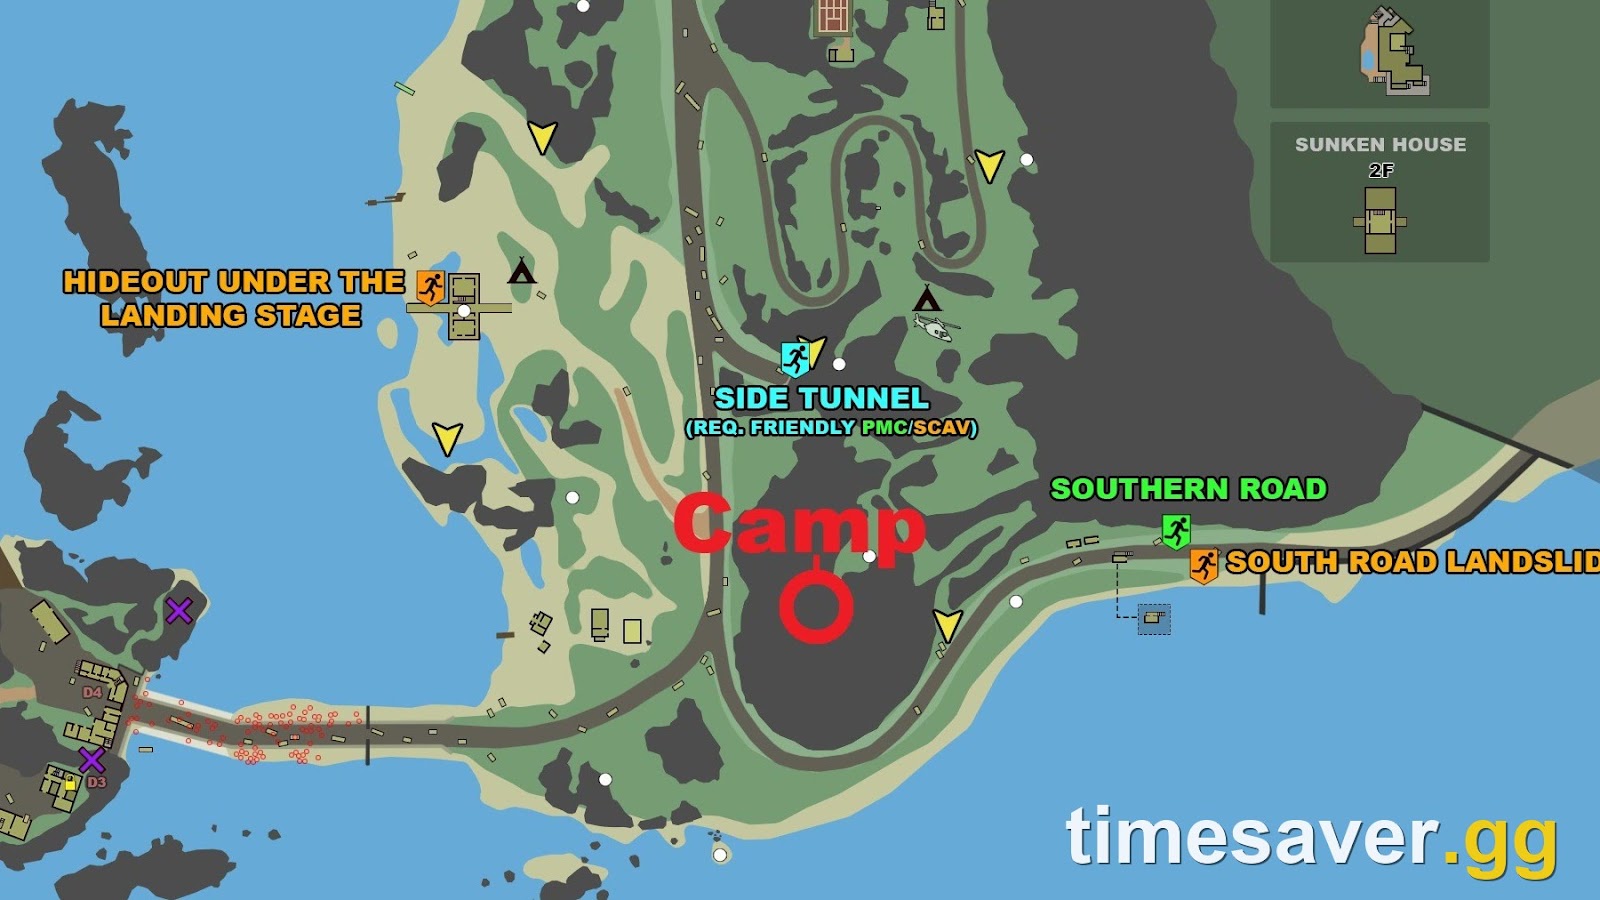
Quick answer: The Ticket is the story chapter that follows Falling Skies. It needs Intelligence Center level 1 to start. If you gave Prapor the armored case, you must find Prapor's people's camp on Lighthouse. Since the 1.1.5.0 Lighthouse rework that camp sits on the hill in the south, by the Southern Road exit, not on the beach. The note goes to your Notes, not your quest items. Everyone then needs the Experimental signal jammer from The Lab to open the case and get Kruglov's RFID keycard (the "Ticket"). After that, Mr. Kerman's offer decides your ending: accept it for Savior, Debtor or Fallen, or refuse it for Survivor. (EFT Wiki – The Ticket)
Escape from Tarkov - Roubles
Get millions of Roubles in 10 minutes
What Is The Ticket in Tarkov, and How Do You Start It?
The Ticket is one of ten story chapters in Escape from Tarkov 1.0. It leads directly from Falling Skies, the downed-plane chapter on Woods that ends with one choice: keep the armored case or hand it to Prapor. That choice changes the first half of The Ticket.
| Step | What you do | Where |
|---|---|---|
| 1 | Build Intelligence Center level 1 | Hideout |
| 2 | Talk to Mr. Kerman, then wait 2–6 hours for him to reach out | Intel Center laptop |
| 3 | Talk to Prapor, then Mr. Kerman again | Trader screen / laptop |
| 4a | (Case given to Prapor) Find Prapor's people's camp + the note | Lighthouse |
| 4b | (Case kept) Skip straight to asking Mechanic for help | — |
| 5 | Get the jammer and craft the case open (Workbench 1, 25 hours) | The Lab + Hideout |
| 6 | Read the RFID card manual, then answer Mr. Kerman's offer | Handbook / laptop |
All four endings (Savior, Debtor, Survivor, Fallen) run through this chapter. The final raid on Terminal is the same for all of them.
Where Is Prapor's Men's Camp on Lighthouse Now?
This is the step that broke today's Reddit threads. The camp moved with the 1.1.5.0 Lighthouse rework (September 8, 2026). Players who remember the old spot keep searching the camp on the rocks by the beach and come back with nothing.

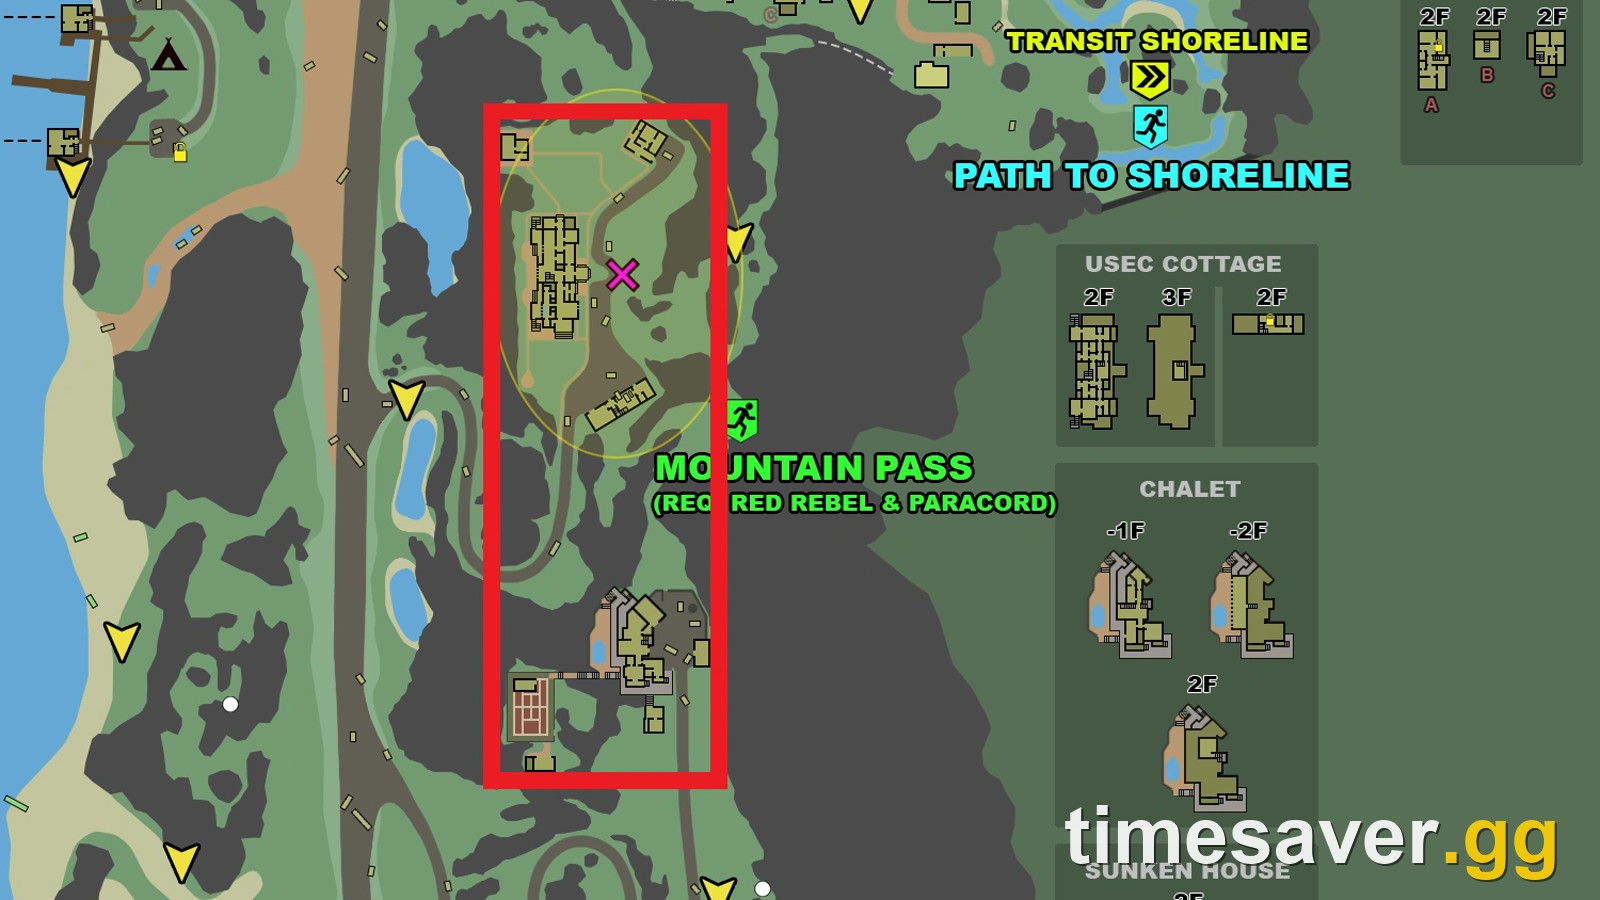
Where it is now: the BEAR-style camp on top of the hill in the south of the map. It is above the Side Tunnel and close to the Southern Road PMC exit, inland from the bridge to Lightkeeper's island. The wiki's current map marks it there. In the October 23 thread, several players confirmed it: it changed, it's now the camp at the top of the mountain near the southern exfil.
Where the note spawns: the Note from Prapor's men is in one of two places in the camp: on the medical boxes or inside a supply crate. The in-game description reads: "The note mentions the delivery of some goods near the lighthouse."

"I Picked It Up but the Quest Didn't Progress": The Fix
This is the most common "The Ticket bugged" report, and usually it isn't a bug. The note is a Note, not a quest item. It doesn't appear in your quest-items tab. You have to open the Handbook and read it before the next objective ticks. In the thread, the original poster had found the note on their first visit, then spent raids looking for a quest item that was never coming. If the note isn't in the camp, you most likely already have it. Check your Notes first, then re-run the map.
How Do You Get Lightkeeper's Part Done?
On the "case given to Prapor" route, you have to win the case back through Lightkeeper. You can't skip this. To reach him you need an encoded Digital secure DSP radio transmitter from the To the Light questline. The 1.1.5.0 patch notes list the access gate as Lighthouse unlocked through Tour, Loyalty Level 3 with every trader except Fence and Ref, Fence reputation of 2.0+, then ask Mechanic about Lightkeeper. The quest-specific wording has shifted since, so trust your in-game task list if it differs. Our Lightkeeper unlock guide walks through that chain.
Then Lightkeeper's part of The Ticket:
- Stay on good terms with Lightkeeper. Hurting Zryachiy, his followers or a Lightkeeper-friendly PMC decodes your transmitter. In local PvE raids, unequipping it does not protect you.
- Hand over 3 TerraGroup "Blue Folders" materials.
- Fire a yellow signal flare in front of ULTRA's main entrance on Interchange.
- Eliminate any 15 targets in one raid on Interchange. Transits are allowed, but every kill must be on Interchange. If you extract short of 15, you redo the flare too.
- Talk to Lightkeeper with an empty special slot. The armored case is the reward.

Pro tip: the objective says "any 15 targets," so Scavs count. Pop the flare early, then farm kills around the mall for the rest of the raid. Don't extract until the counter reads 15.
Where Is the Experimental Signal Jammer?
Every branch needs the Experimental signal jammer. It's a 1x2 TerraGroup device that "is capable of suppressing digital signals within a 100 meter radius." It spawns in The Lab in one of three places:
- Containment block, the left-side glass laboratory, on the middle desks
- Recreational area (R21), on the round table near the red keycard room
- Lecture hall (R16), on a conference-room desk below the kitchen

Then take the jammer, a Toolset and the locked armored case to Workbench level 1. The craft takes 25 hours and needs power the whole time, so keep your generator fuelled. Unpack the case to get Kruglov's RFID keycard. The game calls it the "Ticket from Tarkov". Its description: "A personalized RFID card with a strict design. Grants access to the TerraGroup evacuation point reserved for trusted personnel." (EFT Wiki – Kruglov's RFID keycard). The RFID card manual goes to your Handbook. Read it, or the next step won't unlock.
Escape from Tarkov - Leveling
Get leveled up in 10 minutes
Which Choice Gives Which Ending?
There are three points of no return. The wiki marks the first two in red. The third is a quest you can finish by accident.
| Decision point | Choice | Endings still open |
|---|---|---|
| 1. Mr. Kerman's offer (after the manual) | Refuse | Survivor only |
| Accept | Savior, Debtor, Fallen | |
| 2. Find dirt on TerraGroup? (after swiping the activated card) | Refuse | Fallen |
| Agree | Savior, Debtor | |
| 3. Evidence hand-in | Deliver 8 major evidence, then finish Fence's and the BTR steps | Savior |
| Hand in 2 major evidence, then refuse Kerman's request for more | Debtor |
The Accept Route (Savior, Debtor, Fallen)
- Laboratory master pass: in the safe in Kruglov's office (R22) in The Lab. You need two Black keycard swipes to get in. Move it to your off-raid quest inventory so you don't lose it.
- RFID card encryption device: this objective is scripted to fail. Survive a total of 30 minutes on The Lab (across any number of raids) until it fails, and Mr. Kerman sends you to Mechanic.
- Mechanic wants 40 Physical Bitcoins. He replies in 6–12 hours. The coins do not need to be found in raid. You get Elektronik's key. The device is under the living-room coffee table in Elektronik's apartment (Klimova 14A) on Streets of Tarkov.
- Craft the Activated Kruglov's RFID keycard at Intelligence Center 1 (23 h 30 min, needs power). The recipe takes Kruglov's card, the encryption device, the Labs master keycard and a Blank RFID keycard, so have one in your stash. Then swipe it at the Shoreline port intercom. (EFT Wiki – Activated Kruglov's RFID keycard)

The Savior Lockout to Watch For
After you agree to Mr. Kerman's evidence hunt, Savior asks for Intelligence Center level 3 and 8 of the 9 major TerraGroup evidence. Then come Fence's assignments: Fence above 4.0 the whole time and two no-Scav-kill co-op extracts. In PvE these become 5 PMC kills in one raid on Interchange and on Shoreline, without killing Scavs. Then you need 0.4 standing with the BTR Driver, which only comes from the quest The Price of Independence. Finally, Fence hands you the flash drive with Mr. Kerman's hash codes, and you need Solar Power level 1 to finish the route. (EFT Wiki – The Ticket)
The trap: completing Choose Your Friends Wisely fails that BTR objective and ends the Savior route for good. That's how the October 23 poster got locked out after confirming Kerman three times. On a Savior run, finish The Price of Independence before you touch the other BTR branch. Missing a major evidence item is less final: there are 9 to choose from and only 8 are needed, and the wiki lists a "second chance" objective from Mr. Kerman if you missed the They Are Already Here evidence. Our endings guide covers each evidence pickup.
The Debtor Route
Agree to the evidence hunt, hand in two major evidence, then refuse to hand in more. Handing in fewer isn't enough on its own; the refusal is what locks Debtor. Then:
- Ask the traders how to leave Tarkov
- Give Lightkeeper a military flash drive with compiled topographic intel. The documents are on Lighthouse, Woods, Customs, Ground Zero and Factory.
- Eliminate 30 PMCs on Woods
- Hand 100 PMC dogtags to Lightkeeper
- Stash six Sacred Amulets in the Lighthouse island stash room. They come from the marked rooms: Dorm 314 on Customs, two on Streets of Tarkov and three on Reserve (RB-VO, RB-PKPM, RB-BK).
The Refuse Route (Survivor)
Refuse Kerman and take the activated card to the intercom. Prapor then wants 500,000,000 roubles, or 300,000,000 if you gave him the case in Falling Skies.
If you kept the case, there's a second part. You get 72 hours to finish three Prapor tasks in order:
- Convert the four TerraGroup evidence folders to an SSD
- Eliminate 50 targets on Streets of Tarkov
- Eliminate 4 PMCs in one raid
Miss the window and Prapor takes your Secure container Kappa instead. If you gave him the case, you skip these tasks. Either way, stock ammo and meds before you start the clock.
The Fallen Route
Refuse the evidence hunt. If you kept the case in Falling Skies, Prapor first wants 50 military or advanced electronics, a Theta, Epsilon or Kappa container, and 40 full-durability repair kits. Everyone on Fallen then hands over the Case with dangerous cargo and $1,000,000, and needs Solar Power level 1.
What Happens on Terminal?
Every ending finishes the same way. At the Shoreline intercom between 21:00 and 06:00, swipe your keycard, or use the call button on Survivor. Follow the left road with your weapon lowered. On Savior you also need the Secure container Alpha-1 with TerraGroup evidence in your task inventory, or you can't transit. Then fight through Terminal: the armory key, the Black Division keycard in the seaport building, the fuel-depot gate (an SZ-1 charge, Elite Strength, or a teammate), and the pumping station. After the pier door opens, you have 3 minutes to reach the Zubr Boat. If you die, your character resets to its pre-Terminal state except for the access item you used. For map routes, see our Terminal escape guide.
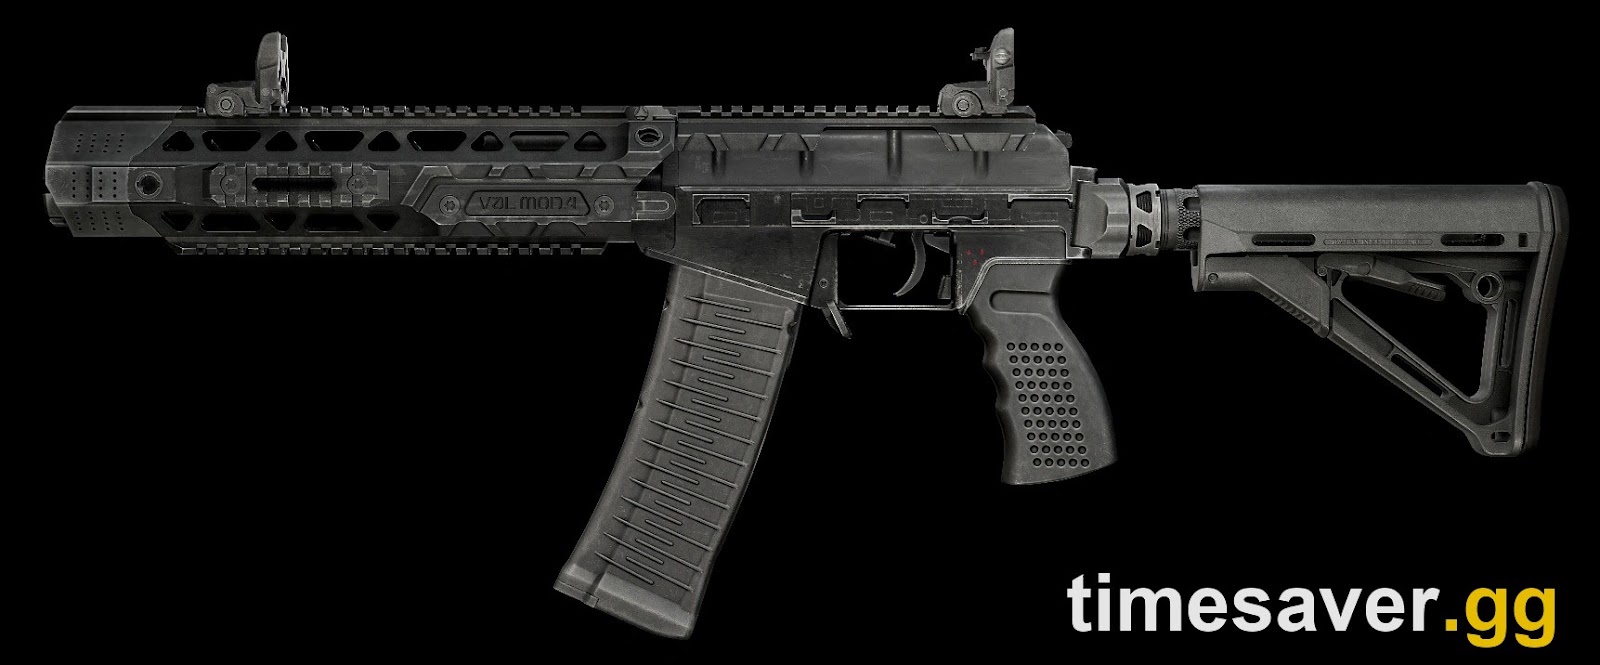
Savior pays the most: $200,000 ($40,000 in PvE), three each of the AS VAL MOD.4, PKP, M32A1, Mk-18, Saiga-12K and TKPD, plus cases and ammo. Debtor pays €120,000 (€30,000 in PvE).
Do You Need The Ticket for PvE Prestige?
PvE Prestige arrived with patch 1.2.0.0 on October 6, 2026. It's voluntary and has six levels. The story requirements step up per level, according to the wiki's Prestige table:
| Prestige | Story requirement |
|---|---|
| 1 (PvE) | None |
| 2 | Complete Tour |
| 3 | Complete Tour + Falling Skies |
| 4 | Complete Tour + obtain the Ticket (Kruglov's RFID keycard) |
| 5 | Complete Tour + They Are Already Here + obtain the Ticket |
| 6 | Complete The Ticket |
So you only need to finish the chapter for Prestige 6. Until then, unpacking the case is enough. In the October 23 thread, one player suggested saving Savior for your last run if you're aiming for Prestige 6, and doing the money-heavy Survivor or Fallen while you still have the roubles. Here's how the Prestige reset works.
Short on time for The Ticket? The roubles, the 40 Bitcoins and the hideout builds are a grind on their own. Let a pro handle the chapters you don't enjoy.
- EFT Kappa Container & Quest Boost: story chapters, Lightkeeper and Kappa tasks, done by pro players
- EFT Roubles: cover the 300M–500M Survivor payment or a stack of Bitcoins without farming (pick your PvP or PvE zone at checkout)
- EFT Hideout Upgrade Boost: Intelligence Center 3, Workbench and Solar Power built for you
- EFT Leveling Boost: hit the trader loyalty levels that unlock Lightkeeper
FAQ
Where is Prapor's people's camp on Lighthouse in The Ticket? Since the 1.1.5.0 rework it's on the hilltop in the south of Lighthouse, above the Side Tunnel and near the Southern Road exit. It's no longer the old camp on the rocks by the beach.
Why isn't The Ticket progressing after I found the note? The Note from Prapor's men is a Note, not a quest item. Open your Handbook, find it under Notes and read it. That completes the objective.
Do I need to go to Lighthouse if I kept the case in Falling Skies? No. The Lighthouse camp, Lightkeeper, Blue Folders and Interchange steps only apply if you gave the armored case to Prapor. If you kept it, go straight to asking Mechanic for help.
Do the 40 Bitcoins for Mechanic need to be found in raid? No. They can come from your Bitcoin farm or the market, but all 40 must be in your stash when you hand them over.
Can I still get Savior after finishing Choose Your Friends Wisely? No. Completing Choose Your Friends Wisely fails the "0.4 standing with the BTR Driver" objective and ends the Savior route. Complete The Price of Independence instead.
What happens if I fail Prapor's 72-hour tasks on Survivor? You have to hand over a Secure container Kappa to Prapor to continue. The timed tasks only apply if you kept the armored case in Falling Skies.