Supplies Drops 2.0 is the most forgiving way to farm loot in Arena Breakout: Infinite right now — unlimited respawns, a free system loadout, and a shared crate you fill as a team. But the 2.0 rework that landed with the Biohazard & Bountiful Autumn Festival (announced September 24, 2026, inside Season 7: Utopia) added a real progression layer, and most squads leave half their loot on the table because they never push the Reward Crate past Level 3. This guide is the strategy half of the mode — not what the rewards are, but how to actually win the raid and walk out with a full crate.
Every mechanic below is verified against Morefun Studios' official Steam announcement for app 2073620. For the full festival reward list, dates, and the 780,000 Koen Lunar Soil Sample, see our Autumn Festival rewards guide.
Quick answer: how do you level the Reward Crate fast in Supplies Drops 2.0?
Raise your Reward Crate by doing three things, in this priority order: secure the single Confidential Terminal on the map (it grants the largest single XP chunk), tag every Standard Terminal early (each team can use each one once), and fill the raid with kills and container loot between objectives. The crate has 5 levels; every level adds rows to the Squad Reward Crate, and Level 5 also adds a row to your Personal Reward Crate, so pushing to Lv. 5 as a four-stack is the single biggest lever on how much loot survives to the settlement screen. Because respawns are unlimited and the loadout is free, you play aggressively toward objectives rather than hoarding — the crate, not your backpack, is what pays out.
- Mode type: casual co-op (PvPvE), unlimited respawns, system-issued loadout
- Progression: Reward Crate Lv. 1 → Lv. 5 (more rows = more loot kept)
- Biggest XP source: the one Confidential Terminal (must be defended after activating)
- Lv. 3 unlock: the Smelter (convert Purple-or-below items into new ones, unlimited uses)
- Live in: Season 7: Utopia, during the Biohazard & Bountiful Autumn Festival (announced September 24, 2026)
How the Reward Crate works — and why rows are everything
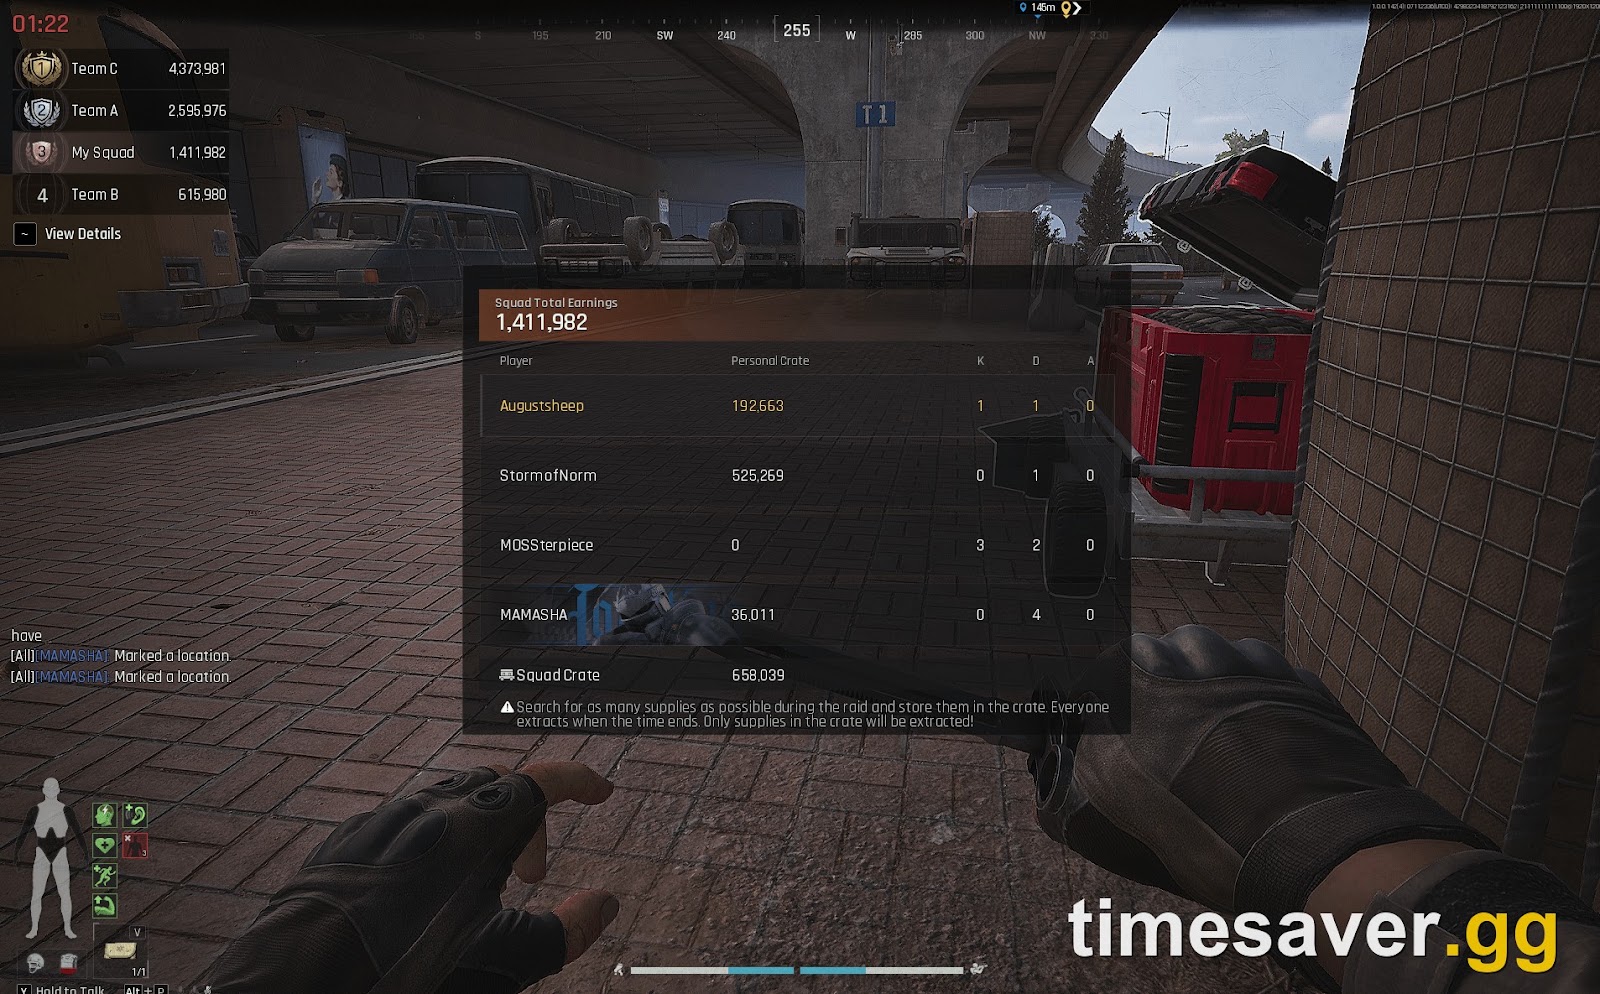
In Supplies Drops 2.0 you are not extracting a backpack of loot the way you would in a Tactical Ops raid. You loot into two crates — a Personal Reward Crate and a shared Squad Reward Crate — and those crates are what settle at the end of the raid. The number of rows in each crate is the hard cap on how much you keep, and the only way to add rows mid-raid is to level the Reward Crate.
Here is the exact progression from the patch note:
- Lv. 1: the crate starts with 4 rows.
- Lv. 2: +1 row to the Squad Reward Crate.
- Lv. 3: unlocks the Smelter.
- Lv. 4: +1 row to the Squad Reward Crate.
- Lv. 5: +1 row to both the Squad Reward Crate and the Personal Reward Crate.
The takeaway: three of the five levels directly expand your loot capacity, and the final level is the only one that grows your personal haul. If your squad caps out at Lv. 3 because you played passively, you are leaving two extra Squad rows and a Personal row behind — that is a large chunk of settled value gone. Treat Lv. 5 as the real objective of the raid, not a bonus.
You earn Reward Crate XP three ways: searching containers, eliminating players, and interacting with Terminals. Of those, Terminals are by far the most XP-dense, which is why your route should be built around them.
Terminals — the real objective, and how to play each type
Season 7's Supplies Drops 2.0 seeds two kinds of Terminal across the map, and they reward completely differently.
Standard Terminals — grab them early, grab them all
Standard Terminals are scattered across the map in multiples. Each team can interact with each one only once, and each gives a small chunk of Reward Crate XP. Because the cap is per-team and the amount is fixed, these are a race: the sooner you sweep them, the more total XP you bank before another squad gets to them. Split a four-stack into two pairs at raid start and tag Standard Terminals on opposite sides of the map — you double your early XP intake and spot enemy squads sooner.
The Confidential Terminal — the single biggest payout on the map
There is exactly one Confidential Terminal on the entire map, and it is where the raid is won. After you interact with it, your team has to stay and defend it while the timer runs — and other teams can contest it during that window. Secure it successfully and you get a large amount of Reward Crate XP, enough to jump a level or more on its own.
Play it like a hold objective, not a loot container:
- Don't touch it the instant you arrive. Clear sightlines and pre-position first — activating it is what tells every nearby squad where you are.
- Hold angles, not the Terminal itself. With unlimited respawns, trading bodies to keep enemies off the point is a winning exchange; you only need the timer to finish.
- Expect company late. Because it is the map's biggest XP source, strong squads rotate to it in the mid-to-late raid — exactly when Airdrop frequency also ramps up (see below). Budget your meds and ammo for a drawn-out fight.
The Smelter — your Lv. 3 loot multiplier
When your Reward Crate hits Lv. 3, you unlock the Smelter. Morefun's official patch note describes it plainly: "Players can use it to smelt items of Purple quality or below into new items, with no usage limit." That no usage limit clause is the part most squads sleep on. That matters for two reasons: it turns the floor of junk you pick up (greens, blues, purples) from dead weight into rolls at something better, and the unlimited uses mean there is no reason to leave the Smelter idle once it is open.
The practical loop: once you hit Lv. 3, funnel every Purple-or-below item you don't specifically want through the Smelter instead of banking it raw. It is the same mechanic as the festival's returning "Trash to Treasure" event — low-value loot in, a chance at something worth keeping out — so the habit pays off across both. Prioritize reaching Lv. 3 quickly for this reason alone; a crate that is only collecting raw greens is wasting the mode's best conversion tool.

Supplies Drops 2.0's other changes — and how to exploit them
The 2.0 rework shipped a batch of adjustments that change how you pace a raid. Each of these is a lever if you know it is coming:
- Entry-pass value and in-raid loot are both up. Each raid is worth more than Season 6's Supplies Drops, so the mode rewards playing the full raid rather than bailing early.
- Revive time increases as the raid progresses. Early deaths are cheap; late deaths cost real time. Play loose in the opening, tighten up once the Confidential Terminal is live.
- Airdrop frequency ramps in the mid-to-late stages. Save map awareness for the back half — the drops cluster there, and so do the fights over them.
- Special heavily armored AI units now spawn on the map. These are not the free kills the base AI are. Bring enough penetration to deal with them or route around them; wasting your whole magazine on an armored unit right before a Terminal contest is how squads lose the point.
- Kill/XP reward announcements, team numbers, and phase-based voice callouts were added — use the audio cues to track raid phase so you know when revive times and Airdrops are about to shift.
Loadout and squad strategy for Supplies Drops 2.0
Because loadouts are system-issued and respawns are unlimited, Supplies Drops 2.0 inverts normal extraction economy — you are not risking your own gear, so there is no reason to play scared. The winning approach:
- Play for objectives, not survival. Your stash isn't on the line. Trade aggressively to tag Terminals and hold the Confidential point.
- Assign roles at the start. Two players sweep Standard Terminals and loot containers; two anchor toward the Confidential Terminal's likely location. Converge for the contest.
- Carry penetration for the armored AI. The new heavily armored units reward matching your Pierce Level to their armor — see our ammo and armor Pierce Level guide for the current Season 7 breakdown.
- Push Lv. 5 before you relax. The last level is the only one that grows your Personal crate; if the squad is alive and the raid is young, keep feeding the crate.
Supplies Drops 2.0 runs inside the Autumn Festival, which layers additional Koen and reward tracks on top — the Merit Challenge alone converts your highest weekly Merit in Biohazard Endless to up to 3,000,000 Koen per week. Farming the mode well feeds those tracks at the same time.
Want more Arena Breakout: Infinite guides?
- Autumn Festival rewards, dates & Lunar Soil Sample
- Zombie mode guide (Infected Zone & Zombie Endless)
- Ammo & armor Pierce Level guide (Season 7)
FAQ
What is Supplies Drops 2.0 in Arena Breakout: Infinite? It is the Season 7 rework of the Supplies Drops co-op mode — a casual PvPvE mode with unlimited respawns and system-issued loadouts, where your squad loots into a shared Squad Reward Crate and a Personal Reward Crate that settle at raid end. The 2.0 version adds a five-level Reward Crate progression, two types of Terminal objectives, and a Smelter. It launched as part of the Biohazard & Bountiful Autumn Festival announced September 24, 2026.
How do you level up the Reward Crate fast? Prioritize Terminals over everything. Tag every Standard Terminal early (each team can use each one once, for a small XP chunk), then secure the single Confidential Terminal on the map — it must be defended after activation but grants a large XP payout, enough to jump a level. Fill the gaps with player kills and container loot. Pushing to Level 5 adds rows to both the Squad and Personal crates, which is the biggest increase to your settled loot.
What does the Smelter do and when do you unlock it? The Smelter unlocks at Reward Crate Level 3. It converts items of Purple quality or below into new items, with no usage limit, so you can keep smelting junk loot for a chance at something better throughout the raid. It works like the festival's returning "Trash to Treasure" event.
What is the difference between a Standard Terminal and a Confidential Terminal? Standard Terminals appear in multiples across the map, can each be used once per team, and give a small amount of Reward Crate XP. There is only one Confidential Terminal per map; after you interact with it, your team must stay and defend it against contesting squads, and securing it grants a large amount of XP — the single biggest Reward Crate source in the raid.
Do you lose your own gear in Supplies Drops 2.0? No. The mode uses system-issued loadouts and unlimited respawns, so your stash and equipped gear are not at risk. What you take home is whatever is in your Reward Crate at settlement, which is why leveling the crate and holding objectives matters more than staying alive.
Is Supplies Drops 2.0 permanent? It is live as a returning mode during the Season 7: Utopia Biohazard & Bountiful Autumn Festival (announced September 24, 2026). Supplies Drops has rotated in and out across seasons rather than being a permanent fixture, so treat the current window as the time to farm it.