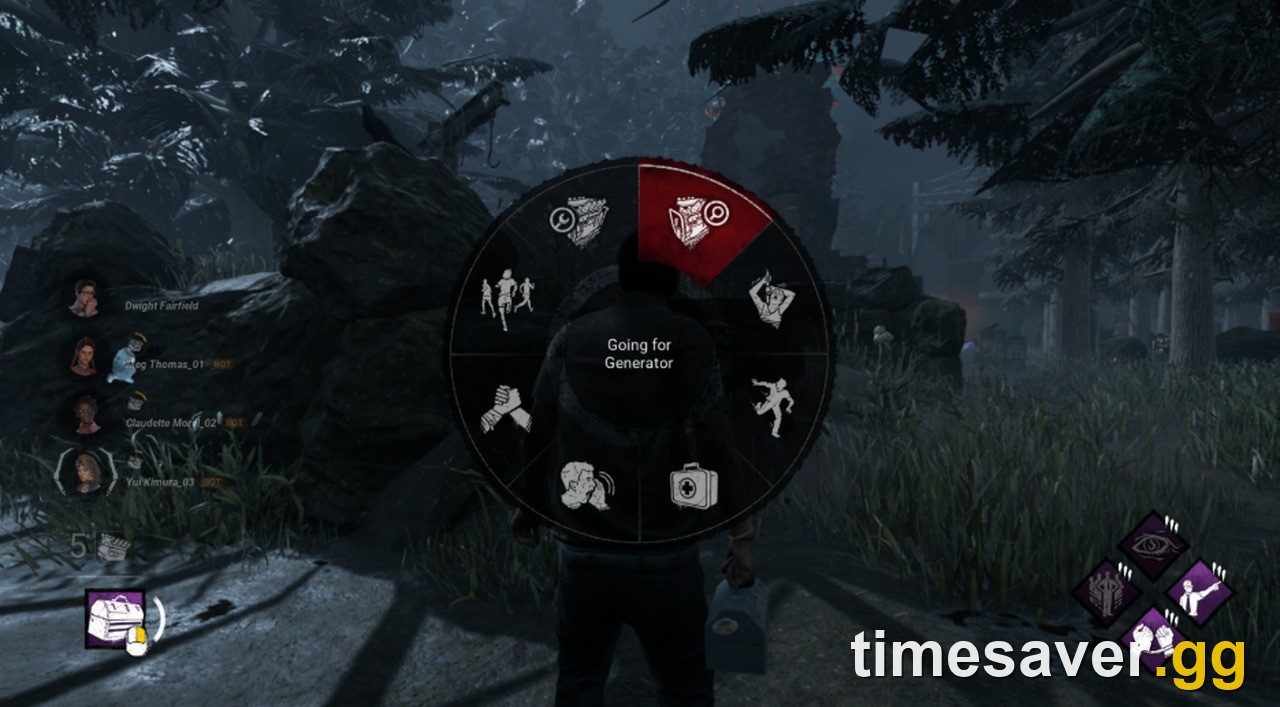
The Onryo has been in Dead by Daylight since 8 March 2022, and she is still the Killer most people get wrong in both directions. Survivors treat Condemned as a gimmick until they get mori'd at five generators. Killers treat her as a stealth Killer and then wonder why they never catch anybody.
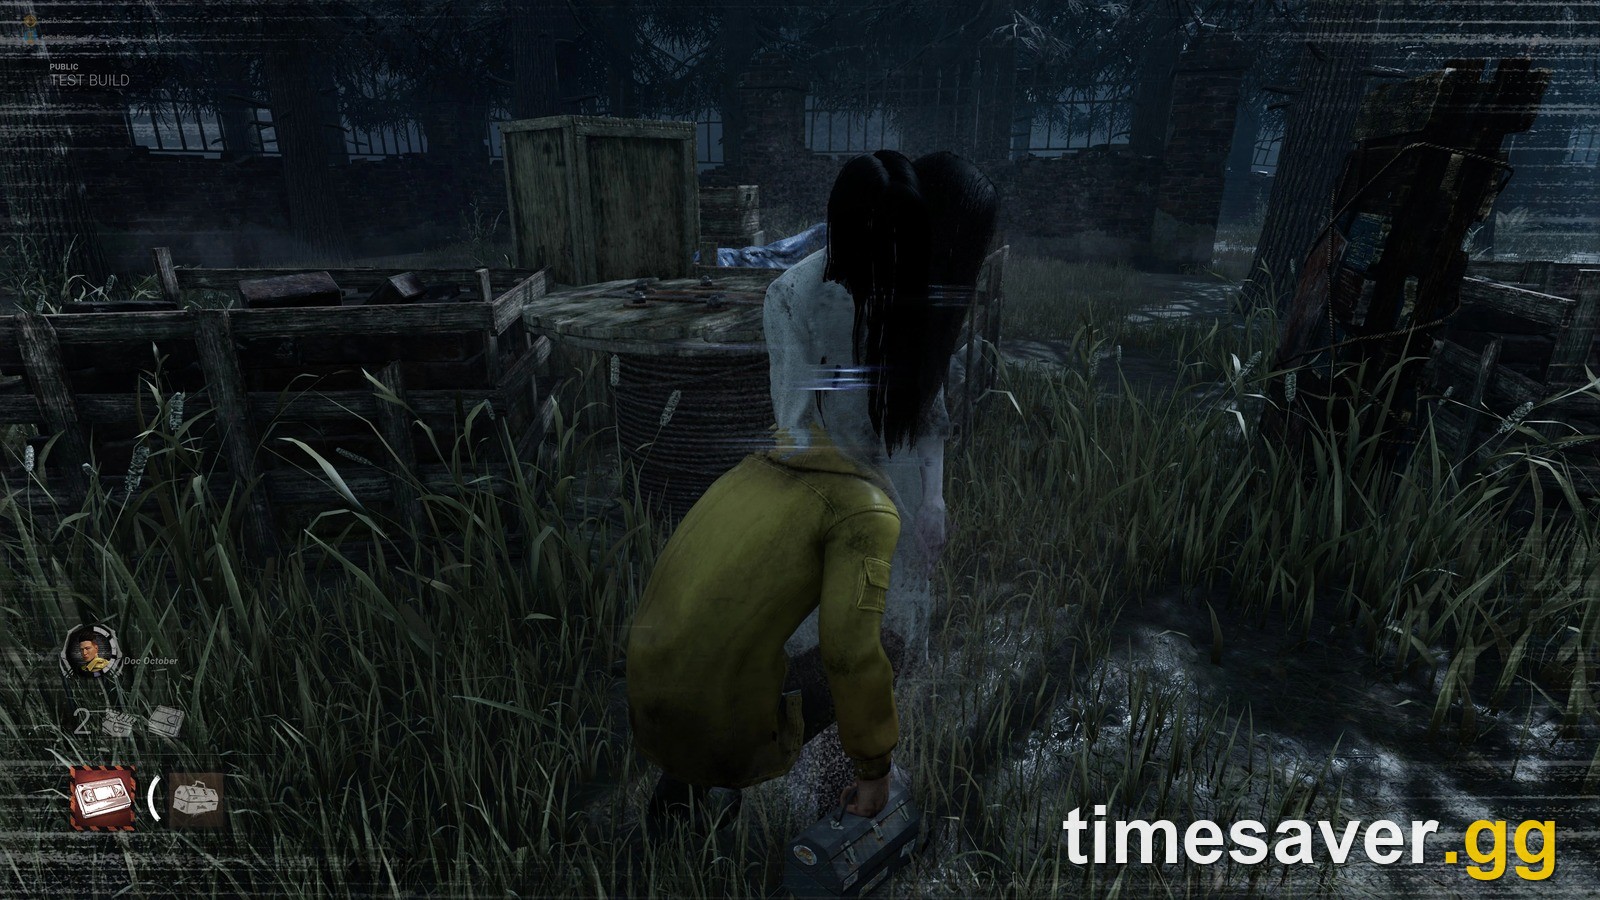
This week she is also the Killer the subreddit is shouting about, because something is visibly wrong with her model after Patch 10.2.0. We checked that against Behaviour's own notes, and the answer is more interesting than "they broke her again" — it is below, with receipts.
Everything here is written against the live build on 7 October 2026, Patch 10.2.0 Mid-Chapter.
Quick answer: how does Sadako actually work?
- She starts the trial Demanifested: Undetectable, fully invisible past 24 metres, flickering in and out within 24 metres, and unable to attack or be pallet-stunned.
- She moves at 4.6 m/s while Demanifested and only 4.0 m/s while Manifesting, so the stealth form is also the faster form.
- TVs spawn around the map, switch on 30 seconds into the trial, and she can project to any powered one. Projecting with a full Power Gauge gives +1 Condemned to every Survivor inside a 16-metre radius of any powered TV.
- Condemned fills to 7 stacks. At 7, the Survivor triggers Killer Instinct for 6 seconds and can be killed on the spot with a mini-mori once downed.
- Survivors fight back by pulling Cursed Tapes out of TVs and inserting them into a different TV, which removes stacks. Turning a TV off costs the Survivor +1 Condemned; pulling the tape costs 0.
- Being hooked locks stacks in permanently: the first hook locks up to 3, the second locks up to 6.
Behaviour's own character page sums the loop up in one sentence: "Sadako can also teleport to any TV positioned around the map, instantly Manifesting and giving any nearby Survivor 1 stack of Condemned." That one line is the entire reason she is dangerous — the pressure is applied to people she has never even seen.
What exactly does Demanifested do?
Demanifested is not just invisibility. It is four effects at once, and one of them is the one Killers forget.
- Undetectable. No terror radius, no red stain. The effect lingers for 1 second after she Manifests, which is the window good Sadako players use to close the last metre of a chase.
- Full invisibility beyond 24 metres. Past that line you simply cannot see her.
- Intermittent invisibility within 24 metres. Inside the line she flickers. The flicker lingers for 4 seconds after Manifesting.
- No attacking, no Survivor interactions, no pallet stuns. She can still interact with props, so she can still break pallets and damage generators in the form that is immune to being stunned by them.
That last bullet is the trap for new Sadako players. Demanifested is not a toggle you flip on approach — it is the state you live in, because it is both faster and silent. You Manifest to swing, and then you go back.

How do TVs and Projection work?
TVs are the map's second objective, and they run on timers most Survivors never learn.
| Event | Result |
|---|---|
| Trial start | All TVs off |
| 30 seconds in | All TVs power on automatically |
| Survivor inserts a VHS Tape | That TV is off for 70 seconds |
| Sadako projects through a TV | That TV is off for 45 seconds |
| Area of effect around a powered TV | 16 metres |
Projection is pressed while Demanifested and sends her to any powered TV. If the Power Gauge is full when she goes, every Survivor standing inside the 16-metre bubble of any powered TV takes +1 Condemned — not just the TV she arrived at. After landing she gets a burst to 6.9 m/s for 2 seconds, which is the part that turns a teleport into a hit.
The 45-second versus 70-second split is the real strategic lever: a Survivor who pulls a tape blacks that TV out for far longer than Sadako's own projection cooldown on it. Survivors who ignore TVs entirely hand her free map pressure.
How does Condemned actually kill you?
Condemned is a 7-stack meter with exactly four inputs, and the numbers are not symmetrical.
| Action | Condemned change |
|---|---|
| Projection with a full Power Gauge, while inside a powered TV's 16 m radius | +1 |
| Turning a TV off | +1 |
| Retrieving a Cursed Tape from a TV | 0 |
| Inserting a Cursed Tape into a different TV | −3 |
At 7 stacks the Survivor enters the Inexorable Stare: Killer Instinct fires for 6 seconds, and Sadako can press the secondary power button over them while they are downed to perform a mini-mori. No hook required, no offering required.
The hook interaction is what makes the kill reachable at all. The first time a Survivor is hooked, all current Condemned up to 3 stacks is locked in permanently — a minimum of 4 stacks stays removable. The second hook locks in up to 6, leaving a minimum of 1 removable. So a Survivor who has been hooked twice with a near-full meter can be one single projection away from death, and no amount of tape-running will undo it.
One honest note on the numbers, because nobody else seems to have checked: Behaviour's public character page for The Onryo says "Interacting with a specific TV can lower a Survivor's Condemned level by 4", while the community-maintained data that the whole playerbase builds around lists the tape insert as −3 stacks. We could not find a patch between 7.6.0 and 10.2.0 that changed this value in either direction. Treat the official character page as marketing copy written at release, and plan around −3 — that is what matches the in-game behaviour players report.

Is Sadako broken in Patch 10.2.0?
This is the live argument, so here is the paper trail rather than an opinion.
Players this week are posting that Sadako's model renders incorrectly — her face reads through her hair, and she is far more visible than she should be. A thread titled around exactly that complaint pulled 292 upvotes and 41 comments on r/DeadByDaylightKillers inside 72 hours, in a subreddit where a strong post is a tenth of that.
Now the receipts, straight from Behaviour's patch notes:
- 10.1.0 listed under Known Issues: "The Onryo can be seen more than 24 meters away while demanifested in some cases."
- 10.1.1 listed under Bug Fixes: "Fixed an issue where The Onryo could be seen more than 24 meters away while demanifested."
- 10.1.2 contains no Onryo entries at all.
- 10.2.0, the current Mid-Chapter, contains zero Onryo or Condemned entries anywhere in the notes, and its entire Known Issues section is a single line about The Slasher's Throw Spike prompt.
So the distance-visibility bug people remember was a real, acknowledged, and already fixed issue from the previous cycle. Whatever is happening now is a different, currently unacknowledged visual problem, and Behaviour has not listed it. It is also an incidental confirmation that 24 metres is still the live threshold — a studio does not file a bug about being seen past 24 metres unless 24 metres is the rule.
Context matters too: the same 10.2.0 threads report camera and model problems on several Killers the patch never touched.
What are the best Onryo add-ons?
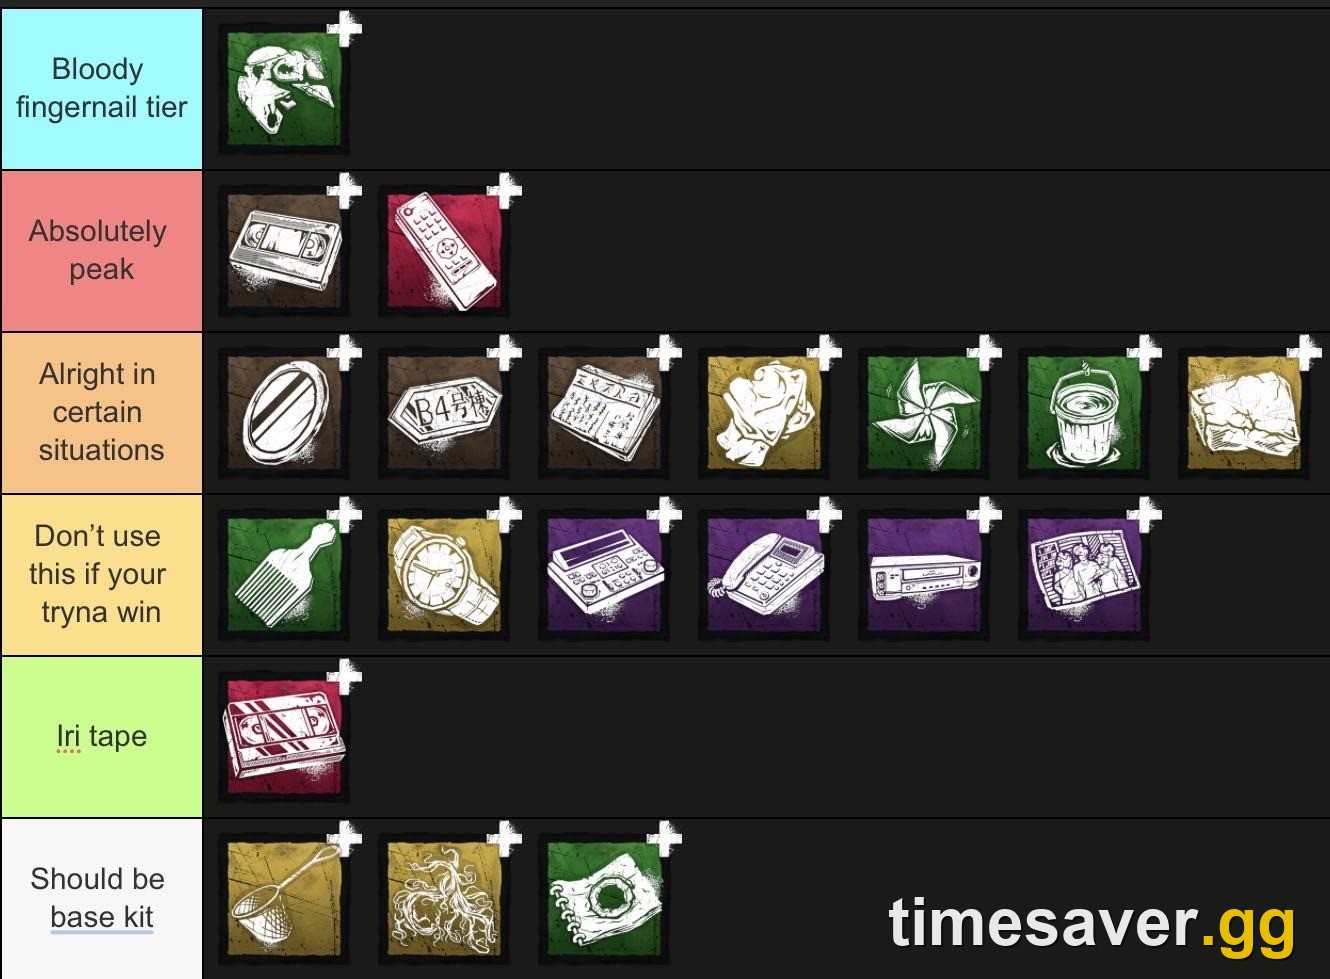
There are 20 add-ons. These are the ones that change how she plays, rather than nudging a number.
- Bloody Fingernails — extends the post-Projection speed boost. This is the consensus best add-on by a wide margin; it converts teleports into hits.
- Remote Control — reveals Survivor auras within 12 metres of powered TVs for 7 seconds after a Projection. Information that tells you which TV to go to next.
- Iridescent Videotape — Projection no longer turns TVs off and repowers 20% faster, but applies no Condemned. A completely different Killer: pure mobility, zero kill pressure.
- Tape Editing Deck — every Survivor starts the trial holding a tape and must use the farthest TV to clear it. Forces the entire lobby into your mechanic from second one.
- Mother's Comb — yellow auras on deactivated TVs plus a loud noise notification. Turns the Survivor counterplay into a tracking tool.
- Reiko's Watch — 25% longer invisibility flicker while Demanifested. Divisive in the community and genuinely strong.
- Ring Drawing — hooking a Survivor who is carrying a tape gives +1 stack to everyone else. The only add-on that applies Condemned without a Projection.
- Yoichi's Fishing Net — Blindness on Survivors at 4 or more stacks. Underrated; it attacks the information game at the exact moment the Survivor needs to coordinate.
On Bloody Fingernails, the community verdict is blunt. One of the top replies in this week's add-on discussion put it this way: "Honestly fingernails should be basekit… The different in sadakos performance just from equipping/ unequipping is honestly night and day." Another added that "vast majority of mains have fingernails as perma equiped." When an add-on is permanently welded to a Killer by her own playerbase, that is a balance signal, not a preference.
What perks does The Onryo come with?
Her three teachables, all of which are still in wide circulation on other Killers:
- Scourge Hook: Floods of Rage — 4 random hooks become Scourge Hooks. Every unhook from one reveals all other Survivor auras for 5/6/7 seconds.
- Call of Brine — generator regression plus information when a damaged generator is worked on.
- Merciless Storm — continuous skill checks on a generator at 90% progress; failing one blocks it for 16/18/20 seconds.
For her own loadout, Floods of Rage pairs naturally with Projection, because the information arrives at the exact moment she can act on it from across the map. If you are building from the current meta rather than from her own kit, our best Killer perks tier list covers what is actually worth the slots in this patch.
How do you counter Sadako as a Survivor?
The counterplay is mechanical, not reactive, and most solo-queue teams never do it.
- Pull tapes early, not late. Retrieving a Cursed Tape costs 0 Condemned and blacks that TV out for 70 seconds. The cost of ignoring TVs is paid later, all at once.
- Never turn a TV off casually. That is +1 Condemned for free. Pull the tape instead.
- Insert into the farthest useful TV. You need a different TV than the one you took it from, and each insert is worth 3 stacks back.
- Watch your hook count, not your meter. After your second hook, only 1 stack of your meter is still removable. If you are at 4 or 5 stacks and going for a second hook state, clear tapes before you get hooked, not after.
- Listen for the Manifest. She cannot hit you Demanifested. The moment she Manifests, she drops to 4.0 m/s — that is the slowest she ever moves, and it is your window to reach a pallet.
- Do not drop pallets on a Demanifested Sadako. She cannot be stunned in that state, and you have just spent the resource for nothing.
If you want the same treatment for her closest stealth-adjacent peers, we have full breakdowns of The Spirit and The Dredge, and her current standing against the rest of the roster is in the DBD Killer tier list.

FAQ
How many Condemned stacks does it take to die in DBD? Seven. At 7 stacks the Survivor triggers Killer Instinct for 6 seconds and can be executed with a mini-mori while downed, without being hooked.
Does getting hooked remove Condemned? The opposite — it locks it. The first hook permanently locks in up to 3 stacks, the second locks in up to 6. Clear your meter before a hook state, never after.
Does picking up a tape give you Condemned? No. Retrieving a Cursed Tape from a TV is 0 stacks. Turning a TV off is what costs you +1.
How far away can Sadako be seen? Past 24 metres she is fully invisible while Demanifested. Within 24 metres she flickers. Behaviour confirmed that threshold indirectly by filing and then fixing a bug about her being visible beyond it, in Patches 10.1.0 and 10.1.1.
Is Sadako hard to play? Behaviour's official character page rates her difficulty as medium, not hard. The skill is in knowing TV timers and hook-lock thresholds, not in aim or mechanics.
What is the best Onryo add-on? Bloody Fingernails, by community consensus, because the longer post-Projection speed boost is what converts teleports into actual hits.
Was The Onryo changed in Patch 10.2.0? No. The 10.2.0 notes contain no Onryo, Condemned or Deluge of Fear entries of any kind, and the only Known Issue listed for the patch concerns The Slasher.
Which patch is this guide written for? Patch 10.2.0 Mid-Chapter, checked on 7 October 2026 against the live notes rather than a test build.
Bottom line
Sadako is a pressure Killer wearing a stealth Killer's coat. The invisibility is not the win condition — it is the delivery mechanism for a 7-stack meter that Survivors have to actively service or die to. On the Killer side the whole game is TV timing and hook-lock maths; on the Survivor side it is pulling tapes before you need them and never, ever spending a pallet on a Demanifested Onryo.
As for the "she's broken" threads: the 24-metre visibility bug was real, was acknowledged in 10.1.0, and was fixed in 10.1.1. What is being reported now is something else, and Behaviour has not named it yet. Until they do, play the numbers above — they are still the live ones.
Keep reading on Dead by Daylight:
- DBD Killer Tier List September 2026 — where The Onryo sits against all 44 Killers
- DBD Best Killer Perks Tier List 2026 — the slots worth filling on her loadout
- DBD Patch Notes 10.2.0 — everything the current Mid-Chapter actually changed
- DBD Spirit Guide — the other Killer you cannot stun on approach
- DBD Dredge Guide — teleport pressure from the other direction