Quick answer — the best Pendola Pass loot route for each condition
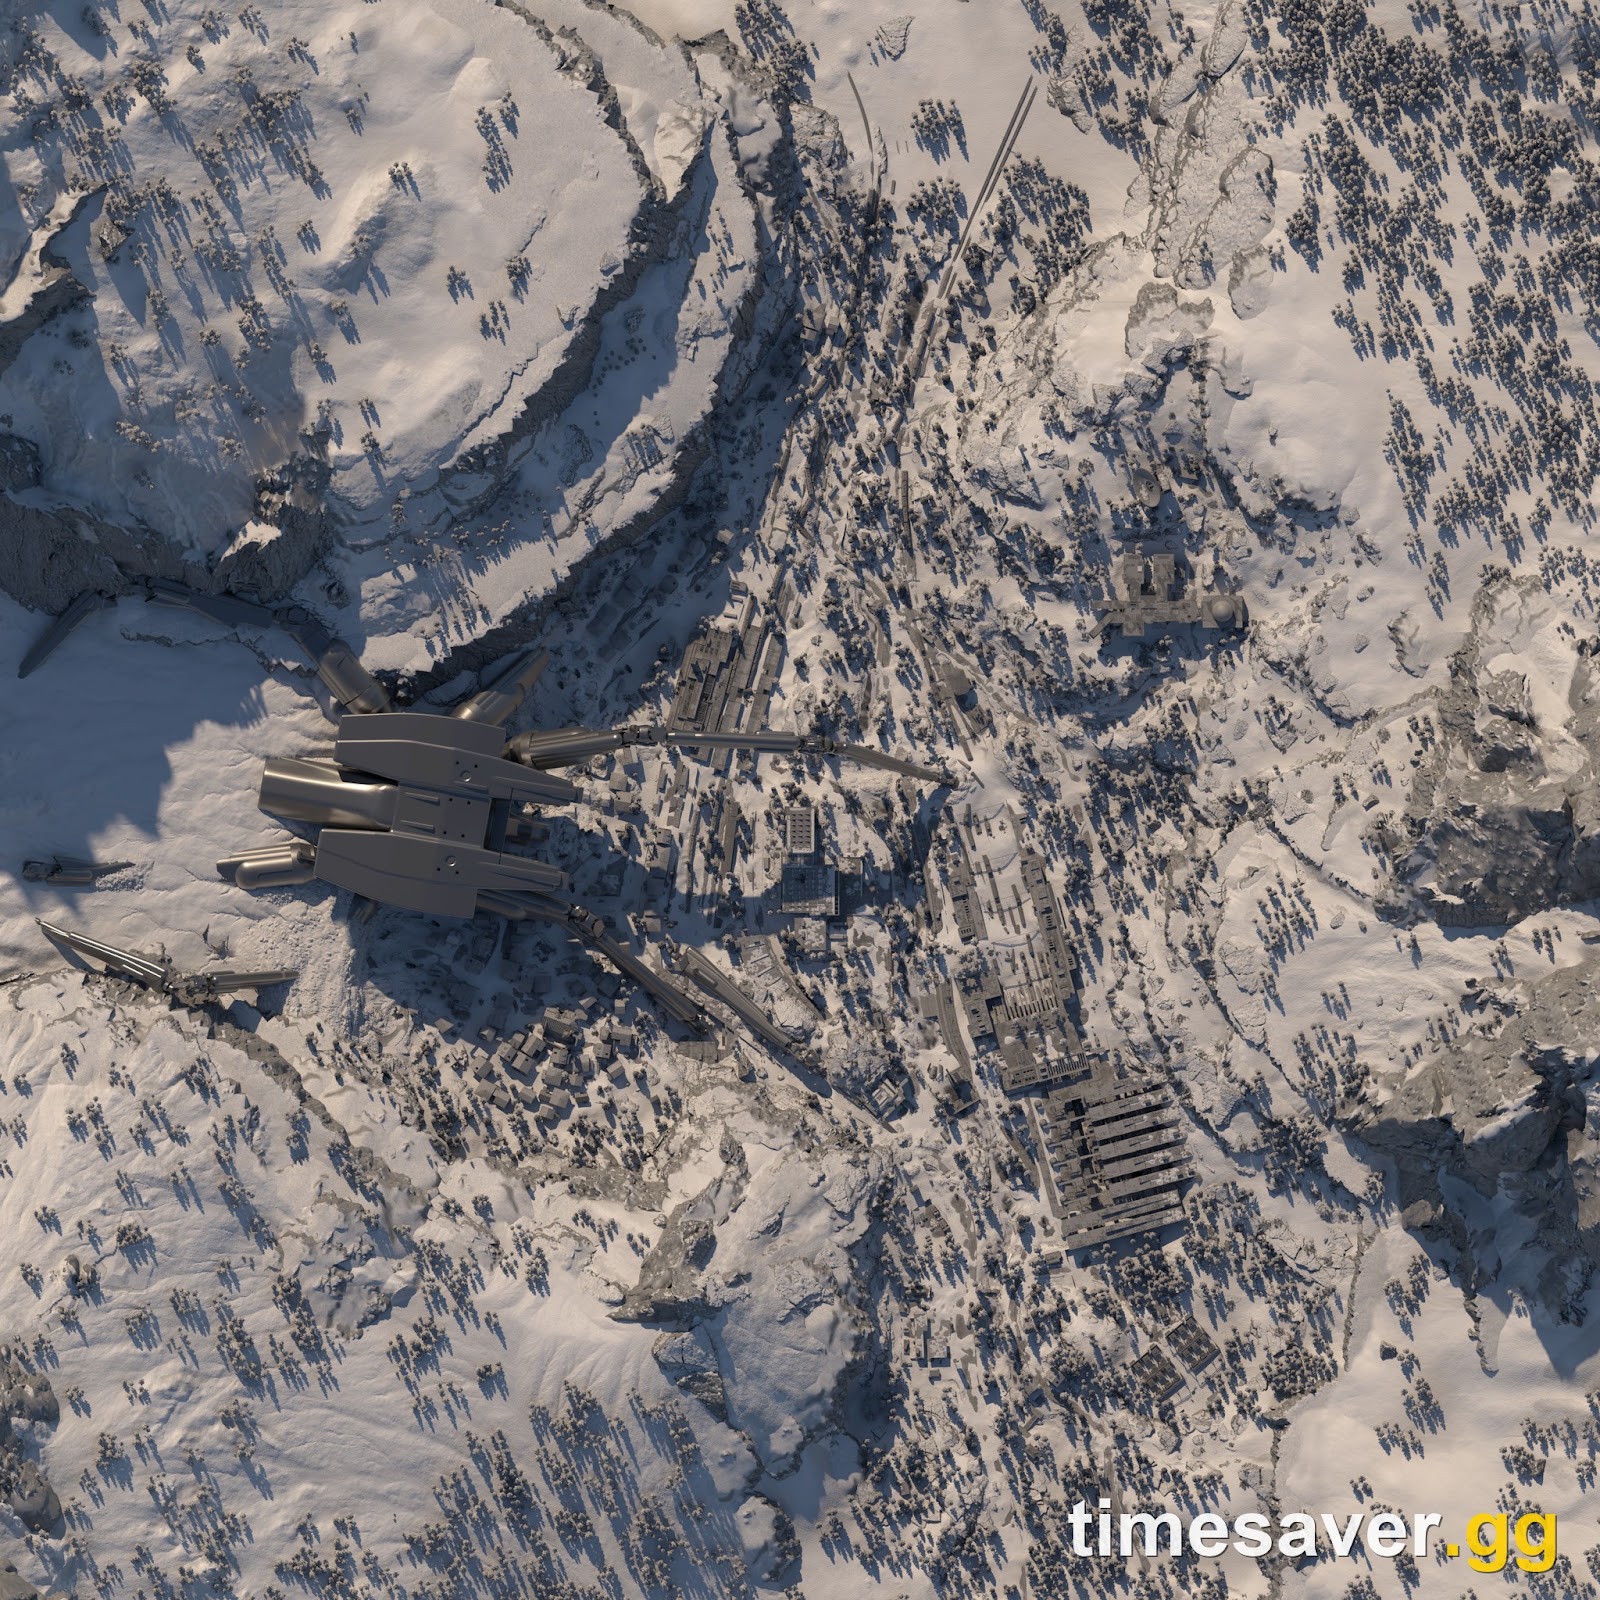
Pendola Pass rotates three states, and each one invalidates the route that works under the other two. With no condition active, locked doors and Raider Hatches behave normally and Flash Freeze is in play, so you run a short indoor loop and keep a roof within sprinting distance. Under Redirection, Flash Freeze is switched off and Emperor Beacons are lootable, so you abandon the building loop entirely and play open ground for Harvester Payloads. Under the ARC Frigate, overall loot value is reduced, every locked door is already open and Raider Hatches are listed as inactive, so scavenging stops paying and the run becomes a fast interior sweep into the Frigate itself. There is therefore no single best ARC Raiders Pendola Pass loot route — there are three, and this page is the route per condition. For what Pendola Pass is — the POIs, the systems and how extraction works in general — read our Pendola Pass map guide.
ARC Raiders - Blueprints
Get blueprints in 10 minutes
Read the condition screen before you drop
The map selection screen tells you the condition before you commit, and on Pendola Pass that line is worth more than any route you memorised. Two named conditions rotate here, and the effects below are quoted from their condition cards. The baseline row is not a named condition — it is the map with nothing rotated in, and its points are inferred from what the other two switch off.
| Condition | Listed effects | What it does to your route |
|---|---|---|
| No condition (baseline, inferred) | Nothing rotated in. Locked doors behave normally, full loot value, Flash Freeze in play | Short indoor loop. Key-gated rooms are the value. Never be more than a sprint from a roof |
| Redirection (Minor, Pendola-exclusive) | "Emperor Beacons are activating throughout the area. Raiders can loot and deploy these to redirect valuable payloads to their own position." Plus: No Flash Freeze, Emperor Relays active, Falling Debris | Open ground is safe from the cold for once. Stop looting buildings, start hunting beacons and holding payload sites |
| ARC Frigate (ARC Operation) | "An ARC Frigate hovers over the area, obliterating any perceived resistance with reckless abandon." Plus: no active locked doors, decreased overall loot value, no active Raider Hatches. No free loadout | Scavenging is the worst it gets. Skip containers, walk through the doors you normally need keys for, go up |
Two things to notice. Redirection is the one exclusive to Pendola Pass — the ARC Frigate condition also runs on Dam Battlegrounds, Buried City, Spaceport, The Blue Gate and Riven Tides, so Frigate habits transfer. And the detail almost nobody routes around yet: Redirection explicitly suppresses Flash Freeze. The cold is a baseline map mechanic, not a condition, and Redirection turns it off — the biggest route unlock on the map.
Baseline Pendola Pass: the short indoor loop
With nothing rotated in, Pendola Pass plays like a conventional scavenging map, and it is also the state where the cold is actively trying to kill you. Embark describes the valley as having "brutal flash freezes", and the community wiki frames Flash Freeze as a harder version of Cold Snap built into the map rather than rotated in as a condition. Embark named the countermeasure in its September 23 announcement: Avalanche Shelters, which "activate as a freeze approaches, offering both protection and the promise of loot, but they can also draw the attention of opportunistic Raiders." They are not mentioned in the Frozen Trail 2.0 patch notes, so plan around a roof as well as a shelter.
Route it so you are never more than one sprint from an interior:
- Commissary Supermarket, then Old Town. Both are dense and enclosed, which is what a freeze rewards. Clear them first and you ride out the opening weather window on cover you are already standing in.
- Cielo Sereno Observatory. This is where the baseline state pays and the other two do not. The Pendola Pass Observatory Key — an Epic key, 0.25 weight, sells for 100 Coins — unlocks a door inside the observatory's main building. With no condition active that door is a locked-room reward. Under the Frigate it is open to everyone, so the key is dead weight.
- The Railyard, and the Nomad Camp beneath it. Deep interior, so it doubles as freeze cover, but it is corridor fighting by nature. Take it after the observatory.
- Extract on a transceiver. Activate a transceiver, ride a Ballistic Gondola out, and treat that as this map's default exit. If you hold a Raider Hatch Key and a hatch is available to you, it is the better bail-out when the gondolas are already loud: a hatch stays open roughly 10–15 seconds, takes one Raider at a time, and has no shutdown timer. Mechanics in our Ballistic Gondola extraction guide.
What you come out with: a general scavenging haul plus whatever the observatory's locked room holds. Embark publishes no per-area loot values for Pendola Pass, so rank the stops by exposure to the cold and to other Raiders. Our Flash Freeze survival guide covers the weather side.
Redirection: drop the buildings, play the open ground
Redirection is the only state with a verified route to the new ARC epics and no loot-value penalty attached, and it should not look anything like the loop above.

What the beacons actually do
The condition scatters Emperor Beacons across the area. A beacon is an Epic quick-use item — 2.0 weight, stacks to three — scavenged from the fallen-over beacons on the map, and its own description tells you the job: a copy of the Emperor's identifier signal that you deploy in an open area to call in Harvester Payloads. Activate one and debris starts falling almost immediately; getting hit by it damages you, so plant it and move off the drop line. The payloads land among that debris, some need breaching, and they hold ARC materials and parts.
The reason to care: the Harvester Payload is the verified source of three new Epic Topside Materials — the ARC Conductive Coupler, the ARC Plated Coupler and the ARC Insulated Coupler, the last described in-game as "one of three distinct couplers found in ARC machines, said to combine into a singular conduit." They do not stack, and they come out of a payload you called in yourself.
The route
- Skip the Commissary Supermarket and Old Town. Full-value containers are not what this raid is for, and interior time is time a rival spends claiming a beacon site.
- Sweep for fallen beacons first, loot second. You want two or three in the bag before you deploy anything, because the first deployment is the one that tells the lobby where you are.
- Pick your open area for sightlines, not convenience. The beacon needs open ground, which is normally where the cold kills you — but Redirection has Flash Freeze off, so for this raid you can take a field, a yard or the Railyard approach and hold it. Choose one with a wall at your back and one approach to watch.
- Deploy, step off the drop zone, let the debris land, then loot the cluster. Breach what needs breaching, and do not ego-fight over an unopened payload.
- Extract after the second cluster. Couplers are Epic and do not stack, so your bag fills with high-value singles fast. No cold timer forces you home under Redirection — which is exactly why Raiders overstay and lose the run to a rat rather than the weather.
What you come out with: ARC materials and parts from every payload you called, with the three couplers as the prize. This is the raid for the Amplification grind — amplifying a weapon requires the Outpost unlocked and your Gunsmith and Research Stations at Level 4, and that pressure sits on ARC-sourced epics, not civilian loot.
ARC Frigate: stop looting, go up
The Frigate condition inverts the whole map. Overall loot value is reduced, so a scavenging loop is the worst use of the raid — and in exchange every locked door on Pendola Pass is already open. Raider Hatches are listed as inactive, so plan on a gondola transceiver, and there is no free loadout, so you are bringing your own kit into an ARC Operation.

The route
- Walk the key-gated interiors for free. Everything you would normally spend a key on is open, the observatory main building included. This is the one raid where the Observatory Key in your stash is worth nothing and the room behind it costs nothing.
- Do not grind containers. Reduced loot value is the condition's headline — the same loop earns less under the Frigate than with no condition active, for strictly more risk.
- Commit to the fallen Emperor and the Frigate. That is where the condition's value lives. Expect the Hydra at both: Embark describes it as the squad killer that "protects the Emperor and Frigate" — the earlier preview placed it only aboard the Frigate, so the live-day wording is the one to plan around.
- Treat the Cargo area as hostile geometry, not cover. Two of Embark's own known issues live here. The Hydra can detect and shoot players through walls in the Cargo area — logged, no fix committed. And standing on the side of the Cargo drop can result in being instantly eliminated — that one has a fix in the works. Until then, do not peek the Hydra from behind Cargo-area walls and do not stand on the lip of the drop.
- Know your exit before you board. With hatches offline, every Raider in the lobby funnels to the same transceivers. Activate one, let the gondola land, and breach a red panel on any of its three tubes — or climb on top of it, or grapple onto it and ride it up, if the tubes are contested.
What you come out with: less bulk, better quality. Embark publishes no drop tables for the Bully, the Skulker or the Hydra, and none for the Emperor interior, so this is the one condition where we will not hand you an expected haul — anyone who does is inventing it.
ARC Raiders - Materials
Get materials in 10 minutes
Why no route survives contact with Dynamic Loot Zones
There is one more layer on top of the conditions, and it is Pendola-exclusive. The patch notes describe a Dynamic Loot Zone system being tested only on Pendola Pass, with the stated intent of making the loot values of certain areas vary from raid to raid, "thus making 'routes' less predictable and scavenging more dynamic."
Read that as a design statement about routing, because it is one. The notes are explicit that a zone keeps its loot type — a Residential pocket stays Residential — while the value it yields is re-rolled. That is exactly why this guide routes by condition instead of by a ranked POI order: condition effects are fixed and knowable, per-area value is deliberately not. Treat a stop that paid last raid as no evidence about this one.
Four route mistakes that cost the run
- Carrying the Observatory Key into a Frigate raid. No active locked doors means no locked-room payoff. Leave it in the stash.
- Playing open ground with no condition active because it worked under Redirection. Redirection is the only state that turns Flash Freeze off. Without it, the same field is a cold-death timer.
- Planning a hatch exit under the Frigate. The condition lists Raider Hatches as inactive wherever it runs. If your plan ends at a hatch, your plan ends with you dead next to a locked one.
- Bringing "Picking up the Pieces" to Pendola Pass. Embark lists it as a known issue: the quest cannot be completed on Pendola Pass and works normally on other maps. Do the quest somewhere else and keep your Pendola runs for the conditions above.
Skip the route-learning phase and have the Frozen Trail haul handed to you.
- Frozen Trail Runs — Pendola Pass runs farmed for you, materials and gear delivered
- ARC Operation Carry — the Frigate-condition endgame run, from $3.87 per run, all loot stays yours
- Frozen Trail Boss Kill — the Hydra and the new ARC machines killed by hand
- Outpost Research Boost — from $9.99, Gunsmith and Research Stations pushed toward Level 4 for Amplification
- Gadget Unlock — the Grappling Hook and Tether Launcher the vertical route is built around
- Frozen Trail Quest Line — the expansion's quest chain cleared for you while you farm conditions
FAQ
What is the best loot route on Pendola Pass? There is no single best route, and that is by design. Pendola Pass rotates two named conditions — Redirection and the ARC Frigate — on top of its baseline state, and each changes which doors open, whether Raider Hatches work, how much loot is worth and whether Flash Freeze is active. The Pendola-exclusive Dynamic Loot Zone test then re-rolls each area's value raid to raid. Route by the condition on the selection screen, not by a memorised POI order.
Does Redirection really turn off Flash Freeze? Yes — "No Flash Freeze" is one of the listed effects of the Redirection condition, alongside active Emperor Relays and falling debris. Flash Freeze is a baseline Pendola Pass mechanic rather than a map condition, and Redirection suppresses it. That is what makes Redirection the only state where holding open ground is a plan instead of a death sentence.
What do Emperor Beacons drop? Deploying an Emperor Beacon in an open area calls in Harvester Payloads, which are searchable containers of ARC materials and parts — including three new Epic Topside Materials, the ARC Conductive, ARC Plated and ARC Insulated Couplers. Falling debris accompanies the drop and damages you on contact, so plant the beacon and step off the drop line.
Is the ARC Frigate condition worth running for loot? Not for bulk. The condition explicitly reduces overall loot value and disables Raider Hatches, so a scavenging loop pays worse than the same loop with no condition active. It is worth running for access: every locked door is already open, and the Emperor and the Frigate are where the condition's real value sits.
Which condition should I farm for Amplification materials? Redirection. Amplifying a weapon needs the Outpost unlocked with your Gunsmith and Research Stations at Level 4, and the Harvester Payloads you call in under Redirection are the verified source of the new ARC-sourced Epic couplers. Embark has not published a full material list for Amplification, so treat any complete recipe you see elsewhere as unverified.
How do I extract if the gondola tubes are taken? Climb on top of the gondola, or grapple onto it and ride it up — the tubes are not the only way aboard. Under the ARC Frigate condition the transceivers are the exit to plan for, because Raider Hatches are listed as inactive. Full breakdown in our Ballistic Gondola extraction guide.