Quick answer: To rank up fast in Rainbow Six Siege in Y11S3, run high-utility operators (Thermite, Ace, or Thatcher on attack; Mute, Smoke, or Azami on defense), spend the full drone phase tagging defenders, call out positions through pings even without mic, and keep your map pool to 4–5 maps you know well. Under Ranked 3.0, wins earn roughly 30 base RP each — consistency beats clutch performances. The changes introduced in Y11S3 mean squad-size gaps no longer pull in far higher-ranked opponents, so coordinating even with one dueling partner meaningfully improves your matchmaking conditions.
Ranking up in Rainbow Six Siege is not about raw aim. Players at every rank have aim. What separates Gold from Diamond — and especially Diamond from Champion — is decision-making speed, operator synergy, and the habits you build around information. This guide gives you the specific habits for Y11S3 (Operation Split Fire, live September 1, 2026).
For the mechanics of how Ranked 3.0 works — 40 ranks, RP math, Legend Division requirements — see the Ranked System Guide. This guide is about what you do inside those mechanics to climb.
Pick Operators That Win Without Team Coordination
The single biggest ranking mistake is picking personal favorites over meta-effective operators. At lower ranks, your team will not run coordinated setups. The operators that climb independently are those whose gadgets solve problems unilaterally.
Best Attackers for Ranked Climbing
Thermite (S-Tier) — A reinforced wall is the most common defensive tool. Thermite bypasses it without requiring anyone else to do anything first. If you open the wall, your team profits even if they do nothing else right.
Ace (S-Tier) — His S.E.L.M.A. breaches reinforced walls over multiple hits, covers more surface area than Thermite's Exothermic Charge, and can open multiple barriers per round. Highly consistent.
Thatcher (S-Tier) — Every competent defense team runs electronics (Bandit Shock Wire, Kaid Rtila, Mute Signal Jammers). Thatcher's EMP grenades neutralize all of them through walls, enabling your Thermite or Ace every round. The best anchor in low-coordination games.
Maverick (A-Tier) — Silent breaching with his blowtorch lets him create lines of sight and holes without alerting defenders to exactly where you're attacking. His Intel-heavy setup rewards players who drone correctly.
Lion (S-Tier, buffed Y11S3) — His EE-ONE-D scan now marks defenders faster (warning time reduced from 1.5 to 1.4 seconds), making it harder for defenders to freeze in place. Combined with Solid Snake for intel, Lion forces movement across the whole map in one activation.
Solid Snake (S-Tier, added Y11S1) — His Soliton Radar Mk. III displays a live map of the area with hostile positions, providing accurate intel on defenders in range. His OSP (On-Site Procurement) ability also lets him pick up secondary gadgets from eliminated operators, adding tactical flexibility per round. Among the highest intel-value operators in Y11S3. (Source: ubisoft.com/en-us/game/rainbow-six/siege/game-info/operators/solid-snake)
"Defence — Mute, Smoke, Thorn, Kaid/Bandit. Attack — Thermite, Snake, Buck, Thatcher/Mav." — community consensus from r/SiegeAcademy, 2026-09-29

Best Defenders for Ranked Climbing
Mute (S-Tier) — Signal Jammers stop drone intel, prevent remote gadget detonation, and in Y11S3 interrupt Dokkaebi's Jegeo Payload upload if she is not careful. One of the highest-utility defenders because the effect is persistent and requires no timing.
Smoke (S-Tier) — The final-second defuser deny. If your team cannot anchor the site, Smoke's Remote Canister detonations on the defuser itself are the last line of defense. Players who can time Smoke canisters under pressure win rounds other teams lose.
Azami (S-Tier) — Her Kiba Barriers create instant walls that replace lost reinforcements and plug holes the attackers opened. Highly responsive, adapts to whatever the attack decides to do.
Kaid (S-Tier) — His Rtila Charges electrify reinforced walls and barbed wire, denying Thermite and Ace breaches. The direct counter to the most common attack composition. In Y11S3, Kaid remains on the permanent Pro Pool so you will face him every ranked match.
Jäger (S-Tier) — His ADS auto-intercepts grenades. At most ranks, attackers spam grenades and Ash Breaching Rounds through soft walls. Jäger neutralizes this passively while you focus on angles.
Use the Drone Phase Completely
The 45-second preparation phase is the most underused information-gathering window at ranks below Platinum. Most players drone for 10 seconds, get shot, and then play the round blind.
What to find in the drone phase:
- Exact operator locations (tagging is free information that persists)
- Where reinforcements are placed (tells you the expected defend angle)
- Whether the defender is anchoring on site or roaming
- Barricades that indicate choke points defenders want you to avoid
Drone discipline rules:
- Stay in your drone until you find at least one defender or confirm the anchor is not in the zone you're entering.
- After your main drone is shot, keep a spare under an entry point. Activate it when your team is about to push — updated defender location in the final 10 seconds changes the entire approach.
- Tag enemies, don't just see them. A tagged Jäger means you know where his ADS traps are by proximity.
If you do nothing else on this list, improving your drone phase will increase your win rate more than any gunfight improvement.
Call Out Positions — Even Without a Mic
High-ranking solo queue relies on pings, not mics. The ping system in Rainbow Six Siege allows you to mark:
- Enemy last known positions
- Entry points you're planning to use
- Gadget locations
A callout of a defender's position 10 seconds before the push is the difference between a coordinated entry and five separate 1v1 duels that all go slightly wrong.
Consistent callout habits:
- After your drone tags a defender, immediately ping their location on the map so your team sees it
- When you're holding a sightline and hear footsteps, ping the direction — your teammate stacking the breach now knows there's a roamer
- If you're the IGL (calling the push), mark the entry point you want the team to use 5 seconds before you push
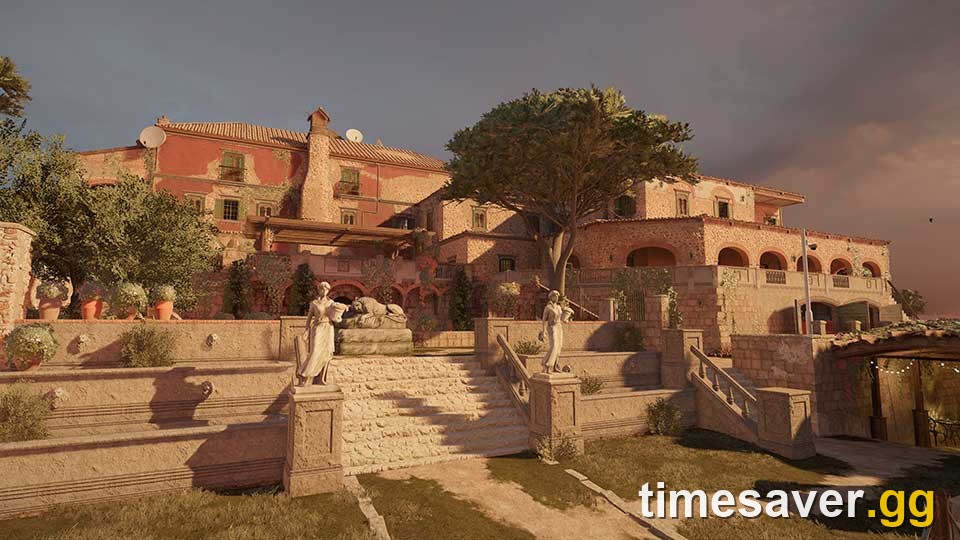
The Villa Callouts Guide demonstrates what complete callout knowledge looks like on a single map — the principle applies to every map in the pool.
The Y11S3 Ban Strategy
Each team bans two operators before the round. Four total operators are removed from the game before a single bullet fires. This decision is worth more RP than any single gunfight.
On attack, always ban one of these first:
- Azami — Her Kiba Barriers deny breaches at the last second and cost attackers more utility to open than any other single gadget in Y11S3.
- Mira — Black Mirror windows give defenders a one-way information advantage and cannot be removed without causing a loud explosion the defender hears.
- Fenrir — His F-NATT Dread Mines impair vision at key pinches, especially in tight bomb sites. Difficult to clear without Twitch or Flores.
On defense, always ban one of these first:
- Ash — Her Breaching Round destroys soft gadgets (Jäger ADS, Bandit wire, Kapkan EDDs) through walls at range. The most unilateral gadget-clearing tool in the game.
- Thermite — No Thermite means the attackers cannot open reinforced walls without risking the slower Ace method or burning Hibana picks.
- Lion — His scan forces defenders to choose between moving and getting marked or freezing and giving up position. Hard to counter without good communication.
For the complete Y11S3 meta context and tier rationale behind these bans, see the Operator Tier List and the Counter-Defenders Guide.
Shrink Your Map Pool
The Y11S3 ranked map ban format uses 3 Pro Pool maps + 2 Seasonal Pool maps per match. The Pro Pool is a fixed, rotated set of maps designed for competitive play. Playing them all at the same time means spreading your knowledge thin.
The most effective climbing approach: pick 4–5 maps and study them at depth. Know every bomb site layout, every common operator placement, every rotate hole.
At Gold and below, the attacker who knows the callouts and site layout is almost always the attacker who wins the round — because their team has context for why an angle is being played.
At Diamond and above, the advantage shifts to defenders who know every sightline and pre-aim position.
Pick maps where your operators have strong placements. Kaid, Bandit, and Mute become significantly stronger on maps with many reinforceable walls between the exterior and the bomb site.
Gunfight Fundamentals That Actually Affect Rank
Aim is not the lever. These are:
Pre-aim common angles. At every rank, defenders hold the same 4–6 angles on entry. On Coastline, the first angle when you push from the beach is always Blue Bar. Stop swinging into it. Pre-aim Blue Bar before you take the corner.
Audio is the best wallhack in the game. Sprinting makes noise that travels through reinforced walls. Rappelling sounds different from walking. Drone motors, gadget activations, and footsteps all have distinct audio cues. Turn off background music in settings (covered in the Settings Guide) and learn what the footsteps above you mean.
Soft walls are your friend. Every wall that is not reinforced can be opened with a melee or shotgun. A path does not have to be the door the map shows you.
Hold off-angles when anchoring. When you anchor site, do not sit in the corner they expect. Take a 45-degree angle off the main sightline — one step sideways from the obvious spot. The attacker who has droned you now has wrong information.
Solo Queue vs Party: What Y11S3 Changed
The Y11S3 matchmaking patch fixed a specific problem: before the patch, a large rank-gap party could pull lobby opponents far above the average rank of the squad. A Gold player queuing with a Diamond duo faced Diamond opponents.
Y11S3 change: Emerald players queuing with Platinum or Gold teammates no longer pull Champion-tier opponents into the lobby. The matchmaker now caps opponent rank closer to the squad's average.
Practical implication: Finding one consistent duo partner at a similar rank to yourself is the highest-leverage social change for climbing. The system can balance one coordinated pair against another coordinated pair. Solo vs a trio of coordinated players is a structural disadvantage that no amount of individual skill fully overcomes.
Squad restrictions by rank:
- Copper–Emerald: Maximum 3-tier gap between any two players in your party
- Diamond–Champion: Maximum 2-tier gap
This means a Champion player cannot queue with a Diamond I player in the same party.
What Not to Do
Quit matches early. Abandoned matches count as a loss at an amplified RP rate in Ranked 3.0. There is no scenario where leaving improves your LP for the day.
Play 5+ hours of ranked in one session. Every piece of data on competitive game performance shows that decision-making degrades after 2–3 hours. Tilt compounds this. A three-game losing streak at hour four is worth less than the six games you would win rested tomorrow.
Ignore the operator ban. Missing the ban phase (via disconnect or inattention) means your team has no ban contribution. This is the highest-yield 10-second decision in ranked — treat it accordingly.
Chase kills over objectives. Rainbow Six Siege rounds are won by planting or defending the defuser, not by fragcount. A 0-kill plant on the defuser with 4 seconds left wins the round. A 3-kill clutch attempt that never gets to the defuser does not.
FAQ
How many RP do you get per win in Rainbow Six Siege Y11S3? Approximately 30 base RP per win, adjusted up or down depending on the rank difference between your squad's average and your opponents'. Winning against higher-ranked opponents earns more; losing to lower-ranked opponents costs more.
How long does a Ranked 3.0 soft reset take? Each new season applies a downward reset of roughly 300 RP. Champion players are hard-reset to Emerald 3 at the start of each season. All ranks lose RP proportionally, not a flat cut.
Is solo queue worth it in Ranked 3.0? Yes, but its ceiling is lower than playing with a duo. The Y11S3 squad restriction patch reduces some of the rank-gap matchmaking variance, making solo queue more predictable than in Y11S2.
What is the fastest way to rank up in Rainbow Six Siege? Consistency in operator selection (high-utility, low-coordination-required picks), full drone phase use, and limiting yourself to a 4–5 map pool so you know every site layout. Gunfight skill matters far less than information and decision speed.
Do placement matches affect RP gains later? Not directly. Placement matches give boosted RP for wins and set your starting division for the season. After placements, RP gains revert to standard rate.
How do you unlock Ranked in Rainbow Six Siege? Ranked requires clearing the tutorial, reaching Level 50, and having an account in good standing. Placements are available immediately after meeting these requirements at the start of each new season.
This guide applies to Year 11 Season 3 — Operation Split Fire (September 1, 2026). Balance changes, meta shifts, and squad restriction updates are specific to this season. For operator tier context, see the Y11S3 Operator Tier List. For loadout details, see the Best Loadout Guide.
Want to accelerate your progress?
>