Quick Answer — what a blueprint is and where it comes from
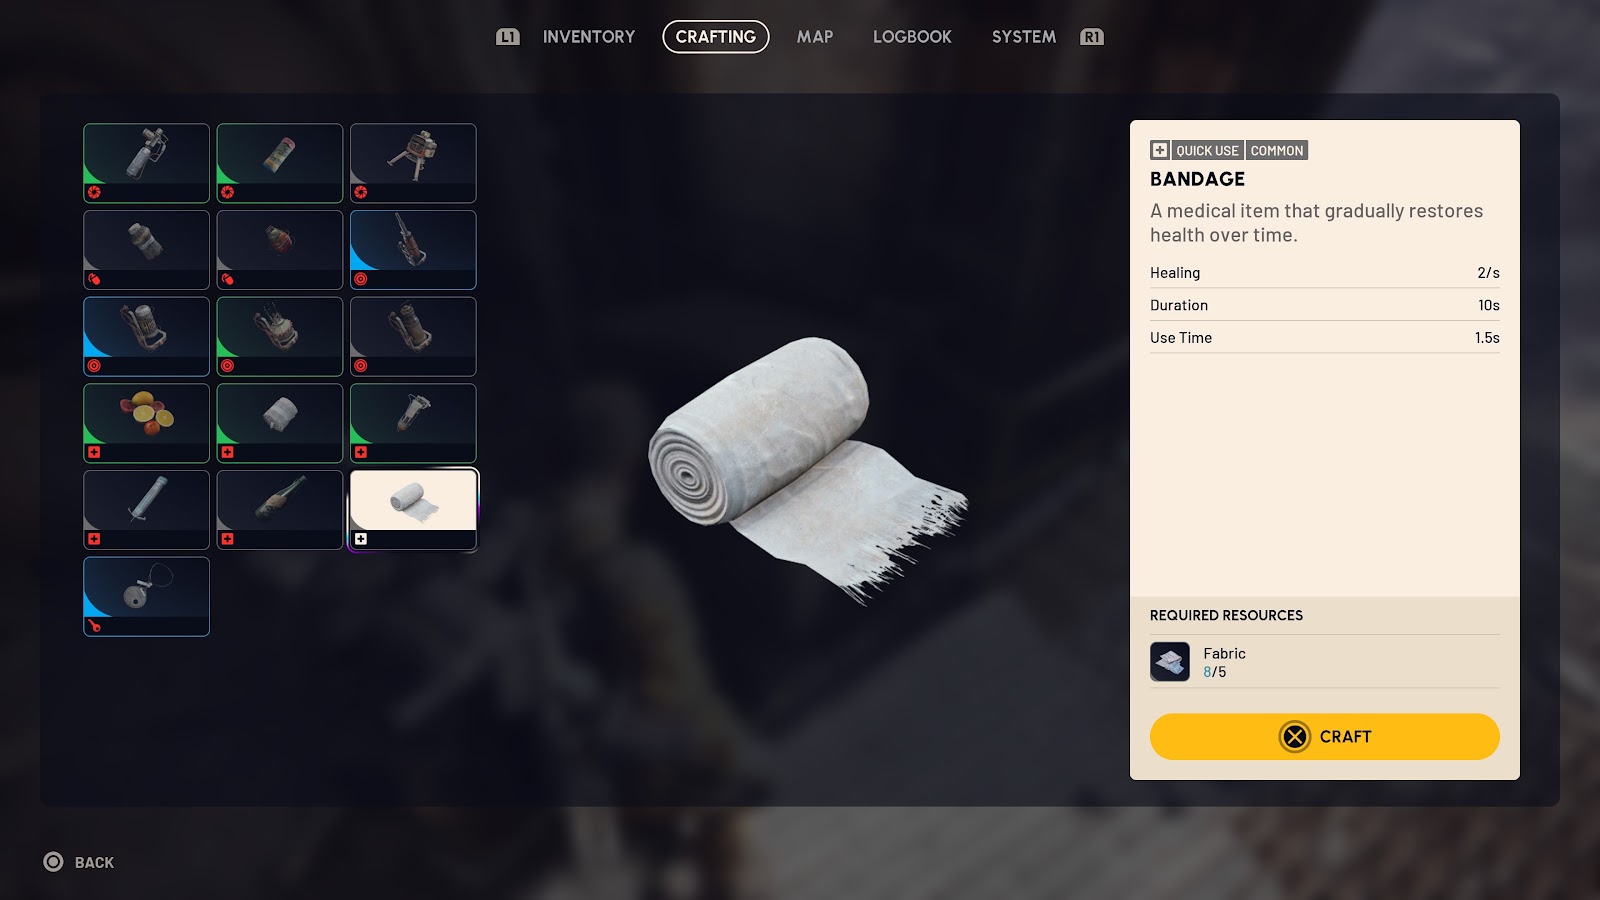
A blueprint in ARC Raiders is a lootable item that unlocks one crafting recipe for your Raider. You take it back to Speranza, "Learn and Consume" it, and the blueprint itself is destroyed in the process. The recipe then stays unlocked for that Raider — the only thing that clears it is departing on an Expedition, which resets Raider-level progress including learned blueprints while keeping account-level things like cosmetics. Expeditions are currently paused (the fifth, ending 29 September 2026, was the last departure, and Embark has said they will not return until early 2027), so for now a learned blueprint stays learned.
Copies you already know keep dropping. The official wiki is explicit about it: "Already-learned blueprints are marked with a ✓ and cannot be consumed." They still drop, but they are still worth money — every blueprint sells for 5,000 Coins, whatever its rarity.
The official ARC Raiders wiki — the community-driven wiki Embark supports, not a developer-published database — indexes 83 blueprints, and that is the table below. There is at least one more in the live game as of the Frozen Trail 2.0 update on 8 October 2026 — the Banjo blueprint, which Embark states is obtainable only by buying the Collector Set DLC and is therefore not a drop anyone can farm. The 83 are not a flat pool. Each one is gated by some combination of three things: which map it spawns on, which map condition has to be active, and which container type it sits in. A handful are not scavengable at all and only come from a named quest or a specific ARC kill.
That gating is the whole game. Farming "blueprints" in general is the slowest way to play it. Farming the one container type on the one map under the one condition that drops the blueprint you actually want is the fast way. The table below is the complete index — name, what it crafts, rarity, exactly where the blueprint drops, and the material cost of the first craft once you know it.
ARC Raiders - Blueprints
Get blueprints in 10 minutes
The container map — the single most useful rule
Blueprints are sorted by category into container types. Learn this and you stop opening the wrong furniture:
| Blueprint category | Container that holds it |
|---|---|
| Explosives | Industrial Containers |
| Weapons and Gun Parts | Raider Containers |
| Medical | Medical Containers |
| Augments | Security Containers, rarely Medical Containers |
| Utilities | Electrical Containers |
Two things people get backwards here. Explosives blueprints come out of Industrial Containers, not an "explosives container" — and Utilities come out of Electrical Containers. Read that pairing twice, because it is the single most commonly inverted fact in ARC Raiders crafting guides. The other one: Raider Containers hold the weapon and gun-part blueprints, but the Medical Bag is not one of them.
One documented exception to that mapping: the Tempest is a weapon but spawns in Residential Containers and First Wave Caches rather than Raider Containers. It is the only weapon in the table that does.
Mod blueprints — grips, stocks, muzzles, magazines — behave differently again and come almost entirely out of Residential Containers, with the tier III versions locked behind an active Major Map Condition.
Workstations, so the cost column makes sense
Learning a blueprint is not the same as being able to craft from it. Each recipe is tied to a workstation in Speranza at a specific level, and the "Craft cost" column below names both:
- Gunsmith — weapons and all weapon mods
- Gear Bench — augments
- Medical Lab — healing items
- Explosives Station — grenades, mines and traps
- Utility Station — gadgets, light sticks, deployables
- Refiner — gun parts and other refined materials
- Workbench — general crafting
Two quirks worth knowing before you read the table. Several grenades are not made at the Explosives Station: the Smoke Grenade and the Lure Grenade are Utility Station recipes, and the Tagging Grenade needs Utility Station 3. And for most multi-tier weapons the first craft is the expensive one — the Canto and the Vulcano both demand Gunsmith 3 to make at all, then only Gunsmith 1 to upgrade.
Every ARC Raiders blueprint — the complete index
All 83 blueprints the official wiki documents, with the drop conditions and the base craft. Rarity is the rarity of the item you craft. "All maps" means the blueprint is not map-locked; a named condition means the blueprint only appears while that condition is active.
Read the drop column as a strong prior, not a guarantee. The wiki attaches an explicit caveat to its own spawn data: the listed maps and containers are where each blueprint is commonly found, not a confirmed exhaustive list. Where a field is genuinely unpublished the row says so rather than filling the gap — and a row that is map-locked with no condition named means no condition requirement is documented, not that every condition is confirmed to work.
| Blueprint | Crafts | Rarity | Where the blueprint drops | Craft cost |
|---|---|---|---|---|
| Angled Grip II | Weapon mod — underbarrel | Uncommon | Residential Containers · all maps | Gunsmith 2 — 2x Mechanical Components + 3x Duct Tape |
| Angled Grip III | Weapon mod — underbarrel | Rare | Residential Containers · all maps · Electromagnetic Storm or Locked Gate or Night Raid condition | Gunsmith 3 — 2x Mod Components + 5x Duct Tape |
| Anvil | Hand Cannon, Heavy Ammo | Rare | Raider Containers · all maps | Gunsmith 1 — 5x Mechanical Components + 6x Simple Gun Parts |
| Aphelion | Battle Rifle, Energy Clip | Legendary | any container · Stella Montis | Gunsmith 3 — 3x Magnetic Accelerator + 3x Complex Gun Parts + 1x Matriarch Reactor |
| Barricade Kit | Deployable utility (Quick Use) | Uncommon | Electrical Containers · all maps | Utility Station 1 — 1x Mechanical Components |
| Bettina | Assault Rifle, Heavy Ammo | Epic | Raider Containers · all maps | Gunsmith 3 — 3x Advanced Mechanical Components + 3x Heavy Gun Parts + 3x Canister |
| Blaze Grenade | Grenade (Quick Use) | Rare | Industrial Containers · all maps | Explosives Station 3 — 1x Explosive Compound + 2x Oil |
| Blue Light Stick | Light stick (Quick Use) | Common | any container · all maps | Utility Station 2 — 3x Chemicals |
| Bobcat | SMG, Light Ammo | Epic | any container or First Wave Cache · Locked Gate or Hurricane condition | Gunsmith 3 — 1x Magnetic Accelerator + 3x Light Gun Parts + 2x Exodus Modules |
| Burletta | Pistol, Light Ammo | Uncommon | quest: Industrial Espionage | Gunsmith 1 — 3x Mechanical Components + 3x Simple Gun Parts |
| Canto | SMG, Medium Ammo | Rare | First Wave Cache · Hurricane condition | Gunsmith 3 — 2x Advanced Mechanical Components + 5x Magnet + 3x Medium Gun Parts |
| Combat Mk. 3 (Aggressive) | Combat Augment | Epic | Medical Containers / Security Containers · Stella Montis / The Blue Gate | Gear Bench 3 — 2x Advanced Electrical Components + 3x Processor |
| Combat Mk. 3 (Flanking) | Combat Augment | Epic | Medical Containers / Security Containers · Stella Montis / The Blue Gate | Gear Bench 3 — 2x Advanced Electrical Components + 3x Processor |
| Compensator II | Weapon mod — muzzle | Uncommon | Residential Containers · all maps | Gunsmith 2 — 2x Mechanical Components + 4x Wires |
| Compensator III | Weapon mod — muzzle | Rare | Residential Containers · Electromagnetic Storm or Locked Gate or Night Raid condition | Gunsmith 3 — 2x Mod Components + 8x Wires |
| Complex Gun Parts | Crafting material — gun parts | Epic | Security Containers · all maps | Refiner 3 — 2x Light Gun Parts + 2x Medium Gun Parts + 2x Heavy Gun Parts |
| Crash Mat | Fall-protection deployable (Quick Use) | Uncommon | any container · Riven Tides | Utility Station 1 — 1x Electrical Components + 1x Durable Cloth |
| Deadline | Mine (Quick Use) | Epic | any container · Stella Montis | Explosives Station 3 — 1x Comet Igniter + 3x Explosive Compound + 2x ARC Circuitry |
| Defibrillator | Healing item (Quick Use) | Rare | Medical Containers · all maps | Medical Lab 2 — 9x Plastic Parts + 1x Moss |
| Dolabra | Shotgun, Energy Clip | Legendary | ARC Assessor · Close Scrutiny condition | Gunsmith 3 — 3x Shredder Gyro + 3x Magnetic Accelerator + 2x Vaporizer Regulator |
| Equalizer | Special — beam rifle, Energy Clip | Legendary | Harvester core-activation containers · Harvester condition | Gunsmith 3 — 3x Magnetic Accelerator + 3x Complex Gun Parts + 1x Queen Reactor |
| Explosive Mine | Mine (Quick Use) | Rare | Industrial Containers · all maps | Explosives Station 3 — 1x Explosive Compound + 1x Sensors |
| Extended Barrel II | Weapon mod — muzzle | Rare | container not published · all maps | Gunsmith 2 — 3x Mechanical Components + 6x Wires |
| Extended Barrel III | Weapon mod — muzzle | Epic | Residential Containers · Electromagnetic Storm or Locked Gate or Night Raid condition | Gunsmith 3 — 2x Mod Components + 8x Wires |
| Extended Light Mag II | Weapon mod — light magazine | Uncommon | Residential Containers · all maps | Gunsmith 2 — 2x Mechanical Components + 3x Steel Spring |
| Extended Light Mag III | Weapon mod — light magazine | Rare | Residential Containers · Electromagnetic Storm or Locked Gate or Night Raid condition | Gunsmith 3 — 2x Mod Components + 5x Steel Spring |
| Extended Medium Mag II | Weapon mod — medium magazine | Uncommon | Residential Containers · all maps · Night Raid condition | Gunsmith 2 — 2x Mechanical Components + 3x Steel Spring |
| Extended Medium Mag III | Weapon mod — medium magazine | Rare | Residential Containers · Electromagnetic Storm or Locked Gate or Night Raid condition | Gunsmith 3 — 2x Mod Components + 5x Steel Spring |
| Extended Shotgun Mag II | Weapon mod — shotgun magazine | Uncommon | Residential Containers · all maps | Gunsmith 2 — 2x Mechanical Components + 3x Steel Spring |
| Extended Shotgun Mag III | Weapon mod — shotgun magazine | Rare | Residential Containers · Electromagnetic Storm or Locked Gate or Night Raid condition | Gunsmith 3 — 2x Mod Components + 5x Steel Spring |
| Fireworks Box | Utility (Quick Use) | Rare | any container · Cold Snap condition · quest: Test Case | Explosives Station 2 — 1x Explosive Compound + 3x Pop Trigger |
| Gas Mine | Trap (Quick Use) | Common | any container · Stella Montis | Explosives Station 1 — 4x Chemicals + 2x Rubber Parts |
| Green Light Stick | Light stick (Quick Use) | Common | any container · all maps | Utility Station 2 — 3x Chemicals |
| Heavy Gun Parts | Crafting material — gun parts | Rare | Raider Containers · all maps | Refiner 2 — 4x Simple Gun Parts |
| Hullcracker | Special — Grenade Launcher, Launcher Ammo | Epic | quest: The Major's Footlocker | Gunsmith 3 — 1x Magnetic Accelerator + 3x Heavy Gun Parts + 1x Exodus Modules |
| Il Toro | Shotgun, Shotgun Ammo | Uncommon | Raider Containers · all maps | Gunsmith 1 — 5x Mechanical Components + 6x Simple Gun Parts |
| Jolt Mine | Mine (Quick Use) | Rare | Industrial Containers · all maps | Explosives Station 2 — 1x Electrical Components + 1x Battery |
| Jupiter | Sniper Rifle, Energy Clip | Legendary | Harvester core-activation containers · Harvester condition | Gunsmith 3 — 3x Magnetic Accelerator + 3x Complex Gun Parts + 1x Queen Reactor |
| Light Gun Parts | Crafting material — gun parts | Rare | Raider Containers · all maps | Refiner 2 — 4x Simple Gun Parts |
| Lightweight Stock | Weapon mod — stock | Epic | Residential Containers · Electromagnetic Storm or Locked Gate or Night Raid condition | Gunsmith 3 — 2x Mod Components + 5x Duct Tape |
| Looting Mk. 3 (Safekeeper) | Looting Augment | Epic | Medical Containers / Security Containers / Metal Crate · all maps | Gear Bench 3 — 2x Advanced Electrical Components + 3x Processor |
| Looting Mk. 3 (Survivor) | Looting Augment | Epic | Medical Containers / Security Containers / Metal Crate · all maps | Gear Bench 3 — 2x Advanced Electrical Components + 3x Processor |
| Lure Grenade | Grenade (Quick Use) | Uncommon | quest: Greasing Her Palms | Utility Station 2 — 1x Speaker Component + 1x Electrical Components |
| Medium Gun Parts | Crafting material — gun parts | Rare | Raider Containers · all maps | Refiner 2 — 4x Simple Gun Parts |
| Muzzle Brake II | Weapon mod — muzzle | Uncommon | Residential Containers · all maps | Gunsmith 2 — 2x Mechanical Components + 4x Wires |
| Muzzle Brake III | Weapon mod — muzzle | Rare | Residential Containers · Electromagnetic Storm or Locked Gate or Night Raid condition | Gunsmith 3 — 2x Mod Components + 8x Wires |
| Osprey | Sniper Rifle, Medium Ammo | Rare | Raider Containers · all maps | Gunsmith 2 — 2x Advanced Mechanical Components + 3x Medium Gun Parts + 7x Wires |
| Padded Stock | Weapon mod — stock | Epic | Residential Containers · Electromagnetic Storm or Locked Gate or Night Raid or Hidden Bunker condition | Gunsmith 3 — 2x Mod Components + 5x Duct Tape |
| Powered Descender | Gadget (Quick Use) | Epic | any container · Riven Tides | Utility Station 3 — 1x Power Rod + 1x Turbine Compressor |
| Pulse Mine | Trap (Quick Use) | Uncommon | any container · Stella Montis | Explosives Station 1 — 1x Crude Explosives + 1x Wires |
| Rascal | Special — Grenade Launcher, Launcher Ammo | Rare | Raider Containers · all maps | Gunsmith 2 — 2x Advanced Mechanical Components + 3x Heavy Gun Parts + 5x Canister |
| Red Light Stick | Light stick (Quick Use) | Common | any container · all maps | Utility Station 2 — 3x Chemicals |
| Remote Raider Flare | Utility (Quick Use) | Common | Electrical Containers · all maps | Utility Station 1 — 2x Chemicals + 4x Rubber Parts |
| Seeker Grenade | Grenade (Quick Use) | Uncommon | any container · Stella Montis | Explosives Station 1 — 1x Crude Explosives + 2x ARC Alloy |
| Shotgun Choke II | Weapon mod — shotgun muzzle | Uncommon | Residential Containers · all maps | Gunsmith 2 — 2x Mechanical Components + 4x Wires |
| Shotgun Choke III | Weapon mod — shotgun muzzle | Rare | Residential Containers · Electromagnetic Storm or Locked Gate or Night Raid condition | Gunsmith 3 — 2x Mod Components + 8x Wires |
| Shotgun Silencer | Weapon mod — shotgun muzzle | Epic | Residential Containers · Electromagnetic Storm or Locked Gate or Night Raid or Hidden Bunker condition | Gunsmith 3 — 2x Mod Components + 8x Wires |
| Showstopper | Grenade (Quick Use) | Rare | Industrial Containers · all maps | Explosives Station 3 — 1x Electrical Components + 1x Hornet Driver + 1x Voltage Converter |
| Silencer I | Weapon mod — muzzle | Uncommon | Residential Containers · all maps | Gunsmith 2 — 2x Mechanical Components + 4x Wires |
| Silencer II | Weapon mod — muzzle | Rare | Residential Containers · all maps | Gunsmith 3 — 2x Mod Components + 8x Wires |
| Smoke Grenade | Grenade (Quick Use) | Rare | Residential Containers · all maps | Utility Station 2 — 14x Chemicals + 1x Canister |
| Snap Hook | Gadget (Quick Use) — grapple | Legendary | any container · Electromagnetic Storm condition | Utility Station 3 — 2x Power Rod + 3x Rope + 1x Exodus Modules |
| Stable Stock II | Weapon mod — stock | Uncommon | Residential Containers · all maps | Gunsmith 2 — 2x Mechanical Components + 3x Duct Tape |
| Stable Stock III | Weapon mod — stock | Rare | Residential Containers · Electromagnetic Storm or Locked Gate or Night Raid condition | Gunsmith 3 — 2x Mod Components + 5x Duct Tape |
| Surge Coil | Deployable utility (Quick Use) | Rare | container not published · Electromagnetic Storm condition | Explosives Station 3 — 1x Electrical Components + 1x Sensors + 1x Hornet Driver |
| Tactical Mk. 3 (Defensive) | Tactical Augment | Epic | Medical Containers / Security Containers / ARC Surveyor · Stella Montis / The Blue Gate | Gear Bench 3 — 2x Advanced Electrical Components + 3x Processor |
| Tactical Mk. 3 (Healing) | Tactical Augment | Epic | Medical Containers / Security Containers · Stella Montis / The Blue Gate | Gear Bench 3 — 2x Advanced Electrical Components + 3x Processor |
| Tactical Mk. 3 (Revival) | Tactical Augment | Epic | Medical Containers / Security Containers · Stella Montis / The Blue Gate | Gear Bench 3 — 2x Advanced Electrical Components + 3x Processor |
| Tactical Mk. 3 (Smoke) | Tactical Augment | Epic | container not published | Gear Bench 3 — 2x Advanced Electrical Components + 3x Processor |
| Tagging Grenade | Grenade (Quick Use) | Rare | Electrical Containers · all maps | Utility Station 3 — 1x Electrical Components + 1x Sensors |
| Tempest | Assault Rifle, Medium Ammo | Epic | Residential Containers or First Wave Cache · Night Raid or Hurricane condition | Gunsmith 3 — 1x Magnetic Accelerator + 3x Medium Gun Parts + 2x Exodus Modules |
| Torrente | LMG, Medium Ammo | Rare | Raider Containers · all maps | Gunsmith 2 — 2x Advanced Mechanical Components + 3x Medium Gun Parts + 6x Steel Spring |
| Trailblazer | Grenade (Quick Use) | Rare | any container · Stella Montis | Explosives Station 3 — 1x Synthesized Fuel + 2x Crude Explosives + 1x Firefly Burner |
| Trigger 'Nade | Grenade (Quick Use) | Rare | any container · all maps · quest: Sparks Fly | Explosives Station 2 — 2x Crude Explosives + 1x Processor |
| Venator | Pistol, Medium Ammo | Rare | Raider Containers · all maps | Gunsmith 2 — 2x Advanced Mechanical Components + 3x Medium Gun Parts + 5x Magnet |
| Vertical Grip II | Weapon mod — underbarrel | Uncommon | Residential Containers · all maps | Gunsmith 2 — 2x Mechanical Components + 3x Duct Tape |
| Vertical Grip III | Weapon mod — underbarrel | Rare | Residential Containers · Electromagnetic Storm or Locked Gate or Night Raid condition | Gunsmith 3 — 2x Mod Components + 5x Duct Tape |
| Vita Shot | Healing item (Quick Use) | Rare | Medical Containers / ARC Surveyor · all maps | Medical Lab 3 — 2x Antiseptic + 1x Syringe |
| Vita Spray | Healing item (Quick Use) | Epic | Medical Containers / ARC Surveyor · all maps · quest: Worth Your Salt | Medical Lab 3 — 3x Antiseptic + 1x Canister + 1x Tick Pod |
| Vulcano | Shotgun, Shotgun Ammo | Epic | any container or First Wave Cache · Hidden Bunker or Hurricane condition | Gunsmith 3 — 1x Magnetic Accelerator + 3x Heavy Gun Parts + 1x Exodus Modules |
| White Flag | Deployable utility (Quick Use) | Common | any container · Riven Tides | Medical Lab 1 — 10x Fabric + 3x Plastic Parts |
| Wolfpack | Grenade (Quick Use) | Epic | Residential Containers · Night Raid condition | Explosives Station 3 — 1x Explosive Compound + 2x ARC Motion Core + 1x Rocketeer Driver |
| Yellow Light Stick | Light stick (Quick Use) | Common | any container · all maps | Utility Station 2 — 3x Chemicals |
What that table adds up to
| Rarity of the crafted item | Blueprints |
|---|---|
| Legendary | 5 |
| Epic | 22 |
| Rare | 32 |
| Uncommon | 17 |
| Common | 7 |
Rare is the fat part of the curve, and that is where the useful stuff lives — the Anvil, the Canto, most of the mid-tier weapon mods and all three gun-part refining lines. Only five blueprints produce Legendary gear — Aphelion, Dolabra, Equalizer, Jupiter and Snap Hook — and all five are condition-, map- or kill-gated. None is a quest reward. Aphelion is the odd one out: it is map-locked to Stella Montis and drops from any container there under any condition.
How blueprints actually drop — the farming mechanics
Four mechanics do nearly all the work, and none of them is "open more boxes."
Two different gates, and people confuse them. Some rows are map-locked and some are condition-locked, and the fix is different for each.
Map-locked rows need you to queue a particular map — Stella Montis, The Blue Gate or Riven Tides — and will drop under any condition once you are there. Condition-locked rows need a specific condition to be live on whatever map you are on. Eight gating states do the work in this table — five Major conditions (Electromagnetic Storm, Locked Gate, Night Raid, Hidden Bunker, Hurricane), one Minor condition (Harvester), one ARC Operation (Close Scrutiny) and one that is currently disabled (Cold Snap). Electromagnetic Storm and Locked Gate carry the most weight by volume, because between them they gate essentially every tier III weapon mod.
If the required condition is not live, the blueprint is not in the loot pool at all, no matter how many containers you open. Check the condition before you queue. If you want the Wolfpack, you want Night Raid; if you want the Vulcano, you want Hurricane or a Hidden Bunker.
Rarity interacts with this too: rare and epic blueprints spawn more often while an x2 Major Map Condition is active. That is a frequency bonus on the existing pool, not a second drop source.
First Wave Caches are the Hurricane payoff. They only exist while the Hurricane condition is active, and they are the richest weapon-blueprint source anyone has documented — community reporting puts it at roughly 60% containing at least one weapon blueprint, which is a player-gathered figure rather than an official drop rate. Four rows in the table name a First Wave Cache as a source — the Bobcat, the Canto, the Tempest and the Vulcano — and the Canto names it as its only source. Several entries in the table list a First Wave Cache as an alternative to the normal container, which means during a Hurricane you have two parallel routes to the same blueprint.
Some blueprints are not scavengable at all. Read the drop column carefully. A handful come from a named quest reward rather than a container, and two — the Equalizer and the Jupiter, both Legendary — come out of the Harvester, which is not a kill at all. Per the wiki's Harvester page, during the Harvester map condition you collect three fusion cores, insert them into the central pillar in quick succession, then destroy the twelve yellow targets that appear; containers then open in the centre of the Harvester holding one to three Equalizer or Jupiter blueprints. The Queen that guards the structure does not have to die for any of that. The Dolabra is listed against the ARC Assessor under Close Scrutiny — and that is a breach-and-search, not a kill: you open the Assessor up and loot it rather than farming it for a death drop. No amount of container looting will produce those; you have to do the specific thing.
Looting is not the only route. Most of this table can also be unlocked without a raid at all. Of the 83 rows, 66 are marked trial-eligible in the official data, meaning the blueprint can come as a Trial reward; 7 are explicitly not, and 8 are unconfirmed either way. The last two are special cases in the trials column itself — the Smoke Grenade is logged as "Any" there, and the Snap Hook as a Trophy reward only. Projects are a further route for some entries, and ARC Surveyors can drop blueprints on death. Trials are still completed during raids, and their threshold rewards pay out from a pool rather than letting you pick a specific blueprint — but they are a genuine second route to a blueprint you cannot currently scavenge.
If you want the condensed version of the route planning — which map, which condition, which container, in what order — our dedicated guide on how to get blueprints fast in ARC Raiders walks the loop rather than the index.
If you would rather not spend a week waiting for the right condition to cycle, we run the raids for you — targeted ARC Raiders Frozen Trail runs farm the blueprints and materials you name, on the condition that actually drops them.
Which blueprints are worth learning first
The index is complete, but completeness is not a priority order. Three rules from the table:
Learn the gun-part refining lines before the guns. Light, Medium and Heavy Gun Parts are the three Refiner blueprints, and almost every weapon in the table is priced in their output. Simple Gun Parts are not a blueprint at all — they are a scavenged input you feed into those three recipes. The Medium Gun Parts blueprint location is the one that unblocks the most of the mid-tier weapon list at once. Do not try to farm the refining line in reverse: 4x Simple Gun Parts refine into 1x Light, Medium or Heavy Gun Parts at Refiner 2, and recycling that refined part returns only 2x Simple Gun Parts, so craft-then-recycle is a net loss of two. Refine only what you are about to spend.
Take the cheap Rare weapons over the expensive Epics. The Anvil blueprint is a Gunsmith 1 craft off Mechanical Components and Simple Gun Parts, which is the lowest station requirement of any weapon in the table. The Uncommon Burletta and Il Toro also craft at Gunsmith 1, and the Burletta is strictly cheaper in materials, so take the Anvil for the better gun rather than for the lower bill. Compare that to the Vulcano, which needs Gunsmith 3 plus Exodus Modules before it makes a single shotgun.
Utility beats damage early. The Snap Hook blueprint is Legendary and gated behind Electromagnetic Storm, so it is not cheap — we rank it high anyway because movement and extraction decide more raids than a marginal damage upgrade, and nothing else in the table does what it does. Light sticks, by contrast, are nearly free and worth taking immediately.
For the full ranked argument, including what to skip entirely, see the best ARC Raiders blueprints to unlock first.
ARC Raiders - Materials
Get materials in 10 minutes
When a blueprint will not drop
The usual cause is one of four things, in descending order of how often it is the answer: the map condition the blueprint needs is not active; you are opening the wrong container category (see the container map above — Explosives are in Industrial Containers and Utilities are in Electrical Containers, not the other way round); the blueprint is quest-locked and not in the loot pool at all; or you are looking at a copy you already learned, which is flagged with a tick and cannot be consumed again. Learning a blueprint does not remove it from the loot pool, so duplicates are normal and are worth 5,000 Coins each.
Note also that the official wiki attaches an explicit caveat to its own spawn data: the listed maps and containers are where each blueprint is commonly found, not a confirmed exhaustive list. Treat the drop column as a strong prior, not a guarantee. Our blueprints not dropping troubleshooting guide covers the diagnostic order.
What the official sources do not settle
Five gaps and contradictions we are not papering over, because the honest version is more useful than a complete-looking table:
The Tactical Mk. 3 (Smoke) drop source is simply not published — the official wiki leaves its map, condition and container fields blank. The same is true for the container holding the Extended Barrel II and the Surge Coil. Those rows read "container not published" above and that is the real state of the data, not an omission on our part.
The Dolabra is the one uncorroborated entry. The wiki's blueprint index attributes it to the ARC Assessor under the Close Scrutiny condition, while the Dolabra's own item page names no drop source at all and states that no current quest rewards or grants it. That is an omission on the item page rather than a flat contradiction, so we have reported the index attribution in the table as the more specific claim while flagging that nothing corroborates it. Our Dolabra blueprint location post tracks it.
Six tier III weapon mods are published with the identical recipe of 2x Mod Components and 8x Wires at Gunsmith 3 — Compensator III, Extended Barrel III, Muzzle Brake III, Shotgun Choke III, Shotgun Silencer and Silencer II — yet two of those six (Extended Barrel III and Shotgun Silencer) are Epic while the other four are Rare. The recipe is consistent; the rarity split across an identical recipe is the oddity. We cannot tell from published data whether that is intentional or a wiki transcription slip, so we have left all six as published. And the White Flag is listed as a Medical Lab 1 craft, which is an odd station for a deployable utility item; we have reported it as published rather than quietly moving it to the Utility Station.
The Hullcracker is a documented conflict between two wiki pages rather than a gap. The blueprint index gives it a quest route, while its own blueprint page records a purchase route from Shani added in update 1.46.0. We have reported the quest route in the table, and we are deliberately not quoting the trader price, because the listing is still denominated in Cred — a currency that has since been retired — so whether Shani still stocks it after Frozen Trail 2.0 needs confirming in-game.
One timing caveat the table cannot express: the Cold Snap condition is currently listed as disabled. That makes the Cold Snap route to the Fireworks Box blueprint unavailable right now, and the Test Case quest the only live path to it. We have left the row as published rather than deleting a route that will presumably return.
The 83 rows above are every blueprint the official wiki documents on its Blueprints index, and that page excludes traveling tinkerer skill crafts by its own note. It also has not yet absorbed the Banjo blueprint, which arcraiders.com confirms is exclusive to the Collector Set DLC — so the honest count is 83 farmable plus one you can only buy. Whether any of the other Frozen Trail additions are blueprint-gated is not stated anywhere official, and we are not going to guess at it.
Finally, note that arcraiders.wiki is the community-driven wiki Embark supports rather than a developer-published database, so its index is the best available catalogue rather than a first-party one. If you are looking for a recipe you unlocked through a skill rather than a lootable blueprint, it is outside the scope of this list by design.
FAQ
How many blueprints are in ARC Raiders? 83 are documented on the official wiki's Blueprints index, excluding traveling tinkerer skill crafts. They break down as 5 Legendary, 22 Epic, 32 Rare, 17 Uncommon and 7 Common by the rarity of the item they craft.
Are blueprints consumed when you use them? Yes. You "Learn and Consume" a blueprint in Speranza and the item is destroyed, unlocking the recipe for that Raider. You cannot consume the same blueprint twice. It is not an account-level unlock, though: departing on an Expedition resets learned blueprints along with the rest of Raider-level progress. Expeditions are paused until early 2027, so in practice a learned blueprint currently stays learned.
What do duplicate blueprints sell for? 5,000 Coins, regardless of rarity. A duplicate Common blueprint is worth exactly as much as a duplicate Legendary one, which makes any already-known blueprint a reliable payday rather than dead weight.
Which container holds explosives blueprints? Industrial Containers. The pairing is Explosives in Industrial, Weapons and Gun Parts in Raider, Medical in Medical, Augments in Security with rare Medical spawns, and Utilities in Electrical Containers. Mod blueprints sit mostly in Residential Containers.
Do I need a specific map condition to find a blueprint? For a large share of them, yes. Eight conditions gate rows in this table — Electromagnetic Storm, Locked Gate, Night Raid, Hidden Bunker, Hurricane, Close Scrutiny, Harvester and Cold Snap — and a condition-locked blueprint is absent from the loot pool entirely while its condition is inactive. Separately, some blueprints are map-locked rather than condition-locked (Stella Montis, The Blue Gate, Riven Tides); those drop under any condition once you are on the right map. The drop column above names whichever gate applies per row.
What is a First Wave Cache? A container type that only spawns while the Hurricane condition is active, and the richest documented source of weapon blueprints — community reporting puts it near 60% containing at least one, not an official figure. The Bobcat, Canto, Tempest and Vulcano all list it as a source, and for the Canto it is the only one. Several blueprints list it as an alternative to their normal container, so a Hurricane gives you two routes to the same unlock.
Can every blueprint be found by looting? No. A handful come from quests rather than containers, and two — the Equalizer and the Jupiter — come from the Harvester core-activation sequence rather than a container you can simply open. Those rows say so explicitly in the drop column, and no amount of container farming will produce them. Conversely, 66 of the 83 are also obtainable as Trial rewards, so looting is not the only route either.
Which blueprint should I learn first? A gun-part refining line, usually Medium Gun Parts, because almost every weapon recipe is priced in gun parts. After that the Anvil, which is the cheapest Rare weapon to craft at Gunsmith 1. It is not the cheapest weapon outright — the Uncommon Burletta is, at 3x Mechanical Components and 3x Simple Gun Parts against the Anvil's 5 and 6 — but the Anvil is the better gun for the same station.
Get there faster
If you want specific blueprints without waiting for the right map condition to cycle:
>
- ARC Raiders Frozen Trail Runs — targeted raids for the blueprints and materials you name
- ARC Raiders Frozen Trail Boss Kill — boss work for the Frozen Trail content gating your progress
- ARC Raiders Gadget Unlock — utility and gadget unlocks handled on your account