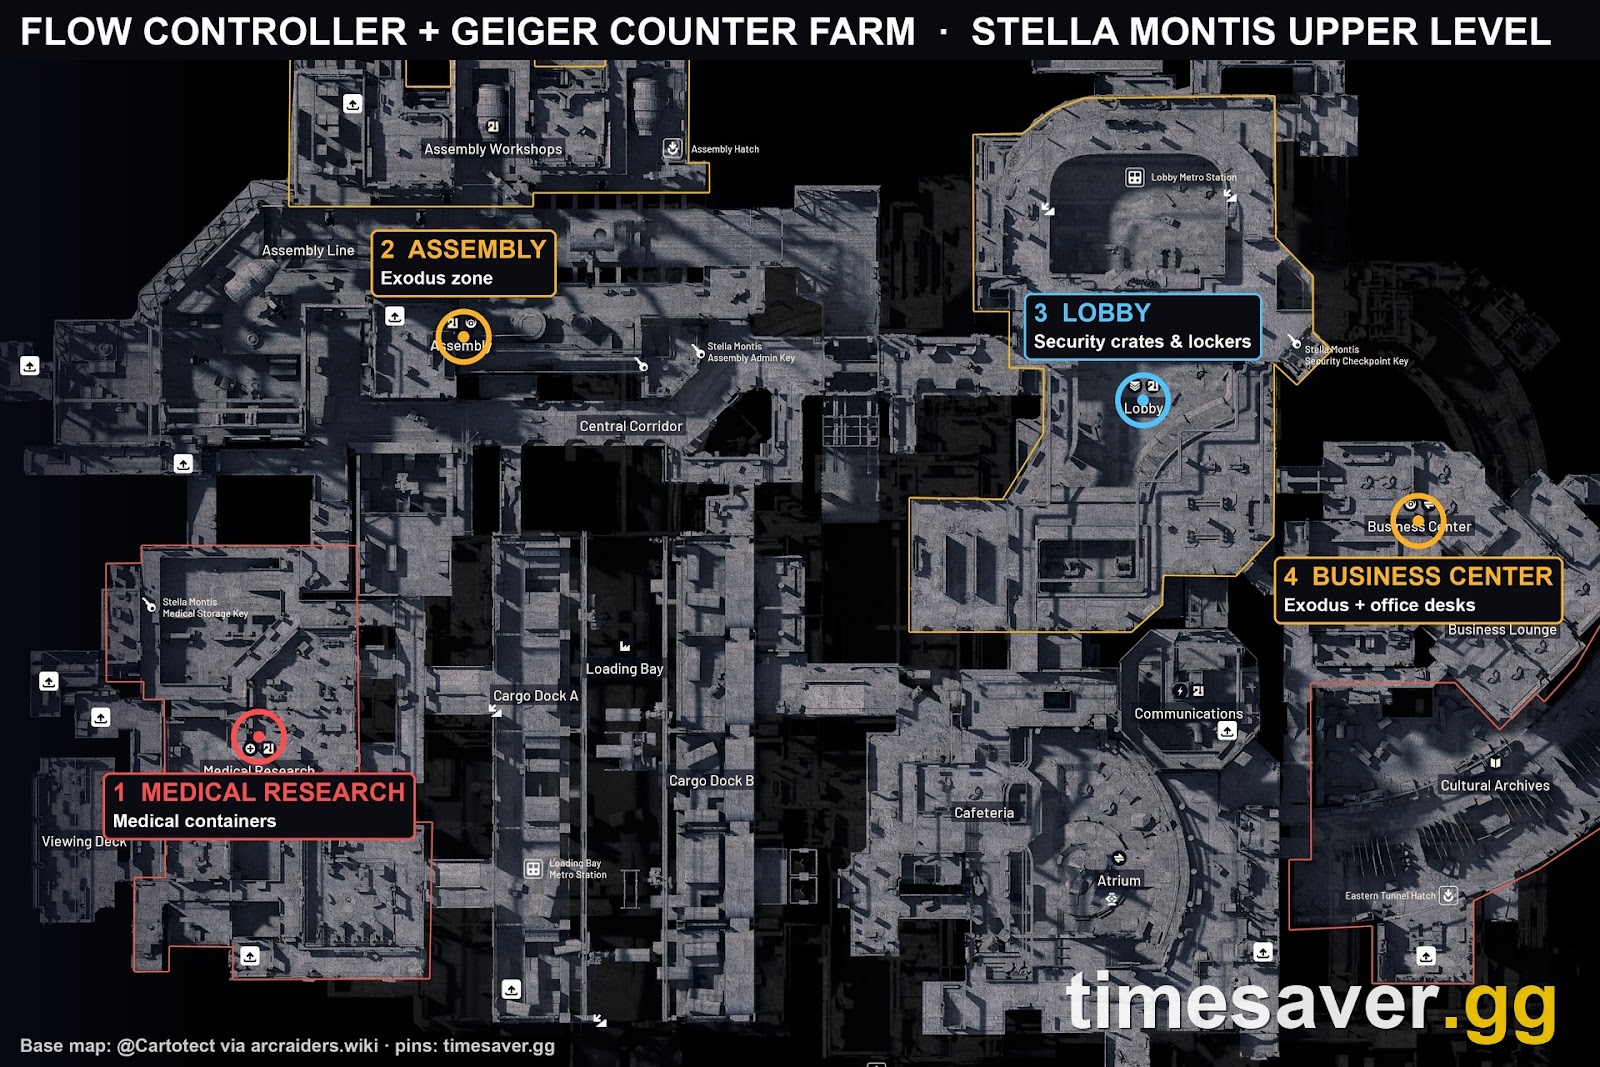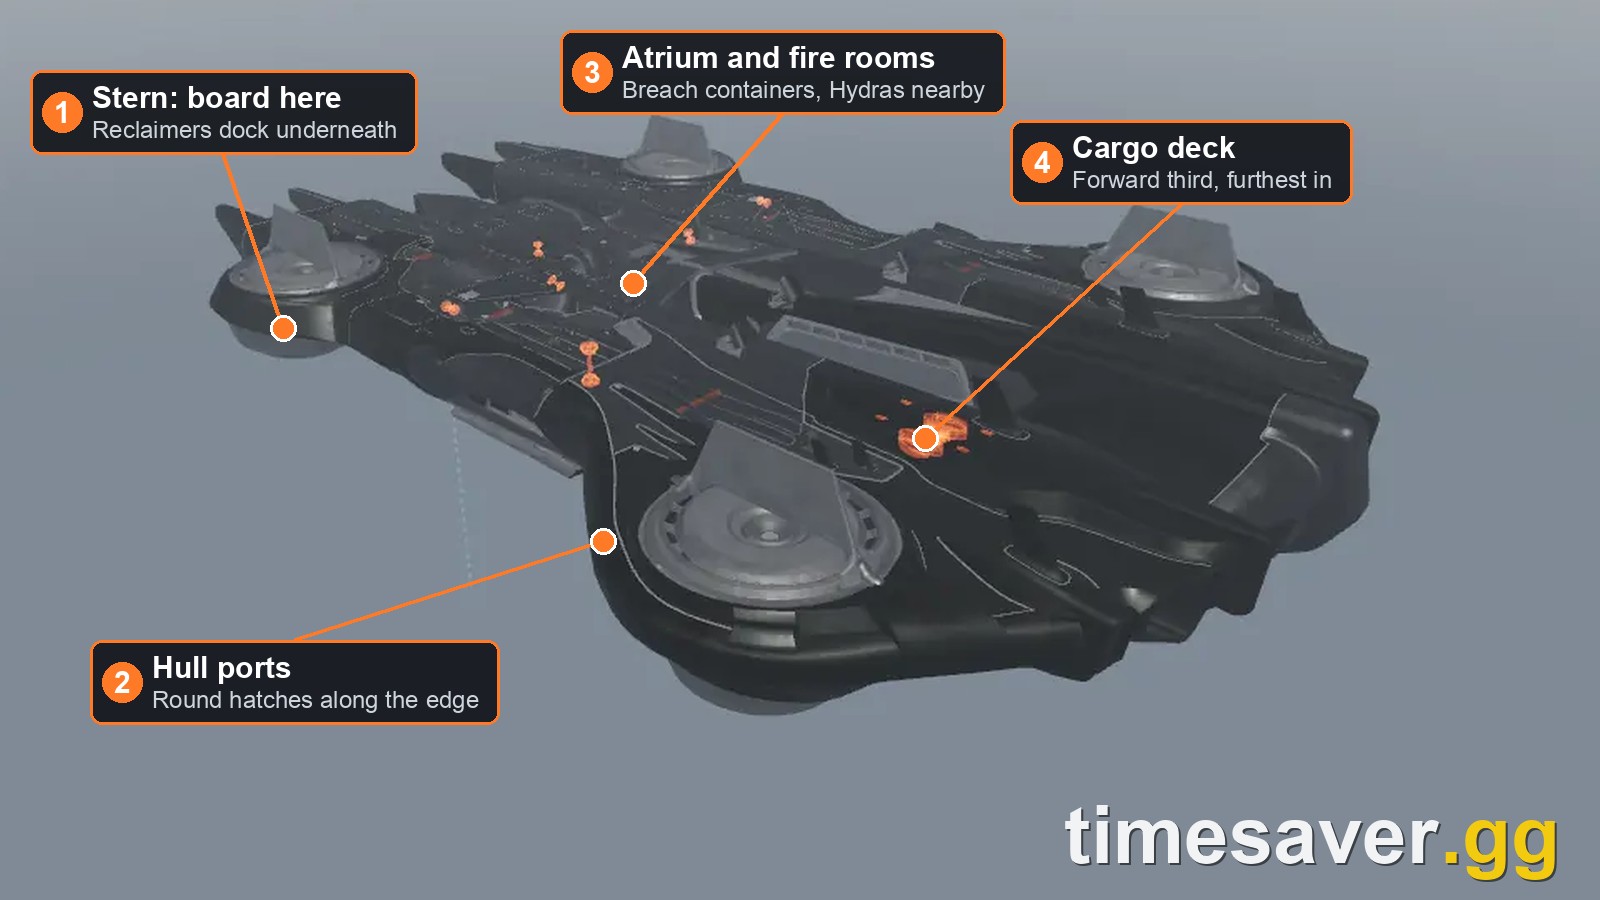
How hard is the Emperor dungeon, and what are you in for before you spend a conduit on it? That's one of the busiest questions on r/ArcRaiders this week, next to a long thread about what to watch for as the second squad into the Emperor's room. The Fallen Emperor is ARC Raiders' first dungeon, and it's still the least-understood thing in Frozen Trail. This guide covers what it is, what it costs to get in, how the inside works, what it drops after Update 2.3.0, and whether it's worth your conduit compared with the Frigate.
This full loadout costs $7.87 on Timesaver and is delivered within 2 hours — see all ARC Raiders prices.
Skip the grind in ARC Raiders
| Item | Price | Delivery | Buy |
|---|---|---|---|
| Remote Raider Flare | $0.09 | 30 min | Buy now |
| Blue Gate Raid | $3.89 | 2 hours | Buy now |
| Buried City Raid | $3.89 | 2 hours | Buy now |
Quick answer (TL;DR): The Fallen Emperor is a dungeon (a key room) inside the crashed Emperor walker on Pendola Pass, added in Frozen Trail 2.0. You open it with a Legendary Emperor Gateway Conduit, crafted at Workbench 1 from its blueprint plus one each of the ARC Conductive, Insulated and Plated Couplers. Inside is a chain of randomly ordered puzzle rooms guarded by Hydras (1,050 HP, and inside the Emperor they never respawn once destroyed). It's one of only two sources of Amplification Modules Mk. I to V, the other being the Frigate, and the only listed source of the Emperor Modulator that Gunsmith 4 needs. Since Update 2.3.0, containers near the entrance roll lower-tier loot and the good stuff sits deeper in. Run it if you need a Modulator or want modules without fighting a respawning Hydra. Skip it if you're solo and can't afford to lose the conduit.
Did this answer your question?
Your feedback helps improve this guide.
What is the Fallen Emperor in ARC Raiders?
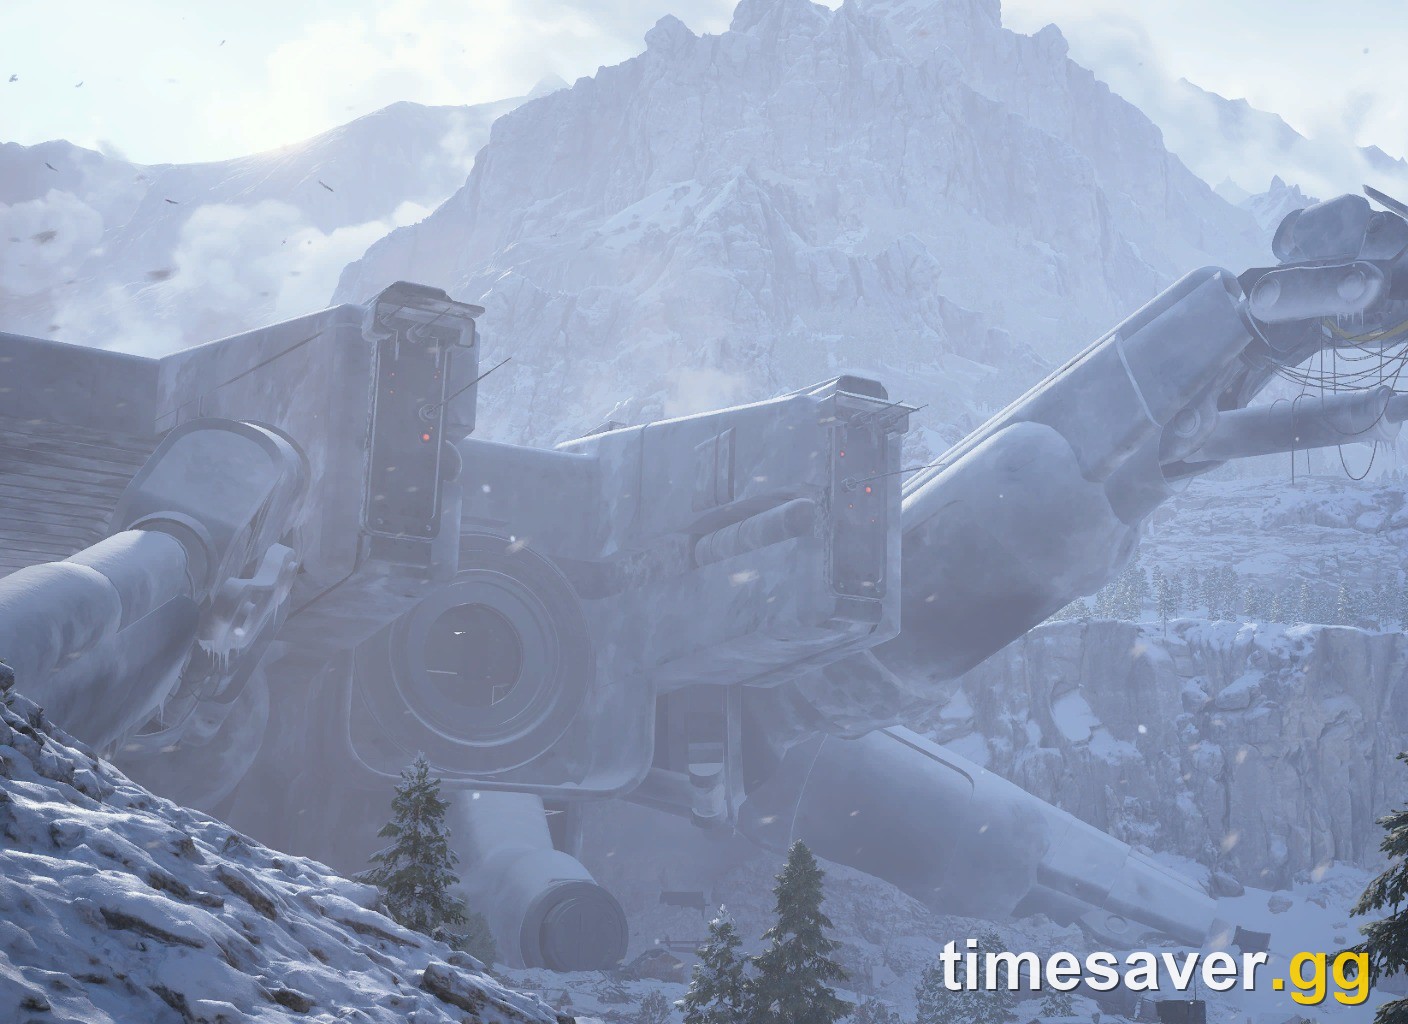
The Emperors are ARC's giant legged walkers, and one of them has fallen across the middle of Pendola Pass. The ARC Raiders Wiki (community-run) describes it as "a dungeon/key room within the Pendola Pass map", accessed "mainly via the use of an Emperor Gateway Conduit", containing "a series of randomly alternating puzzle rooms that contain scavengeable parts."
So it isn't a separate mode or map condition. You queue a normal Pendola Pass raid, walk to the Emperor, and open its door with a key. That's the big difference from the Frigate, which is a map condition you board in the air. If you're used to locked rooms on Buried City or Spaceport, think of the Emperor as the biggest locked room in the game, with an obstacle course between the door and the loot.
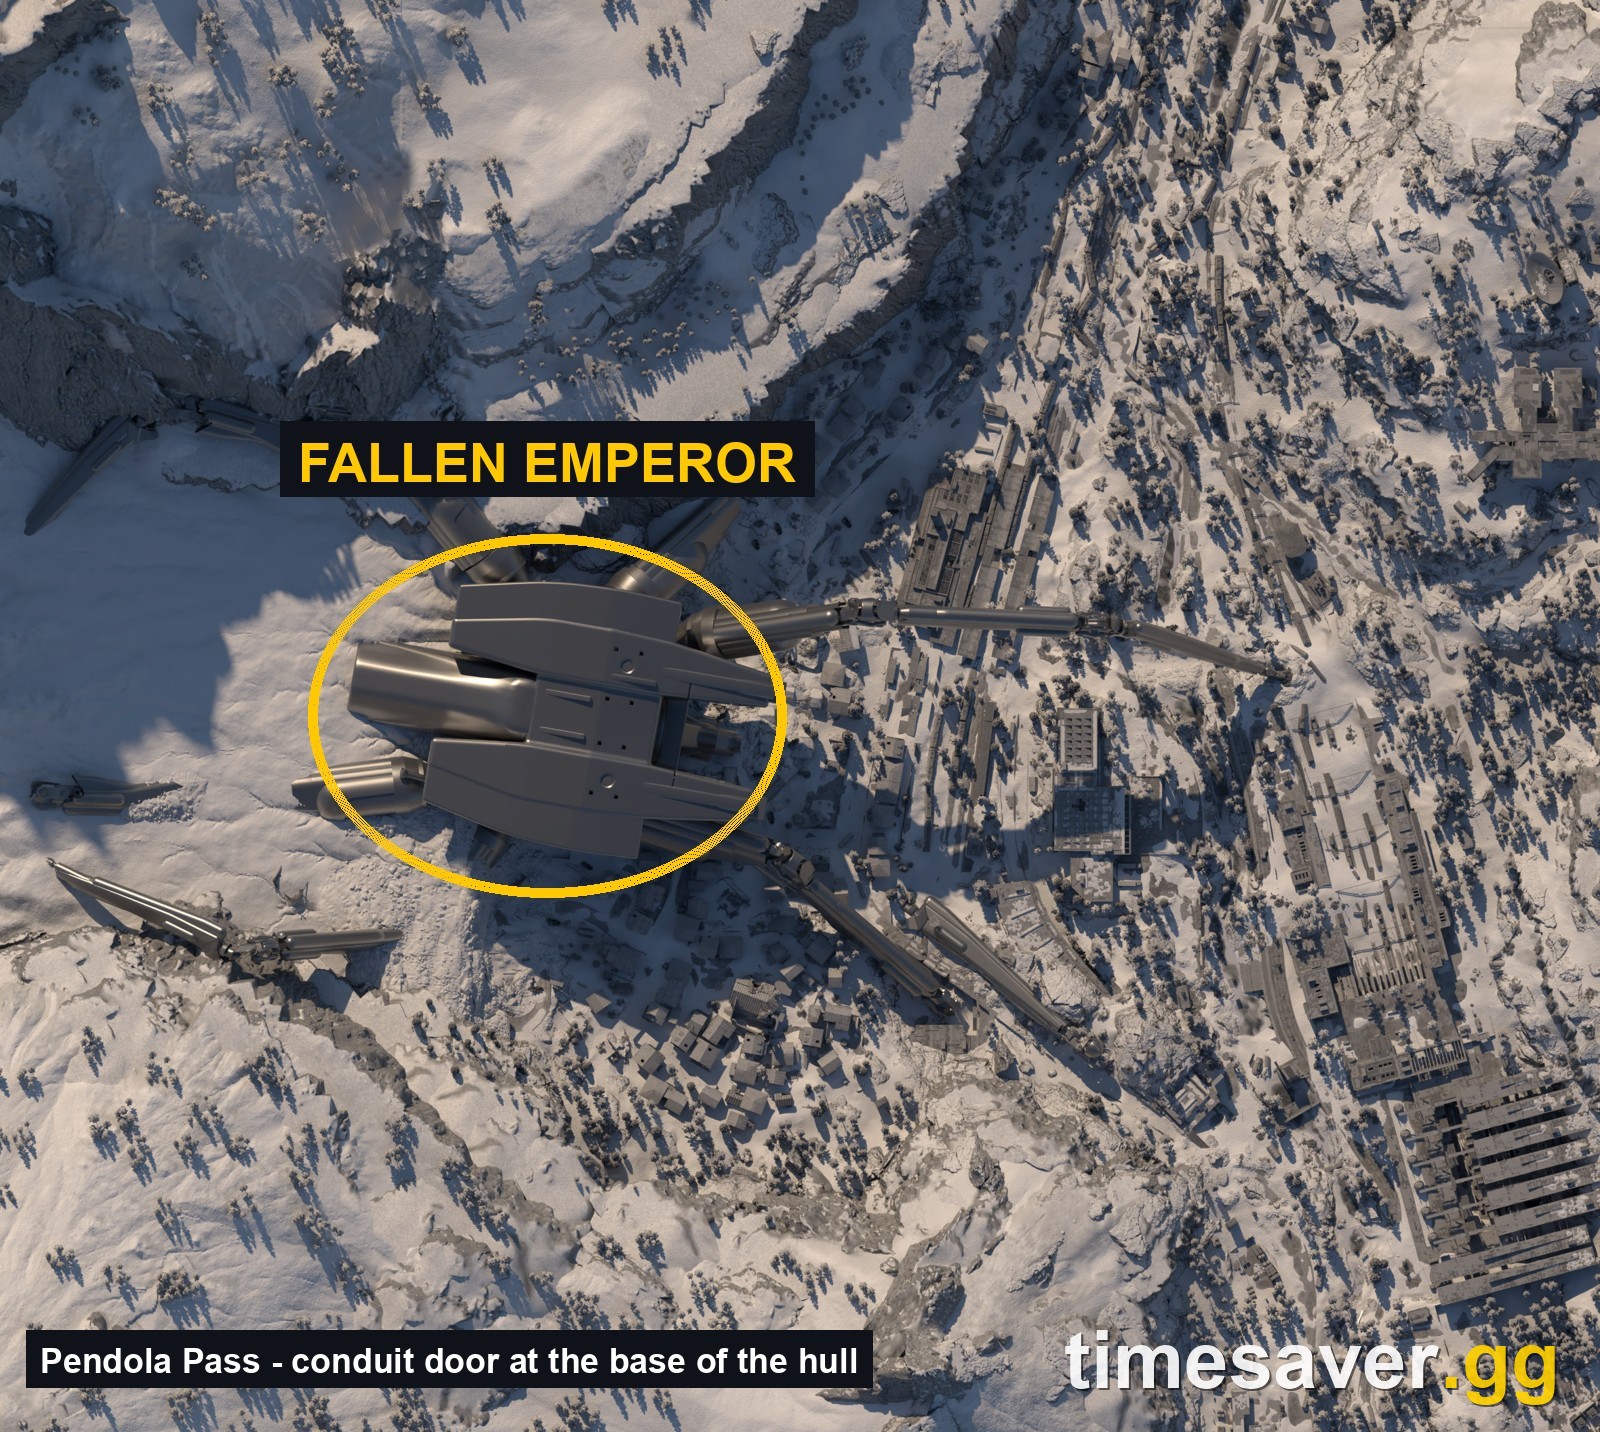
The wreck sprawls across the centre-west of the map, with its legs reaching toward the town and the station to the east. You can't miss it from anywhere on Pendola Pass. For the rest of the map, extracts and flash freezes, see our Pendola Pass map guide.
What do you need to get into the Emperor?
One key, but that key is the slow part. Here's the full cost, from the wiki's Emperor Gateway Conduit and blueprint entries:
| Piece | Rarity | Where it comes from | Notes |
|---|---|---|---|
| Emperor Gateway Conduit | Legendary key | Crafted at Workbench 1, or the last reward of the Frozen Trail Premium Reward Pass | Weight 0.5, stack 1, sells for 1,000 |
| Emperor Gateway Conduit Blueprint | Blueprint | Harvester Payloads, ARC Surveyor | Sells for 5,000; can't be researched |
| ARC Conductive Coupler | Epic | Harvester Payloads during Redirection | 1 per conduit |
| ARC Insulated Coupler | Epic | Harvester Payloads during Redirection | 1 per conduit |
| ARC Plated Coupler | Epic | Harvester Payloads during Redirection | 1 per conduit |
The couplers and blueprint come out of the payloads you call down with Emperor Beacons during the Redirection condition. Our Emperor Beacon farm loop covers that route step by step, so we won't repeat it here.
The catch is the blueprint. Update 2.3.0's notes say Embark "Reduced the drop chance of the Emperor Key blueprint from Redirection pods, and added a small chance to find ARC parts and high-tier ARC loot to compensate" (Live Update 2.3.0, Steam). Couplers stay fairly common. The blueprint is now the bottleneck, so take down any Surveyor you pass, since the wiki lists it as the other source.
Two rules catch a lot of players:
- You can't craft the conduit mid-raid. Extract, learn the blueprint, craft at Workbench 1, then queue a fresh Pendola Pass run.
- Each conduit needs one of each coupler. Three Conductives don't make a key. If you're carrying spares, keep one of each type in your safe pocket so a death still leaves you a full set.
There's also a quest hook. Shani's Belly Of The Beast quest asks you to enter the Emperor, find its power source, find where the Harvester Payloads end up, search 5 containers inside and grab "a unique piece of Emperor loot." The wiki lists the reward as a Snap Hook, a Pendola Pass Observatory Key, 3 Shield Rechargers, 3 Sterilized Bandages and 10,000 XP. Do it on your first entry so the conduit pays twice.
How does the inside of the Emperor work?
Embark hasn't published a room list, so the layout below comes from community guides. Arc Raiders Hub's dungeon guide has the most complete breakdown, built from launch-day runs and creator footage:
- About a dozen trials, built from giant rings and shafts you climb through.
- Fixed start and finish. The ground floor with its elevator always comes first and the loot hangar always comes last. The rooms in between change order every run, and Arc Raiders Hub found six route layouts in the game files. Learn the rooms, not a route.
- Electrified boxes and containers. Shoot one and it discharges, then it's safe to touch for a few seconds. You use this all the way up.
- Room types include a gas room with closing walls, a laser room, a maze where Pops chase you through gaps at floor level, platform climbs over electrified containers, a chasm you drop down one level at a time, and a container hangar ridden by Hydras.
- A broadcast at 10 minutes left says "the safe window is closing." The hangar is where most of the loot is, so leave time for it.
- No second chances solo. Go down without a teammate to revive you and the run is over.
Embark's own patch notes back up the general shape. They mention "moving platforms inside the Emperor" (2.2.0), "the compaction killboxes inside the Emperor" (2.2.0) and "killboxes at the top of the compactor" (2.3.0), plus a 2.1.0 fix for "unintended interactions between throwables and certain doors on the Emperor." Expect platforming and crushers, not just gunfights.
How do you deal with the Hydras inside?
The Hydra is the reason most first runs end early. Per the wiki, it has 1,050 health, is heavily armoured, fires in three directions, and appears only on the Frigate and inside the Fallen Emperor. Destroying it gives +500 XP.
What matters for the Emperor:
- Inside the Emperor, it never respawns once destroyed. On the Frigate it keeps coming back. Kill it once and that room stays clear for the rest of your run.
- Its back is the weak spot. The rear section is unarmoured and exposes yellow weak points, so it dies fast if a teammate holds its attention.
- Standing dead centre in front of it, between the gun segments, stops it from aiming at you. That leaves you open to other ARC and Raiders, so use it to reload or reposition.
- Loot isn't worth the fight. Its debris gives Light Ammo, ARC Powercell and ARC Alloy. Kill it only when it blocks the path.
Note that Update 2.2.0 raised the Hydra's base damage after fixing its targeting, so older clips that make it look easy are out of date. Arc Raiders Hub puts it at about 8 Hullcracker shots. If you're bringing one, our Hullcracker amplification guide covers which branch hits ARC hardest, and the Hydra guide has the full kill plan.
What loot does the Emperor drop after Update 2.3.0?
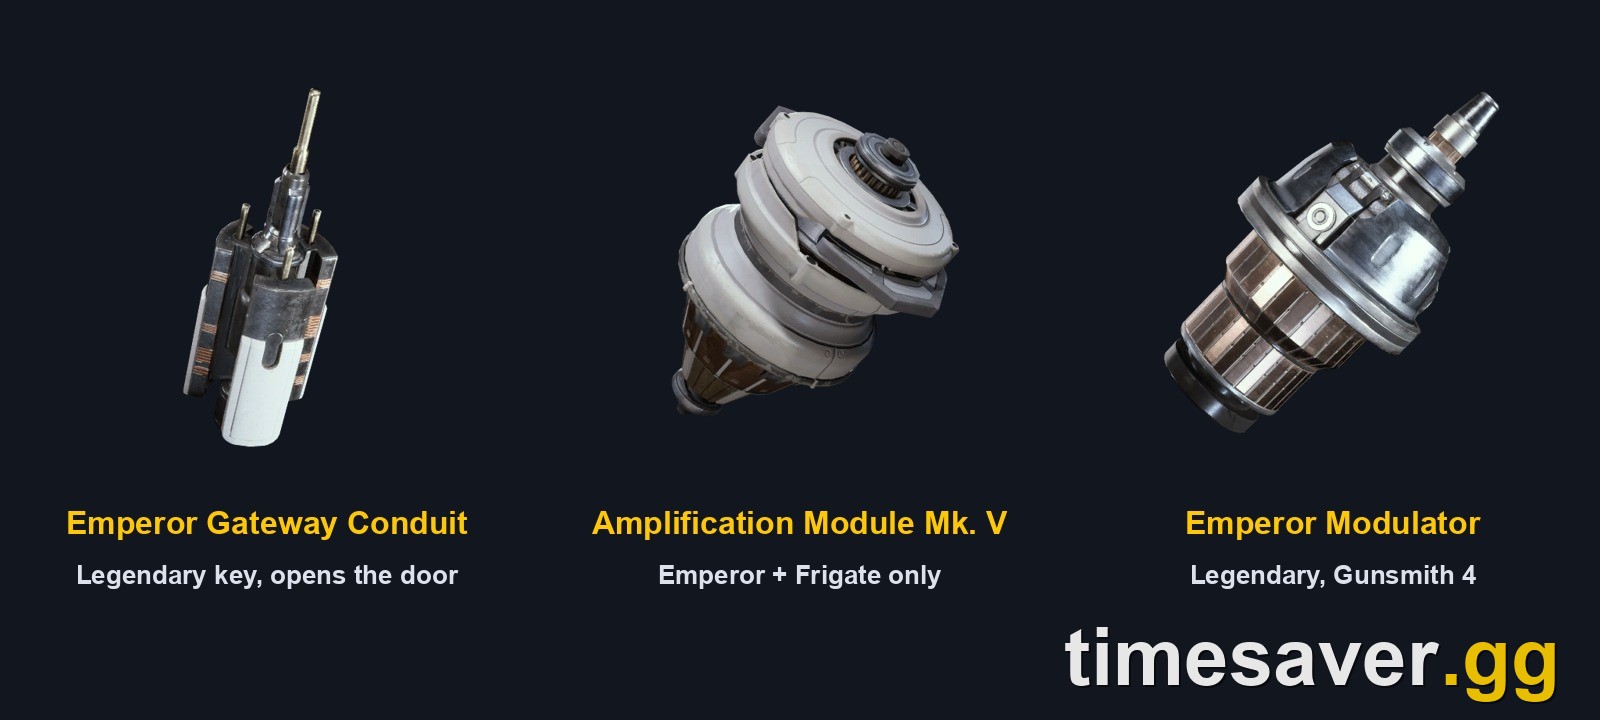
Embark changed the loot curve in 2.3.0: "Adjusted loot distribution in the Emperor. Containers near the entrance now yield lower-tier rewards, with higher-tier loot placed deeper inside." No zone list or percentages came with it. In practice, the early panels are no longer worth a quick in-and-out.
What the Emperor is known to drop, from the wiki's item pages:
| Item | Rarity | Sources | Sell value | Why you want it |
|---|---|---|---|---|
| Amplification Module Mk. I to V | Amplified | Fallen Emperor, ARC Frigate | 7,000 (Mk. III) | Amplifies a weapon at the Gunsmith; Mk. must match weapon rarity |
| Emperor Modulator | Legendary | Fallen Emperor | 7,000 | 1 needed for Gunsmith level 4 |
| Amplification crafting materials | Varies | Emperor, Frigate | Varies | Repairs and crafts for amplified gear |
| ARC parts and data | Varies | Panels and hangar canisters | Varies | Crafting and quick sell value |
Two numbers worth knowing. An Amplification Module Mk. III recycles into 7 Amplified Fragments, so a duplicate module isn't dead weight. And Gunsmith 4 needs 3 Radial Press, 3 Magnetic Accelerator and 1 Emperor Modulator and an Outpost (wiki Workshop page). The wiki lists the Fallen Emperor as the Modulator's only source, with no Frigate drop, so anyone pushing Gunsmith 4 ends up here.
Community runs report the loot in the breachable round panels on the way up and in canisters in the final hangar, where opening the roof brings in small ARC and a Vaporizer. Some canisters explode, so step back from any that flash. If you're still deciding which weapon to amplify first, the weapon amplification guide ranks them.
Is it dangerous to go into the Emperor second?
This is the question the 88-comment thread was really asking. If another squad opened the door before you, you're walking into a dungeon where someone is already ahead, already knows you're coming, and may be waiting at the exits with the loot.
What's confirmed and what isn't:
- Confirmed: Embark "Expanded on the exploit prevention feature used in locked rooms to provide a more fair experience inside the Emperor" in 2.3.0, and patched locked-room access exploits in Hotfix 2.1.1. They didn't say exactly what changed for late entrants.
- Community-reported: Arc Raiders Hub says the hangar has a door with a yellow light that leads back to the base elevator, and that it "lets anyone who came in late skip every trial." If that's still true for you, a late squad can reach the hangar fast, and so can anyone following you.
The practical read: if you go in second, the first squad has the deep loot and the Hydra kills, but also has to clear every trial while you don't. Treat the hangar as contested. Clear it from cover (a silencer helps) and pocket modules the second you have them. If you're the first squad, assume someone is behind you and don't loot the hangar with your back to the yellow door.
Night raids don't change the dungeon itself according to anything Embark has published, but the extra darkness makes the walk to and from the door riskier. Plan the extract before you go in. The Ballistic Gondola guide covers the closest pickup.
ARC Raiders - Materials
Get materials in 10 minutes
Emperor vs Frigate: which should you run for Amplification Modules?
Both drop Mk. I to V modules, so this is the real decision. Here's how they compare on the facts we have:
| Fallen Emperor | Frigate | |
|---|---|---|
| How you get in | Crafted conduit (blueprint + 3 couplers), any Pendola Pass raid | Board it when the Frigate condition is up |
| Entry cost if you die | You lose the conduit | Nothing but your kit |
| Hydra | Never respawns once destroyed | Respawns, killing it is temporary |
| Emperor Modulator | Yes | No |
| Loot curve | Since 2.3.0, better deeper in | Since 2.3.0, "areas further in have a higher chance of higher-tier rewards" |
| Main danger | Puzzle rooms, gas and crushers, late-entry squads | Respawning Hydra, crowded lobbies, height |
Pick the Emperor if you need an Emperor Modulator, if you have a squad that can revive, or if Frigate lobbies keep emptying the containers before you get there.
Pick the Frigate if you don't have a conduit yet, you're solo, or you just want modules without spending a crafting loop first. Our Amplification Module farm guide has the Frigate side in detail.
For most squads the best plan is both. Farm couplers and the blueprint during Redirection, run the Frigate while you wait for the blueprint, then spend the conduit on a full squad Emperor run once you have one.
How should you kit up for the Emperor?
The community loadout that keeps coming up, and the reasoning behind each piece:
- An ARC-killing primary for Hydras and electrified nodes. Hullcracker is the common pick.
- Something that one-shots small ARC for the maze, where Pops and Fireballs chase you through the gaps. The Anvil is the usual answer.
- Snap Hook or Grappling Hook for the gap jumps. Belly Of The Beast grants a Grappling Hook and rewards a Snap Hook.
- Shield Rechargers, heals and Stims. The gas room drains stamina.
- A safe-pocket augment. Modules are the reason you came. Pocket them as they drop.
Bring a squad if you can. Revives are the difference between losing the conduit and finishing.
Want the Emperor without the conduit grind?
Stuck at the blueprint or one coupler short? timesaver.gg delivers the Emperor key parts by in-raid handover, so you can spend your next Pendola Pass run inside the Emperor instead of under a debris shower.
- Emperor Gateway Conduit (key): skip the whole craft and walk straight to the door
- Emperor Gateway Conduit Blueprint: the drop 2.3.0 made rarer
- ARC Conductive Coupler, ARC Insulated Coupler and ARC Plated Coupler: fill the missing one
- Emperor Modulator: the Gunsmith 4 part only the Emperor drops
- Amplification Module Mk. V: amplify a legendary without the run
- ARC Operation Carry: Frozen Trail co-op endgame with a pro squad, you keep the loot
FAQ
Can I buy this loadout instead of farming it? Yes: this loadout costs $7.87 on Timesaver, and a Timesaver pro completes it by hand within 2 hours. How handover works and what happens if something goes wrong: account safety.
Is it safe to buy ARC Raiders items from Timesaver? Every order is done by hand by verified Timesaver pros, with no cheats, bots or third-party software, and item orders need no access to your account. Embark's rules prohibit real-money trading, so the risk is not zero: since 2024 about 0.01% of our orders have led to sanctions. If your account is sanctioned because of our work, the Account Safety Guarantee refunds 100% of the order price. Account safety: how handover works and what happens if something goes wrong
Where is the Emperor in ARC Raiders? The Fallen Emperor lies across the centre-west of Pendola Pass, the Frozen Trail map. You enter through a door at the base of the wreck during a normal Pendola Pass raid. No special map condition is needed to get in.
How do you open the Emperor in ARC Raiders? Use an Emperor Gateway Conduit, a Legendary key crafted at Workbench 1 from its blueprint and one ARC Conductive, Insulated and Plated Coupler. The parts come from Harvester Payloads during Redirection. It's also the last reward on the Frozen Trail Premium Reward Pass.
Can you do the Emperor dungeon solo? You can, but going down solo ends the run and costs you the conduit, since nobody can revive you. With Hydras, a gas room and crushers on the path, most players bring at least one teammate.
Does the Emperor drop Amplification Modules? Yes. The wiki lists the Fallen Emperor and the ARC Frigate as the only sources of Amplification Modules Mk. I to V. Since Update 2.3.0, the higher-tier loot is deeper inside rather than near the entrance.
Is the Emperor or the Frigate better? The Frigate is easier to start because it needs no key, but its Hydra keeps respawning. The Emperor costs a conduit and needs a squad, but its Hydras stay dead and it's the only source of the Emperor Modulator for Gunsmith 4.
Is the Emperor Gateway Conduit blueprint rarer now? Yes. Update 2.3.0 reduced its drop chance from Redirection pods and added a small chance of ARC parts and high-tier ARC loot in its place. ARC Surveyors are the other listed source.