ARC Raiders has seven playable maps plus the Practice Range, and every one of them changes shape depending on which map condition rolled, how many rounds you have played, and whether you are carrying the right key. This is the index: the full map list with difficulty and raid length, the complete condition-to-map matrix, all four extraction types, and the 41 keys, security codes and access items we can verify, with the exact door, room or gate each one opens — or, in one case, officially opens nothing at all.
TLDR — the short answers
- Seven playable maps, plus the Practice Range training area. Riven Tides is the hardest at Difficulty 5; Dam Battlegrounds is the only one available from the start.
- Raids are 30 minutes everywhere. Only two conditions extend that to 40 — Hidden Bunker on Spaceport and Locked Gate on The Blue Gate.
- 17 live map conditions (7 major, 10 minor), and the pool is per-map. Spaceport has the most at 13 live; Stella Montis has exactly one.
- Four extraction types — cargo elevator, metro station, airshaft, Raider Hatch — plus the Pendola Pass Ballistic Gondola. Only the Raider Hatch has no shutdown timer, and it needs a key.
- 41 keys, codes and access items are documented, all single-use. Riven Tides carries the most at ten keycards.
- Frozen Trail 2.0 added Pendola Pass, the Frigate and Redirection conditions, Dynamic Loot Zones on Pendola Pass only, and roughly +15% loot value on Riven Tides.
Everything below is sourced from the ARC Raiders wiki, which is community-run but supported by Embark Studios, and the official Frozen Trail 2.0 patch notes on arcraiders.com, verified 2026-10-08. Where those sources contradict each other, we say so rather than picking one quietly. If you want the deep dive on a single map, each row links to our full guide for it.
ARC Raiders - Blueprints
Get blueprints in 10 minutes
Every ARC Raiders map at a glance
Difficulty is the map's published difficulty level. "Unlock" is the number of rounds you must play before the map becomes selectable. Raid length is the standard timer, with the two condition-driven exceptions noted.
| Map | Difficulty | Unlock | Raid length | Conditions in pool | Our guide, or a note where we have none |
|---|---|---|---|---|---|
| Dam Battlegrounds | Difficulty 2 | None, available from the start | 30 min | 12, 11 live | Starter map, home of the Alcantara Power Plant |
| Buried City | Difficulty 3 | 8 rounds | 30 min | 10, 9 live | In-world the city was called Marano before the Collapse |
| Spaceport | Difficulty 3 | 12 rounds | 30 min, 40 min under Hidden Bunker | 14, the most of any map, 13 live | Spaceport Night Raid loot route |
| The Blue Gate | Difficulty 4 | 18 rounds | 30 min, 40 min under Locked Gate | 12, 11 live | Blue Gate breach room farm |
| Stella Montis | Difficulty 4 | 24 rounds | 30 min | 1, Night Raid only | Stella Montis map guide |
| Riven Tides | Difficulty 5, the hardest | 20 rounds | 30 min | 7 | Riven Tides map guide |
| Pendola Pass | Difficulty 3 | Not published | 30 min | 2 | Pendola Pass new map guide |
| Practice Range | Not rated | 4 rounds | 2 hours | None | Training area, not a raid map |
Two honest caveats on that table. The wiki's Maps index lists 8 rounds to unlock Buried City while the dedicated Buried City page says 6 — we use the index figure because that is the canonical comparison table, but treat it as 6 to 8. And Pendola Pass genuinely has no published unlock requirement; the field is a question mark on the wiki, so we leave it blank rather than guess. The pool counts for Dam Battlegrounds, Buried City, Spaceport and The Blue Gate include Cold Snap, which is still listed on those maps but is currently disabled — live counts are 11, 9, 13 and 11.
Note that difficulty level and unlock order do not move together. Riven Tides is the hardest map in the game at Difficulty 5 but unlocks at 20 rounds, four rounds before the Difficulty 4 Stella Montis.
Which map conditions can roll on which map
Map conditions are the single biggest thing that changes a map between raids. Per the Map Conditions pages, there are 17 live conditions — 7 major and 10 minor — plus Cold Snap, which is still listed on four maps but currently disabled. Majors rewrite how the raid plays. Minors change what spawns and where the value is.
Crucially, the pool is per-map. Locked Gate only exists on The Blue Gate, Redirection only on Pendola Pass, Beachcombing only on Riven Tides, Bird City only on Buried City, Launch Tower Loot only on Spaceport. Stella Montis has exactly one condition in its entire pool.
| Condition | Type | Maps it can roll on |
|---|---|---|
| Night Raid | Major | Dam Battlegrounds, Buried City, Spaceport, The Blue Gate, Riven Tides, Stella Montis |
| Electromagnetic Storm | Major | Dam Battlegrounds, Spaceport, The Blue Gate |
| Hurricane | Major | Dam Battlegrounds, Buried City, Spaceport, The Blue Gate |
| Hidden Bunker | Major | Spaceport only, extends the raid to 40 minutes |
| Locked Gate | Major | The Blue Gate only, extends the raid to 40 minutes |
| Close Scrutiny | Major, ARC Operation | Dam Battlegrounds, Buried City, Spaceport, The Blue Gate |
| ARC Frigate | Major, ARC Operation | Dam Battlegrounds, Buried City, Spaceport, The Blue Gate, Riven Tides, Pendola Pass |
| Redirection | Minor | Pendola Pass only, added in Frozen Trail 2.0 |
| Lush Blooms | Minor | Dam Battlegrounds, Buried City, Spaceport, The Blue Gate, Riven Tides |
| Uncovered Caches | Minor | Dam Battlegrounds, Buried City, Spaceport, The Blue Gate, Riven Tides |
| Husk Graveyard | Minor | Dam Battlegrounds, Buried City, Spaceport, The Blue Gate, Riven Tides |
| Prospecting Probes | Minor | Dam Battlegrounds, Buried City, Spaceport, Riven Tides |
| Harvester | Minor | Dam Battlegrounds, Spaceport, The Blue Gate |
| Matriarch | Minor | Dam Battlegrounds, Spaceport, The Blue Gate |
| Beachcombing | Minor | Riven Tides only |
| Bird City | Minor | Buried City only |
| Launch Tower Loot | Minor | Spaceport only |
| Cold Snap | Disabled | Listed on Dam Battlegrounds, Buried City, Spaceport, The Blue Gate, but not currently in rotation |
Three of those majors — Night Raid, Close Scrutiny and ARC Frigate — carry the NO FREE LOADOUT tag, so you are risking your own kit when they are up. Two of them, Close Scrutiny and ARC Frigate, also run with no active locked doors. That does not lock you out of those rooms — it means the keyed doors are not locked at all on that raid, so the key you brought is wasted rather than needed. Check the condition before you spend one. Full behaviour of each one, including what spawns and what the modifiers actually do, is in our ARC Raiders map conditions explained guide, with the version-specific rotation notes in the 1.42 map conditions guide.
One common mistake worth killing here: Flash Freeze is not a map condition. It is a Pendola Pass environmental mechanic rather than something that rolls. The one thing that switches it off is the Redirection condition, whose published effect list includes "No Flash Freeze".
Extraction points: the four types

The wiki's Extraction Points page is explicit that there are four different types of extraction point. All four are activated at a terminal and all four connect to the underground tunnel network that returns Raiders to Speranza. The Ballistic Gondola is a fifth, separate mechanic and it does not work that way — it carries you upward, away from a map the tube network does not reach.
| Extraction type | How it works | Shutdown timer | Notes |
|---|---|---|---|
| Cargo elevator | Activate the terminal, ride it down | Yes | Descends into the tunnels back to Speranza |
| Metro station | Enter the station, activate the terminal | Yes | Connects to the tunnels back to Speranza |
| Airshaft | Activate the terminal to descend the shaft | Yes | Descends into the tunnel network |
| Raider Hatch | Locked until you supply a Raider Hatch Key; once unlocked it stays open for roughly 10 to 15 seconds | No timer | One Raider at a time, and suppressed by five of the seven majors |
| Ballistic Gondola | Pendola Pass only, carries you upward rather than into the tunnels, see below | Not published | Added in the Frozen Trail update |
Two mechanics that decide a surprising number of raids. Extraction points appear on your compass within about 400 metres, and the symbol changes colour at five minutes remaining and greys out entirely once the lift has closed — so on the map screen the symbol colour is a faster read than the printed countdown. And if you interact with a terminal immediately before shutdown, you can survive into what players call overtime. Downed Raiders can still interact with terminals, which means a teammate who went down next to an elevator is not necessarily lost.
The Raider Hatch is the one that changes your loadout decisions, but not in the way most guides claim. It has no shutdown timer, which makes it the one extract that cannot go offline partway through a raid the way a lift does. The 10-to-15 seconds is how long the hatch stays open once you have used the key on it, not a wait before it opens. And the Keys index scopes the Raider Hatch Key to minor conditions only. Five of the seven majors, Night Raid, Electromagnetic Storm, Hidden Bunker, Locked Gate and ARC Frigate, list no active Raider Hatches, and four of those also run fewer active return points. So a hatch key is insurance on a quiet raid and dead weight on a loud one. Note it is an inventory item, not an equipment slot.
The Ballistic Gondola on Pendola Pass
Pendola Pass got its own extraction mechanic in the Frozen Trail update. You find and activate one of the transceivers placed around the map, and a Ballistic Gondola floats down from above and lands. To get out, you breach the red panels on any of the three tubes attached to the gondola and climb inside. There are two alternatives: climb on top of the gondola, or attach a Grappling Hook to it and let it carry you up as it floats away.
We have the full step-by-step in the Ballistic Gondola extraction guide and the surrounding map detail in the Pendola Pass map guide.
Every ARC Raiders key and security code, and what it opens
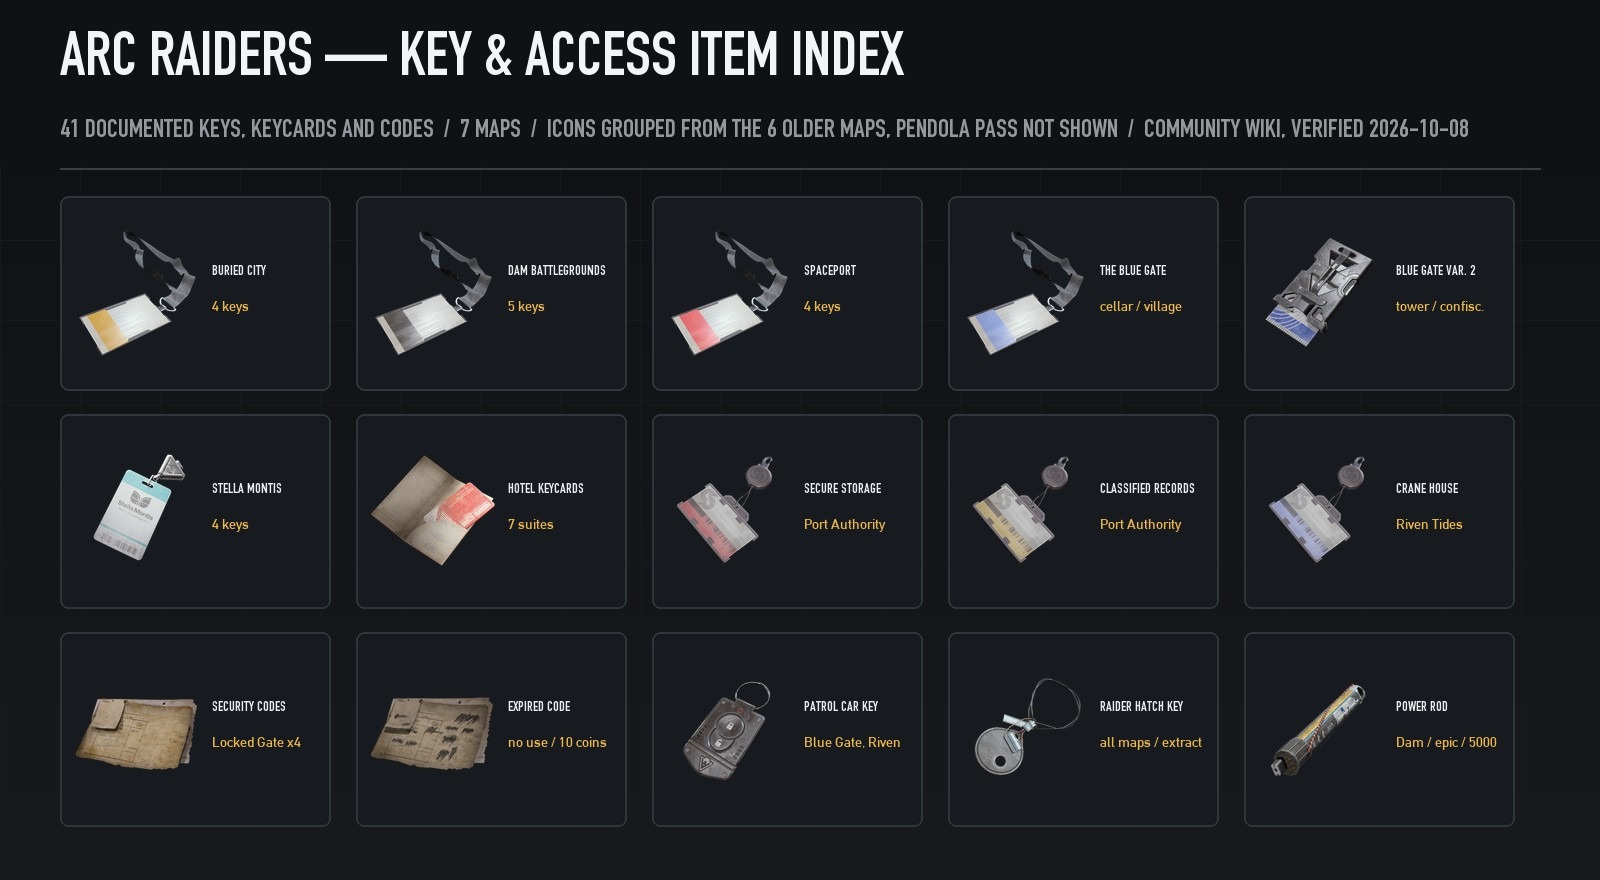
Keys are single-use consumables that open doors, rooms and hatches across all maps. Below are 41 entries we could verify as of 2026-10-08. Thirty-nine are on the wiki's Keys index — including the four Locked Gate security codes and one item that acts as a key without being one, which is why we say "keys, codes and access items" rather than just keys. The remaining two are both Pendola Pass keys that have their own pages but are missing from that index. Treat 41 as the verified count rather than a guarantee that nothing else exists. Each row links to our location-and-loot guide for that door where we have written one.
| Map | Key or code | What it opens |
|---|---|---|
| All maps, minor conditions only | Raider Hatch Key | Raider Hatch extraction points |
| Buried City | Hospital Key | The Hospital |
| Buried City | JKV Employee Access Card | The J Kozma Ventures company building |
| Buried City | Residential Mastery Key | Certain apartment doors in the residential blocks |
| Buried City | Town Hall Key | Town Hall |
| Dam Battlegrounds | Control Tower Key | The Control Tower |
| Dam Battlegrounds | Staff Room Key | The staff room in Research and Administration |
| Dam Battlegrounds | Surveillance Key | The Water Treatment Control building |
| Dam Battlegrounds | Testing Annex Key | The Testing Annex |
| Dam Battlegrounds | Controlled Access Zone Key | The Controlled Access Zone high-value loot area |
| Dam Battlegrounds | Power Rod, not a key | A door on the east side of the Power Generation Complex |
| Spaceport | Container Storage Key | Container Storage |
| Spaceport | Control Tower Key | The Ground Control Tower |
| Spaceport | Trench Tower Key | The Trench Towers |
| Spaceport | Warehouse Key | The Shipping Warehouse |
| The Blue Gate | Cellar Key | Certain cellar doors |
| The Blue Gate | Village Key | One of the old village buildings |
| The Blue Gate | Communication Tower Key | A door by the Communication Tower, in the Pilgrim's Peak basement |
| The Blue Gate | Confiscation Room Key | The Confiscation Room by the Blue Gate tunnels |
| The Blue Gate, Locked Gate condition | Ancient Fort Security Code | Part of the main gate at Checkpoint, printed at the Ancient Fort Code Printer |
| The Blue Gate, Locked Gate condition | Pilgrim's Peak Security Code | Part of the main gate at Checkpoint, printed at the Pilgrim's Peak Code Printer |
| The Blue Gate, Locked Gate condition | Raider's Refuge Security Code | Part of the main gate at Checkpoint, printed at the Raider's Refuge Code Printer |
| The Blue Gate, Locked Gate condition | Reinforced Reception Security Code | Part of the main gate at Checkpoint, printed at the Reinforced Reception Code Printer |
| The Blue Gate, Locked Gate condition | Expired Security Code | Nothing, the wiki states it has no more practical use |
| The Blue Gate and Riven Tides | Patrol Car Key | Patrol cars on both maps, the only map-specific key listed for two maps |
| Stella Montis | Archives Key | The Archives |
| Stella Montis | Assembly Admin Key | The Assembly area |
| Stella Montis | Medical Storage Key | Medical Research storage |
| Stella Montis | Security Checkpoint Key | The Security Checkpoint |
| Riven Tides | Crane House Keycard | One of the Crane Houses |
| Riven Tides | Secure Storage Keycard | Secure storage in the Port Authority Building |
| Riven Tides | Classified Records Keycard | Classified records in the Port Authority Building |
| Riven Tides | Riven Tides Hotel Keycard No. 102 | One of the Panorama Azzurro hotel suites |
| Riven Tides | Riven Tides Hotel Keycard No. 107 | One of the Panorama Azzurro hotel suites |
| Riven Tides | Riven Tides Hotel Keycard No. 113 | One of the Panorama Azzurro hotel suites |
| Riven Tides | Riven Tides Hotel Keycard No. 205 | One of the Panorama Azzurro hotel suites |
| Riven Tides | Riven Tides Hotel Keycard No. 208 | One of the Panorama Azzurro hotel suites |
| Riven Tides | Riven Tides Hotel Keycard No. 311 | One of the Panorama Azzurro hotel suites |
| Riven Tides | Riven Tides Hotel Keycard No. 404 | One of the Panorama Azzurro hotel suites |
| Pendola Pass | Pendola Pass Observatory Key | A door in the Cielo Sereno Observatory main building |
| Pendola Pass | Emperor Gateway Conduit | The Emperor |
Two things about the Pendola Pass pair. Neither appears on the Keys index — each has only its own page, which is why most key lists miss both of them. And the Observatory Key's page URL reads "Observation" while the displayed item name is Observatory Key. It is Epic rarity, 0.25 weight, 100 Coins, from Scavenging. The Emperor Gateway Conduit is Legendary, 0.5 weight, 1,000 Coins, and comes from Loot Containers; its page is flagged as a stub, and the one thing it does state is that it opens the Emperor on Pendola Pass. Separately, the in-game item name is Buried City Residential Mastery Key, even though "master key" is what the community says and what our older guide is titled.
Two of those 41 entries do not behave like keys at all, and the count would be misleading without saying so: the Dam Power Rod is a quest-style item that happens to open a door, and the Expired Security Code officially opens nothing.
The two map puzzles that gate loot rooms
Two areas are not opened by a key at all. They are opened by a multi-step puzzle, and both sit on top of genuinely high-value loot.
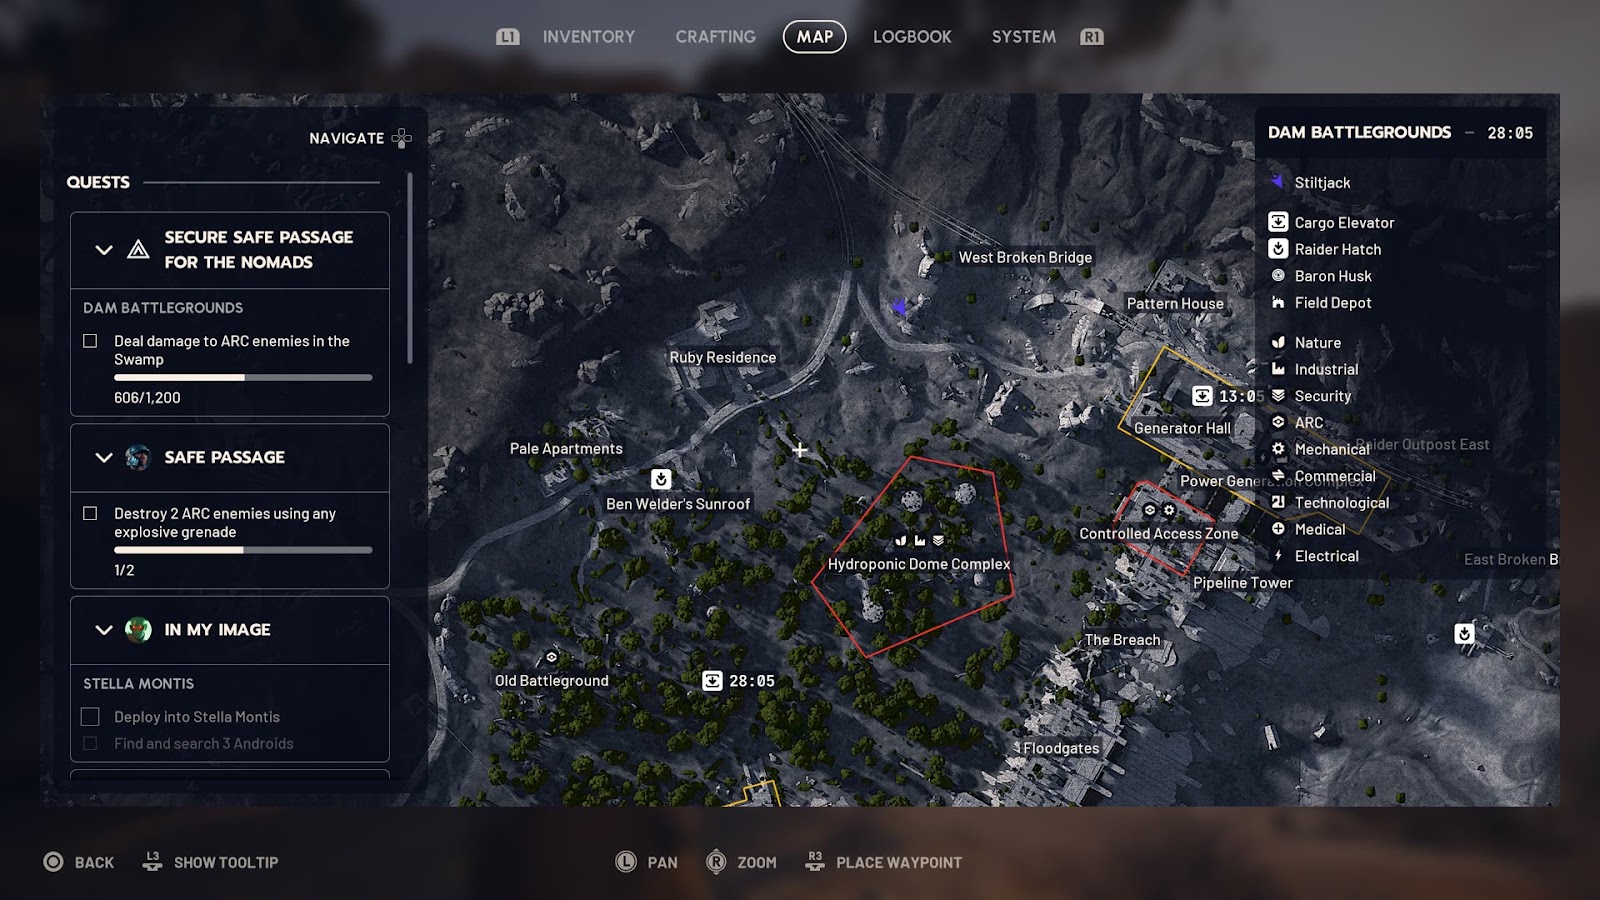
Dam Battlegrounds, Controlled Access Zone. Added as a new high-value loot area. Find a Fuel Cell, usually on the ground floor, and parkour it up to the wall receptacle to unlock the fourth switch room. Then press all four buttons near-simultaneously — doable with three people, but the last one needs a Snap Hook. Four lights above the door turn green when you have it. A second door behind that one demands randomised item deposits, drawn from a large pool including ARC Performance Steel, Industrial Battery, Leaper Pulse Unit, Motor and Rocketeer Driver, and a small pool of ARC Powercell, Battery, Metal Parts and Wires.
Riven Tides, Stacking Yard. Four hidden buttons open the first loot room on the right-hand platform. After that you need to repair the lift with a battery and wires — one or two of each — with one player holding Move Up while another ferries the battery across. Depositing it opens a further building.
ARC Raiders - Materials
Get materials in 10 minutes
How to read the in-game map screen
The map screen is doing more work than most players use it for. The three things the wiki's UI documentation says it gives you in a raid are your position arrow, your waypoints, and an extraction countdown clock — so the map, not the round timer under your compass, is where you read how much life an extract has left.
Loot is organised into four published zone types, and knowing which is which is the difference between a full bag and a wasted 30 minutes:
- Industrial Zones are best for Batteries, Gears, Electronic Components and Toolsets.
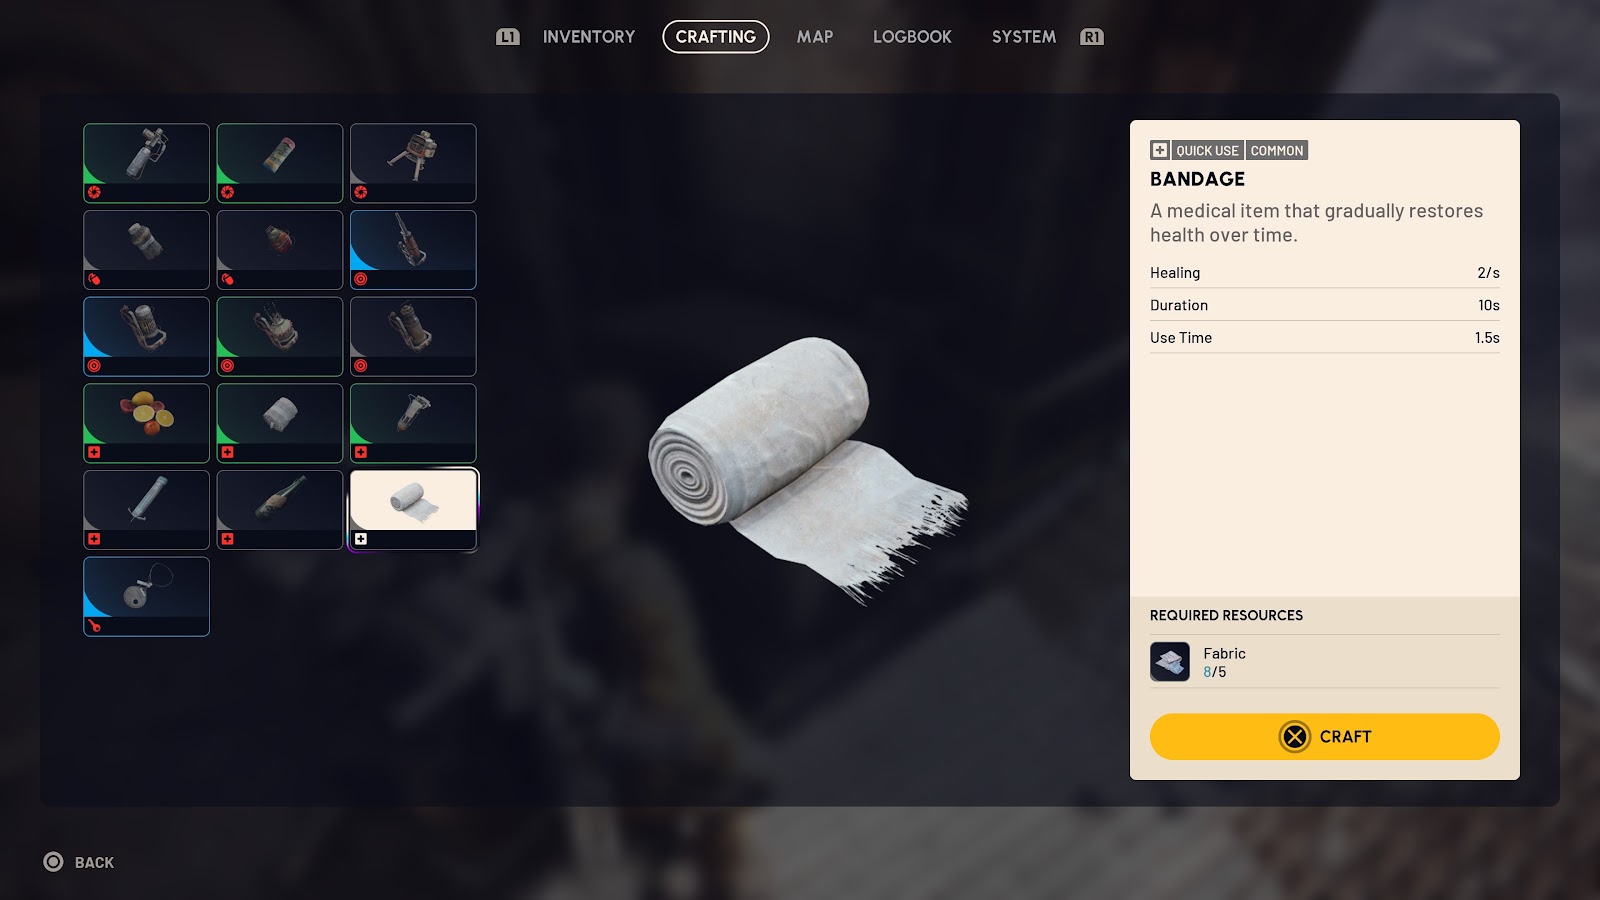
- Medical Areas carry Antiseptics, Syringes, Bandages and Stim-shots.
- Residential Sectors hold Dog Collars, Valuables, Food and Cosmetic items.
- Security Outposts hold Weapon Parts, Ammo, Access Keys and Armor Plates, and the wiki's own warning is to expect heavy resistance.
Frozen Trail 2.0 also added the ability to open the map while downed, which is exactly when you most need to know where the nearest hatch is.
What Frozen Trail 2.0 changed about the maps
The current update is the biggest map-layer patch the game has had. From the official Frozen Trail 2.0 notes: Pendola Pass is the new map, Frigate and Redirection are the new map conditions, and the Map Selection screen was reworked.
The most interesting change is a system rather than a map. Embark is testing a Dynamic Loot Zone system, currently exclusive to Pendola Pass. The patch-note wording is clear about what it does and does not do: zones keep their inherent loot type, so a Residential area stays Residential, but the same area may yield more value on one raid and less on another. That makes Pendola Pass the one map where re-running the same route is a genuinely different proposition each time.
Elsewhere, Riven Tides overall loot value went up by roughly 15%, which is a meaningful nudge toward the hardest map in the game. Buried City had the Hospital Roof made climbable again, and The Blue Gate's lighting was adjusted. Cred has been removed from the game and replaced by Reward Points.
Which map should you actually run?
Four calls. The facts underneath them are official; the recommendations themselves are our judgment, and each one has a cost attached.
Learning the game or rebuilding after a wipe of your kit — Dam Battlegrounds. Difficulty 2, no unlock requirement, 11 live conditions so it stays varied, and the Controlled Access Zone gives you a high-value target to work toward without a Difficulty 5 tax. The trade, in our assessment rather than from any published loot figure, is that it is also the thinnest map per raid.
Chasing raw value per raid — Riven Tides after the 15% loot bump, or Spaceport under Hidden Bunker for the 40-minute timer. We rate the extra ten minutes on a 13-live-condition map the best time-for-loot trade available, but that is our read, not a published figure — and Hidden Bunker does not roll on demand, so you cannot plan around it.
Quiet runs and quest clearing — Stella Montis, in our judgment. Embark publishes no encounter-density numbers; what is official is that it has exactly one condition in its pool, which makes it the most predictable map rather than provably the calmest. Predictability is worth a lot when you are completing something specific rather than farming. The cost is a 24-round unlock and Difficulty 4.
Something new — Pendola Pass, for the Dynamic Loot Zones and the Ballistic Gondola. One live warning from the official known-issues list: the quest "Picking up the Pieces" cannot be completed on Pendola Pass.
If you are picking for Trials rather than for loot, the calculus is different — we break that down in the best maps for ARC Raiders Trials.
FAQ
How many maps are in ARC Raiders? Seven playable maps — Dam Battlegrounds, Buried City, Spaceport, The Blue Gate, Stella Montis, Riven Tides and Pendola Pass — plus the Practice Range, which is a training area rather than a raid map.
What is the hardest map in ARC Raiders? Riven Tides, at published Difficulty 5. It is the only Difficulty 5 map in the game, and it unlocks at 20 rounds.
How do you unlock all the maps? By playing rounds. Buried City at 8 on the wiki Maps index, though its own wiki page says 6, then Spaceport at 12, The Blue Gate at 18, Riven Tides at 20 and Stella Montis at 24. Dam Battlegrounds needs nothing and the Practice Range opens at 4. Pendola Pass has no published unlock requirement.
Which ARC Raiders map has the most map conditions? Spaceport, with 14 in its pool and 13 live, including the Spaceport-exclusive Hidden Bunker and Launch Tower Loot. Stella Montis has the fewest with one, Night Raid.
How long is a raid in ARC Raiders? Thirty minutes on every map. Two conditions extend it to 40 minutes — Hidden Bunker on Spaceport and Locked Gate on The Blue Gate. The Practice Range runs for two hours.
How many extraction types are there? Four — cargo elevators, metro stations, airshafts and Raider Hatches — plus the Ballistic Gondola, which is exclusive to Pendola Pass. Only the Raider Hatch has no shutdown timer, and it needs a Raider Hatch Key.
Are ARC Raiders keys reusable? No. Keys are single-use consumables. Once you have opened the door, the key is gone, which is why key runs are usually planned around a specific room rather than opportunistic.
Which map has the most keys? Riven Tides, with ten keycards, seven of which are numbered cards for suites in the Panorama Azzurro hotel. The Blue Gate is second if you count the four Locked Gate security codes alongside its four standard keys. Note that this counts published keys, not locked doors — Embark publishes no door count, and several keys open more than one door while the Raider Hatch Key and the Patrol Car Key both span maps.
Skip the grind
Map unlocks, key farming and condition-gated loot rooms are all round-count and time problems. If you would rather spend your evening playing the raids you want instead of grinding into them:
- ARC Raiders Frozen Trail runs — Pendola Pass and Frozen Trail content run for you
- ARC Operation carry — Close Scrutiny and ARC Frigate raids handled
- Frozen Trail boss kill — the new bosses cleared
- Enemy kill quests — quest kill counts cleared on any map
- Frozen Trail quest line — the current Frozen Trail quest chain completed
All runs are done by hand on your account by players who know the routes, with no bots and no sketchy software.
All data verified 2026-10-08 against the Embark-supported ARC Raiders wiki and the official Frozen Trail 2.0 patch notes on arcraiders.com. Per-map POI rosters are not published by Embark — the wiki's Locations category is empty — so this hub indexes named keyed interiors rather than inventing a POI list. The widely repeated claim that the Ballistic Gondola fits three Raiders appears only on third-party sites and has been left out. Exact extraction-point placements are also unpublished and rotate, so we cover the types and the mechanics instead.